
Tom Clancy’s The Division 2 Summary
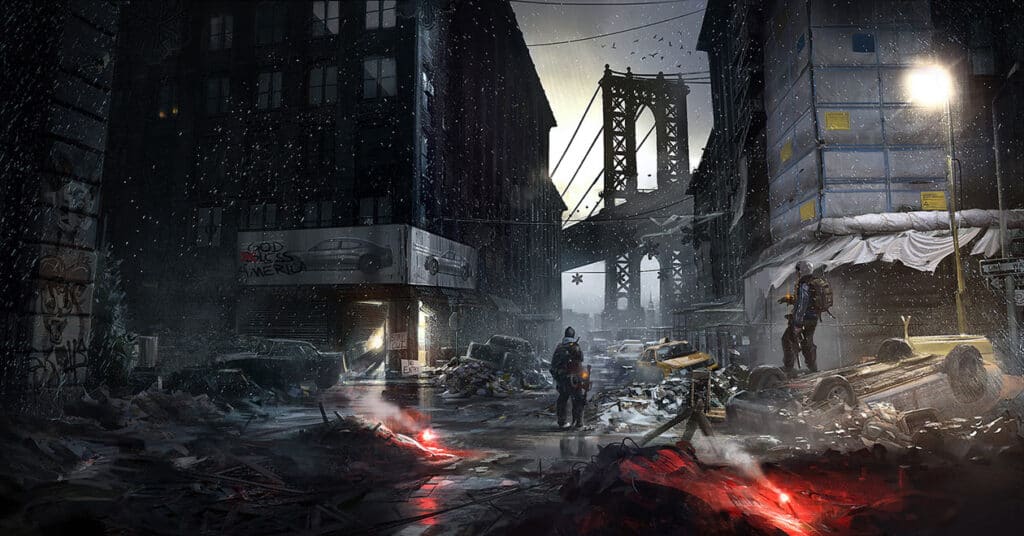
Tom Clancy’s The Division 2 was developed by Massive Entertainment and published by Ubisoft for PlayStation 4, Windows, Xbox One, and Stadia. The game has received generous reviews for its storyline, gameplay, and graphics. Tom Clancy’s The Division 2 is the sequel to the 2016 Tom Clancy’s The Division and is set shortly after a genetically engineered virus outbreak. As the virus takes hold of Washington D.C., the main character, an agent of the Strategic Homeland Division, must try to rebuild the city.
Tom Clancy’s The Division 2 Premise
©IGDB – License
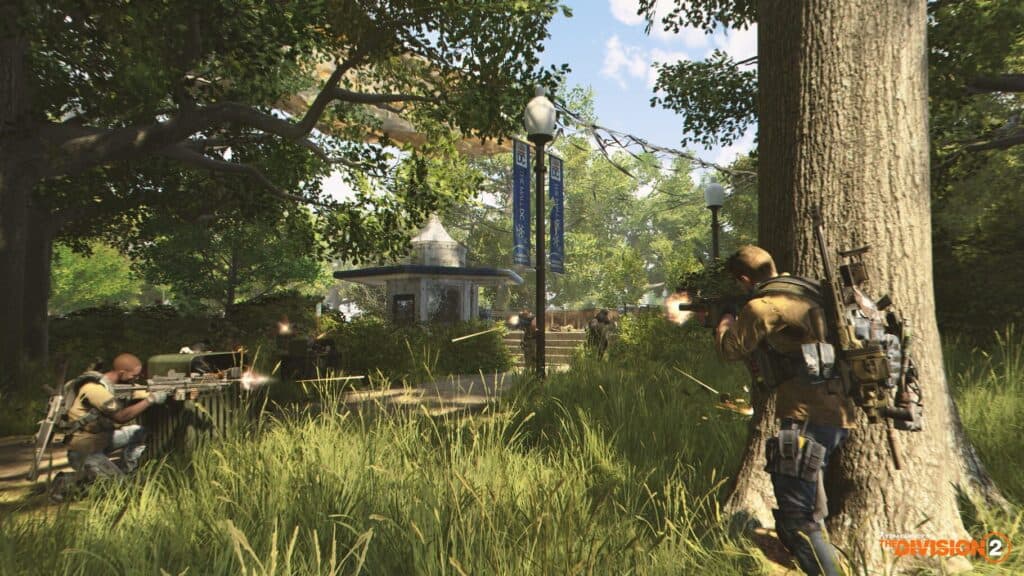
The game is played through a third-person perspective. The game features an open-world concept, and players are free to roam the city of Washington, D.C., as they defeat enemies. Players can create their own Division agent and customize the appearance and gender of the character. The gamer will be able to unlock new features and projects by recruiting non-playable characters throughout the game. Following the 2016 Tom Clancy’s The Division, the green poison virus has caused a global pandemic, and most of the law and order of the city has collapsed. Due to the city’s lawlessness, it has been divided into five territories: the Joint Task Force. Throughout the game, the player will assist the Joint Task Force against enemies in the city.
Main Characters in the Game
The main character in the game is customizable by the player, while there may not be other main characters within the title. There are factions within the game; below is a list of the different factions.
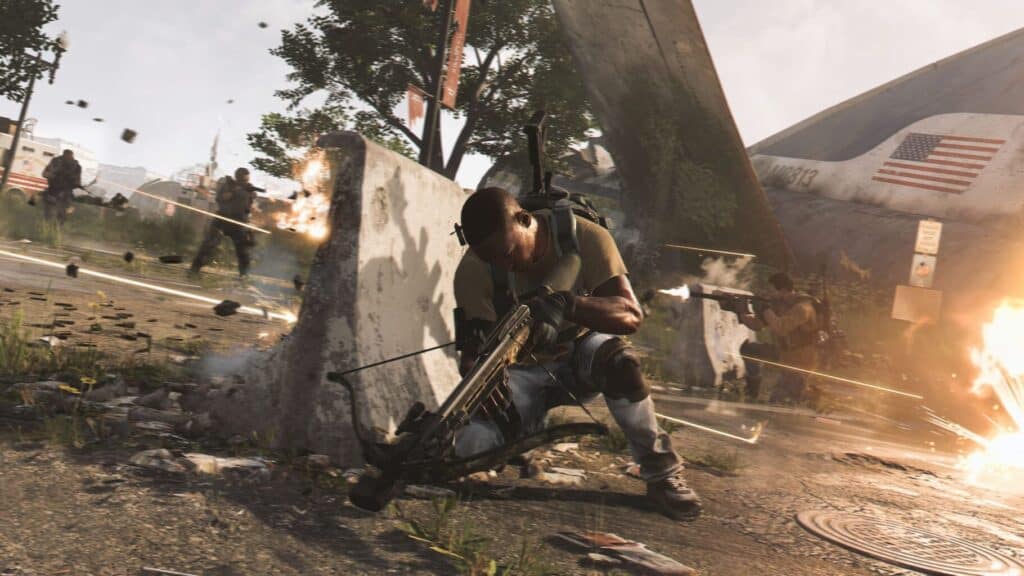
- Hunters: An enemy faction and most dangerous enemy the Division can encounter
- Black Tusk: A major enemy task force operating as a large Private Military Company with ties to the US Government
- The Strategic Homeland Division: A classified unit of highly trained self-imported tactical agents
- Cleaners: Sanitation workers that take matters into their own hands after the fall of the city
- Rogue Division agents: Agents who disavowed the Strategic Homeland Division
- Rikers: Riker Island escaped prisoners.
Titles in the Series
There are two titles in the series and all fans need to be satisfied with this apocalyptic game.
- Tom Clancy’s The Division (2016)
- Tom Clancy’s The Division 2 (2020)
Cheats for Tom Clancy’s the Division 2
Merciless exotic rifle
Defeat the final boss in the Jefferson Trade Center SHD mission on the Hard difficulty to have a chance at the Merciless exotic rifle dropping. Note: Try doing the mission with other people that already have the Merciless so they can trade it to you if it drops for them. Additionally, the Merciless can also drop from any Hyena boss.
All keychain accessories
Keychains are unique customization options you can unlock throughout the game. Successfully complete the indicated task to unlock the corresponding keychain:
2 Chess Pieces: Take control of all the Control Points on World Tier 4 at the same time.
Arm patch and Dog tags: “Capitol Hill” stronghold – Drops from the final True Sons boss.
Blood Vial: “Roosevelt Island” stronghold – Look for a lootable dresser before going down into the underground tunnel.
Capitol Building: Complete activities in the Open Beta.
Conflict Symbol: Unlock Maximum Level in Conflict.
DC Flag: Unlock Commendation Tier 5.
East DZ: Earn disavowed agent kills in East DZ.
Gavel: Successfully complete the main mission where you rescue and return the President.
Gold Bar: “Treasury” mission – When entering the vault itself, search the deposit boxes to find the Gold Bar keychain.
Hunter’s Axe: Kill all the secret Hunter bosses and collect their eight Ivory Keys. Use the keys to open the Ivory Chest in the White House to get the Hunter’s Axe keychain (unique shader) and an Exotic weapon.
Lincoln Bust: “Lincoln Memorial” mission – Loot the containers in the giftshop area under the memorial.
Plushie Flower: Campus Settlement – Upgrade to Settlement Level 2 to find the Plushie Flower keychain in a container, in the new area above the Stage.
Plushie Hippo: Theater Settlement – Upgrade to Settlement Level 2. Then, explore the new area above the leader’s room. Open the box to get the Plushie Hippo keychain.
Rogue Coin: Randomly earned for entering the special Rogue Agent Safe House in DZ, or by accessing Rogue Agent terminals.
Skeleton: “DCD Headquarters” mission – After going down the elevator, you will enter a morgue. Explore the lower floors to find a model human skeleton. Loot it to get the Skeleton keychain.
Space Shuttle: Air And Space Museum – Look for the area with the crashed space shuttle. Near the tail of the shuttle is a lootable shelf with the Space Shuttle keychain.
South DZ: Earn disavowed agent kills in South DZ.
Supply Crate: Play Dark Zone East in the Open Beta.
Teddy Bear: Pre-order bonus for all versions of the game on PC.
Traffic Cone: Successfully complete all Contaminated Zones.
US Flag: Earn maximum Shield Tier in the first The Division.
West DZ: Earn disavowed agent kills in West DZ.
All secret masks
Successfully complete the indicated tasks to unlock all 12 secret masks. Note: There will be static on the user interface while doing an interaction correctly and near a Hunter boss. The secret masks are also displayed downstairs on a wall at the Base of Operations.
Ghost and Specter masks: Go to the underground area of the Washington Monument. You must first reclaim the Control Point before you can reach the underground area. After going down the elevator shaft, interact with the switch in the loot room to reveal a map on the screen above with three marks. Go to the three locations at night to find fresh gravestones on dirt. While standing on the dirt at all three graves, select the “Salute” emote. If done correctly, there will be static on the user interface while saluting. Return to the switch at the underground area of the Washington Monument.
Interact with the switch again. If a SHD circle appears on the screen, players will have correctly spawned the Hunters. One Hunter spawns just south of 16th St. NW (White House region). The other appears in the small structure just outside the Washington Monument CP. Defeat the Hunters to get the Ghost and Specter masks. Note: The Hunters spawn in random locations and will exit the map quickly. Try to kill them with one shot by using your Signature Weapon. Use Specialization Points to increase your Signature Weapon’s power. If they disappear before players kill them, they will have to wait until the next night for them to spawn again.
Midas and Revenant masks: Stand in the swimming pool and select the “Jumping Jacks” emote to spawn two Level 35 Hunter bosses. Defeat the bosses to get the Midas and Revenant masks. Note: This can only be done at night.
Ghoul mask: Defeat the secret Hunter boss to get the Ghoul mask. Interact with the “MB3” laptop found in the sewer tunnel, in the same area as an SHD Tech Cache, to activate a map above the laptop. After activating the map, an “X” will appear on the map with a crescent moon symbol above it. Shoot the lightbulb hanging from the platform in the reflecting pool to spawn a secret armored Level 35 Hunter boss. Defeat the boss to get the Ghoul mask. Note: This can only be done at night.
Wraith mask: There will be a memorial wall with many veteran names on it. First, shoot the light that is illuminating the names on the wall. Then, face the wall while not standing in the water, and select the “Salute” emote to spawn a Level 35 Hunter boss. Defeat the boss to get the Wraith mask. Note: This can only be done at night.
Crimson mask: Stand in the middle of the courtyard and enter each of the two open office buildings. There is a laptop you can interact with on the desk in each building. Interact with both computers to spawn a Level 35 Hunter boss in the courtyard. Defeat the boss to get the crimson mask. Note: This can only be done at night.
Cross, Death, Diamond, and Phantom masks: Locate the hidden switch next to the coffee machine in The Pavilion Cafe. Activate the switch, then run around the Christmas tree in the middle of the park a few times to spawn three Level 35 Hunter bosses. Defeat all three Hunter bosses to get the Cross, Death, and Diamond masks. Note: This can only be done at night.
Demon mask: Enter the large glass atrium by going down the escalator and wrapping around to some stairs you ascend to reach the area. There will be four small black and white targets in four windows to the west. Shoot them from top to bottom to spawn a Level 35 Hunter boss. Defeat the boss to get the Demon mask. Note: This can be done during the daytime.
Secret WW2 uniform
Travel to Foggy Bottom (west area of the map). Follow the road directly west of the safe house to find a point-of-interest. Travel up the road and enter the open doorway to find a ladder leading to the sewers underground. Enter the sewers and look for a woman in a bunker. Talk to her, and she will send you to a nearby observatory, where you will unlock a bonus mission. Successfully complete this mission to unlock a WW2 uniform. The uniform can be found in the apparel menu, under the full-body outfit option. Note: If you get lost in the observatory, go upstairs and interact with the painting to reveal a secret passage.
Easy blueprints
Once you reach the endgame, there will be Level 1 Control Points around the map. If players complete the two nearby activities connected to a Control Point, they will unlock Level 3 of that Control Point. Complete Level 3 of a Control Point to unlock one or two random weapon and/or armor blueprints. To easily unlock blueprints, first complete Level 1 of the Control Point, but do not call for support when prompted at the end.
Instead, leave the area and the Control Point will change to white (allowing you to fast travel to it). Then, go to the other two activities connected to the Control Point and complete them. They will be easy to complete since they are also Level 1 activities. Next, go back to the Control Point and call in the support. You will now only have to finish off the final wave of enemies on Level 1 to get one or two random weapon and/or armor blueprints, instead of having to progress to Level 3 and clearing multiple waves of harder enemies. Use this method to save a lot of time and obtain blueprints much quicker and easier.
Easy loot and money
This trick allows you to collect a lot of loot daily that you can either keep (rarely) or sell/deconstruct for parts. As you progress through the story, complete every Control Point. Note: Control Points become harder at Level 30, after finishing the story. As you capture Control Points, you will unlock Supply Rooms, which contain multiple chests. There is one weapon and one piece of gear in every supply room. There are 2-4 Control Points in every region of the map, which you can fast travel to. The Supply Rooms will resupply every 24 hours (real time). Fast travel to as many Supply Rooms as desired and collect the loot. Then, repeat the process after the Supply Rooms resupply in 24 hours.
Easy all suit of cards
There are 52 collectible cards in The Division 2, divided into four suits of cards (sets). That is 13 cards per set. You only need one set to get the “Suits You Sir!” achievement. These cards are exclusively dropped by named enemies with yellow health bars that can only spawn in the open world (not in missions or Dark Zone). Each named enemy drops one card guaranteed, but it is random for which set. There is no way to find these as collectible pick-ups, as they are all dropped by the named enemies with yellow health. What makes this a little annoying is that only one named enemy can spawn every 30 minutes (real time).
Furthermore, if you die during an encounter with such an enemy, they disappear, and it takes another 30 minutes for a new named enemy to spawn. However, they can all be farmed at the same spot. Every 30 minutes a new named enemy will spawn in the same place. In total, you have 52 potential cards. 30 minutes per card spawn x 52 cards = 1,560 minutes (26 hours) to get them all. If you are really lucky, you may be done in approximately ten hours of playtime with the “Suits You, Sir!” achievement if you keep getting cards for the same set.
One location a named enemy spawns is at the White House. Note: You cannot farm two different spots at the same time. If you kill one named enemy, all other named enemies disappear from the game for 30 minutes. It is best to start doing this early and check after every 1-2 main missions or keep a stopwatch running. If you have a second console or a friend who is playing, you can join their world every 30 minutes to grab another card, then return to your world.
Crafting exotic D50 Desert Eagle weapon
The easiest exotic to craft is the D50 Desert Eagle. You need a high-end (yellow rarity) D50 Pistol to craft it into the Exotic version. Keep an eye out for it from the beginning of the game. It is a random drop. If you find one, put it in the storage box for later. Otherwise, you will need to farm for it until it randomly drops. There are multiple steps to craft the exotic D50.
1. Get four exotic pistol parts from the following missions:
- Capitol Building Stronghold (Story difficulty): Dropped by mid-mission boss.
- Viewpoint Museum (Hard difficulty): Dropped by end boss.
- American History Museum (Hard difficulty): Dropped by end boss.
- Space Administration HQ (Hard difficulty): Dropped by end boss.
2. After getting the fourth part, it will automatically drop the blueprint for the exotic D50 Desert Eagle (guaranteed drop). The final thing you need to craft this blueprint is a high-end (yellow rarity) D50 Pistol. Then, craft it at the workbench to get the “Taste of The Exotic” achievement. You must upgrade the workbench two times to craft high-end and exotic items.
Unlocking hidden safe houses in Dark Zone
Note: This does not work in the daily occupied Dark Zone (Red Dagger icon is the occupied Dark Zone). Go to a Dark Zone that is not occupied that day. There will be hackable SHD Network Terminals around the map, on the walls of buildings and alleyways. Most frequently they are found in little side alleys. Hold Y to hack them. This will turn you to Rogue status and mark other SHD Terminals with a grey skull icon.
Run around the map and activate 10 of the terminals while not getting killed in the process. In the top left corner, it will display how many percent the location to the hidden safe house is triangulated. Each terminal adds 10%. After you have hacked all 10 terminals, it will mark the entrances to hidden safe houses on the map. Enter any one of them to get the “Dark Zone: Safe House” achievement.
Unlocking and joining clans
To unlock the Clan menu at your base, successfully complete two Theater Settlement main story missions. Then, return to the Theater Settlement and talk to Larson to recruit her. She will then be sent back to your main base at the White House. You can fast travel back to the White House to talk to her or access the Clan tab from the main menu. The menu unlocks after she has been recruited. To join a clan, access the Clan menu from the main menu. Select “Options”, “Search Clans”, enter the name of the clan you want to join, and apply. You can get special rewards like items and cosmetics for joining a clan.
Easy “Dark Zone: Blackout Hijack” achievement
Go to the daily Occupied Dark Zone (red dagger icon). Each day one of the three possible Dark Zones will be occupied — this randomly changes every calendar day (not in-game day). During an extraction at an extraction point, a robot dog with a purple health bar can spawn (approximately 30% chance). Destroy it to cause an EMP Blackout and prevent players in the area from using skills. After another player has attached their loot to the helicopter, cut the rope to get the “Dark Zone: Blackout Hijack” achievement. To easily get this achievement, invite another player that is willing to help. Kill enemies in the Occupied Dark Zone until they find contaminated gear.
During the extraction, kill the robot dog together. Then, have the other player leave the group, attach their loot, and you cut the rope. This method allows you to not have to wait for random players to extract their gear. If the robot dog does not spawn, let the helicopter leave, and then immediately call for an extraction again. Repeat this until the robot dog spawns. You can also lure a robot dog from another enemy group to reduce the randomness.
Easy “Negative Ramos!” achievement
A good place to get the “Negative Ramos!” achievement early is in the “American History Museum” main mission on the Story difficulty. During the “Reach the archive room” objective, a medic with a purple health bar will spawn. Medics have a “+” sign above their health bar. They carry a defibrillator on their backs. While a medic revives a dead enemy, shoot his backpack to make the defibrillator explode, thus shocking the medic. It only works while the medic is in the process of reviving an enemy. You will be fighting a lot of medics throughout the game, and this achievement will most likely come naturally.
Easy “Resourceful Agent” achievement
Fast travel to “The Theater Settlement”. Run around the streets (outside settlement) once and look for a group of friendlies that has “En Route to Gather” above their heads when you aim at them. If you cannot find anyone, fast travel back to “The Theater” and run around the settlement again. Repeat this until you find a group that is on their way to gather something. Then, follow them to their destination. Wait for them to enter the location.
One of the looters will have the option to press a button prompt. This will give them materials and unlock the “Resourceful Agent” achievement. You can also encounter groups of friendly gatherers randomly while exploring the world. By following them from the settlement, it is less random. If you cannot find anyone around the settlement, just keep playing normally and watch for friendlies running across the streets. Aim at them to check their status. If it says, “En Route to Gather,” follow them.
Easy “TV Cop” achievement
Simply run towards the hood of a car and hold B to slide over it and get the “TV Cop” achievement.
Easy “Undressed To Kill” achievement
Tanks are heavily armored enemies. They are the biggest enemies in the game. They have armor around every body part. Shoot off the armor around the arms, legs, upper body, and head. This is best done in solo play. While playing with others, they may kill the tank before shooting off all the armor. After one piece of armor is destroyed, focus on the next armor part. Do not shoot unprotected body parts, as it will result in the tank dying before you can shoot off all armor. Fully automatic weapons (machine guns, assault rifles, SMGs) work best for this.
An easy place to do this is in the “American History Museum” main mission on the Story difficulty. During the “Defeat True Sons reinforcements” objective, you will encounter one tank that shoots grenades at you. While playing solo, first take out all other enemies. Then, dodge his grenades until he needs to reload. Get really close to him so you can aim precisely and shoot a body part with a fully automatic weapon. Dodge his next grenades until he needs to reload again and repeat. Be careful to only hit armor, never any unprotected parts. If you defeated him but missed an armor part, kill yourself with a grenade to restart the checkpoint.
Achievements
Accomplish the indicated achievement to get the corresponding number of Gamerscore points:
Hard as Nails (100 points): Finish all missions on hard difficulty or above.
Rebuilding DC (30 points): Fully upgrade all settlements.
Undressed to Kill (35 points): Destroy every piece of a tank’s armor, then eliminate the tank.
Command and Control (30 points): Discover 20 control points in DC.
Group Therapy (20 points): Take over a control point in a group without anyone being downed.
A Friend in Need (20 points): Respond to a call for help and revive the agent.
Help Me! (10 points): Put out a call for backup.
Suits You, Sir! (20 points): Collect any suit of cards in the open world.
TV Cop (5 points): Perform a slide across the hood of a car.
Negative Ramos! (10 points): Shock enemy medics by shooting their defibrillator.
Patchwork (10 points): Get 10 patches from commendations.
Resourceful Agent (20 points): Help friendlies in resource gathering.
Dark Zone: Extraction (20 points): Extract an item from each dark zone.
First Among Equals (10 points): Win a match of skirmish or domination.
Clan War (15 points): With your clan, face off against another clan in conflict.
Big Game Hunter (20 points): Complete a bounty from each safe house.
Autograph Hunter (30 points): Kill one enemy with each of the signature weapons (crossbow, sniper rifle & grenade launcher).
Arrow to the Knee (20 points): Shoot 10 enemies in the leg with a crossbow.
Next Level Operative (30 points): Reach Level 30.
Strength in Numbers (20 points): Create or join a clan.
Crafty Collector (20 points): Collect 20 blueprints.
Taste of the Exotic (50 points): Craft an exotic weapon or item.
Specialized (30 points): Equip your first specialization.
Best of the Best (40 points): Invest in each type of upgrade available for a specialization.
Dark Zone: Takedown (20 points): Eliminate a disavowed agent in each dark zone.
For Posterity (10 points): Photo mode: take a photo of a group of 4 agents.
Project Management (20 points): Complete a project for both the Theater and Campus settlements.
King of the Skill (25 points): Equip and use each skill.
Dress to Impress (20 points): Equip high-end gear (or above) in each slot.
Dark Zone: Blackout Hijack (20 points): Hijack an extraction in any dark zone during a blackout.
Tom Clancy’s The Division 2 FAQ
What skills does a hunter use in Tom Clancy’s The Division?
Hunters are a high-level enemy faction that are one of the most dangerous enemies. They are combatants, specifically in tactical combat. Hunters use two different types of skills and can choose from five different skills: Turrets, Sticky Bomb, First Aid, Turret, and Seeker Mine.
How do you defeat a Hunter in the game?
One of the best ways to defeat a Hunter is to bombard them so they can’t heal. Set up a position with a lot of cover, deploy a turret, throw grenades, and use high powered weapons.
How do players get better weapons in the game?
This can be achieved through various means: complete missions and side missions, crafting, dark zone, loot drops, and vendors.