
Call Of Duty: Black Ops 3
Cheat mode
After completing Mission 2: New World in the campaign, you can enter the safehouse at any time. In the safehouse is a data terminal (looks like a big computer screen). Access the terminal and highlight the secret button in the top left corner (the blue and white logo to the left of the “Data Vault” that looks like an “S”), then hold LB + RB + LT + RT and press X + Y to display a hidden code entry menu. Enter one of the following codes to activate the corresponding cheat function. Note: These codes do not disable achievements from being earned. The cheat menu can also be displayed at any options menu.
| Result | Code |
| Extra Fabrication Kits [Note] | MANIFEST |
| Unlock Nightmares mode | DREAMLAND |
Note: This code can only be used once. You will be given a random number of Fabrication Kits. The code also cannot be reversed.
Secret Dead Ops Arcade 2 game
After completing Mission 2: New World in the campaign, you can enter the safehouse at any time. In the safehouse is a data terminal (looks like a big computer screen). Access the terminal and press the secret button in the top left corner (the blue and white logo to the left of the “Data Vault” that looks like an “S”) to start Dead Ops Arcade 2. After the intro sequence finishes, you will get the “Silverback In Black” achievement.
Nightmares mode
Successfully complete all missions in Campaign mode to unlock Nightmares mode, which is a bonus single player and co-op campaign with an alternate story and zombies.
All collectibles locations
Search the indicated locations to find all 56 collectibles and get the “Curator” achievement. You will also get the “Walking Encyclopedia” achievement for finding all collectibles in one mission. There are a total of 11 missions. Each collectible looks different and they come in many forms and shapes (e.g. intel, helmets, weapons, flowers, necklaces, robot parts, etc.). They usually get marked by a white icon when you are getting really close. There is a collectible tracker in mission selection that displays how many collectibles you have found in each mission. Additionally, you can pause the game anytime and see a little collectible tracker in the bottom right corner. The pause menu shows them in the order in which they can be collected, making it very easy to find what is missing. You can also replay missions at any time to find the missing items.
Mission 1: Black Ops
1. Infiltrate the Security Station: Immediately after the mission begins, you must crouch under some broken plane wheels. In the next room, on a computer desk, is the first collectible.
2. Infiltrate the Security Station: In the room where you have to hack the camera control, turn around from the camera control panel to see it in a corner.
3. Go to the Interrogation Room: You will come to a bunker where you have to breach the door to the interrogation room. After breaching the door, check the corner to your left.
4. Go to the Extraction Point: In the hangar where you have to shoot a VTOL’s rockets to destroy two armored vehicles, after destroying the vehicles, search inside the office on the left side of the hangar.
5. Go to the Secondary Extraction Point: When you get ambushed by a large group of robots, you have to flee into a hangar. You are then told to get into an APC with your teammates. Before entering the vehicle, look at the back of the hangar for the last collectible of this mission. When you enter the vehicle, you cannot go back and will miss it — so make sure you pick it up beforehand.
Mission 2: New World
6. Locate the Generator: When you control the drone/robot, you will have to enter a large room with lots of enemies. When you enter the room, on the right side, is a collectible. You can only pick it up after you have killed the enemies with your drone and destroyed the generator.
7. Locate the Explosives: After chasing down a high value target, you will see some cutscenes and be in a frozen train station where robots attack you. Go up the escalator on the left to find a collectible next to a trash can.
8. Locate the Explosives: After going through a dark corridor with enemies, you will enter a large room that looks like a workshop. There is a broken part of a train with a ladder in the middle. Go downstairs and search the shelves to find it.
9. Locate the Explosives: After a cutscene, you will be in a driving train. In the first train compartment you enter is a collectible (not the one you start in, the next one after that).
10. Locate the Explosives: While still in the train, very shortly after the previous collectible, you will come to a train compartment that has some stairs leading to the upper deck. Go upstairs to find a collectible on a chair.
Mission 3: In Darkness
11. Go to the Docks: In the area where you encounter the first group of enemies, in one of the stores on the right side behind the counter, is a collectible.
12. Go to the Docks: In the flooded area where you get hit by waves and can use the anchor, you will come to a bulding with lots of enemies. Go around the right side of the building to find a collectible by the wall.
13. Go to the 54i Communications Hub: When you have to dive in the water with the glowing algae, follow your teammate. As you dive down into a wreck, a collectible will show up to your left. Swim through the broken windows to collect it.
14. Go to the 54i Communications Hub: Soon after the underwater section from the last collectible, you will enter a building with lots of enemies. Stay on the lower floor (looks like a bar/restaurant). Go to the end of the room and through the door. There is a side room where you can pick up a helmet collectible.
15. Go to the 54i Secondary Comms Relay: After a cutscene, you will go outside to a flooded area. Follow your teammate until you reach a building with enemies. Before entering, look for some stairs leading up to the upper floor of that building. Go up and turn around. From here you can jump to the upper floor of the building where you just came from. a collectible is on the upper floor of that building, in the second room.
16. Go to the Black Station Operations Center: You will come to a point where you have to use a zipline. Kill the enemies in the next area and go to the waypoint in a building. A collectible is in the first room of the upper floor.
Mission 4: Provocation
17. Get to Cloud Mountain: Immediately after the mission begins, jump down and go into the garage on the right side to find a collectible (golden brass knuckles).
18. Get to Cloud Mountain: In the same area as the previous collectible, search on the right side of the market square (outside). It will get marked when you are nearby.
19. Get to Cloud Mountain: Move to the next waypoint and you will come to a village with a turret and watch tower. On the upper floor of the building on the left side is a collectible (slave collar).
20. Get to Bald Mountain: When you get to the area with all the containers, take the path on the right side. Go around the corner to see a red container you can walk through. Climb this red container. There is a blue container on top with a collectible (golden vase).
21. Locate 54i Servers: When you go up the tower to find the 54i Server, you will be going through one museum room. There are many rock formations in this room and also an ammo crate. In one of the display cases is a collectible (mineral).
22. Go to the Far Super Tree: When you have to navigate between the big platforms that look like trees, you can find a collectible (necklace) on the lower deck of the second tree on the left side. Use ziplines to get there (before going to the burning tree with the objective marker).
Mission 5: Hypocenter
23. Go to the Facility Entrance: At the very start of the mission, go down the hill and to the yellow tent on the right to find a collectible inside.
24. Hack the Datapad: After fighting the big robot, you must hack a door to enter the facility. Once you are in the facility, you can find a collectible (contamination kit) at the end of the left hallway.
25. Descend in to the Core: As you approach the bottom of the tower, you will be ambushed by some robots. They will break through windows and attack you. In the same area is a little office building. Inside, on a table, is a collectible (marketing material).
26. Go to the Signal Source: After jumping through the pitch-black area, you enter a room with a mobile armory and an ammo crate. There is a blue eagle sign on the wall and your teammates talk about this sign. After the conversation, a door will open. Search the office on the left to find a collectible.
27. Go to the Server Room: After seeing a cutscene, you will be in a laboratory with skeletons of test subjects in front of you. Search in the right corner of the room to find a collectible.
28. Go to the Server Room: After leaving the flooded room where you are attacked by robots, you will find an ammo crate in the hallway. Next to this ammo crate is a room with a beeping TV screen. Under the TV screen is a collectible (Prototype DNI Implant).
Mission 6: Vengeance
29. Go to the Safehouse: Turn around when the mission begins and look behind the house to find a collectible.
30. Go to the Safehouse: This one is in Chinatown. Stay on the far right side and make your way through Chinatown. At the end, on the right side, is a collectible (luminescent flower) in the garden. It is very small and glows blue and green. It is easy to miss.
31. Go to the Safehouse: You will reach a large courtyard where enemy sniper are shooting at you from a parking garage. After killing the enemies, a big robot will attack you. Defeat it and go through the hole in the wall to the waypoint, then look in the corner to your left to find a collectible.
32. Go to the Safehouse Panic Room: While in the burning building, go upstairs and through the hole in the wall where robots attack you. On the right side of the room, by a table and a chair, is a collectible (necklace). Make sure you collect it before entering the panic room, as doing so will end the mission.
Mission 7: Rise & Fall
33. Enter the Holding Room: Follow your teammates through the camp until you enter a dark room where you are supposed to open the door to the interrogation room. In front of the interrogation room, on a computer desk, is a collectible (helmet).
34. Clear Debris from Station Exit: When your camp gets ambushed, you can go up the escalators. In this area, behind some servers, is a collectible (piece of broken glass) on a table.
35. Plant a Spike at the Weak Point: After the car drive/cutscene when you spawn with the spike launcher, look for a collectible (poster on a wall) on the left side of the area.
36. Go to Safiya Square: After a cutscene, you must go to the top of a building. Then, you will come to a destroyed village. Search the homes on the right side to find a collectible (sword on a cupboard).
37. Open the VTOL Hatch: Before interacting with the VTOL, check on the right. There is a collectible (piece of a broken statue) on a table. Make sure you do this before pulling the VTOL door (objective marker).
38. Destroy the A.S.P.-ML: At the very end of this mission, after opening the VTOL hatch, you will be in a big courtyard and have to fight a huge machine. From the starting point, go left into the only building of this area. The collectible is upstairs.
Mission 8: Demon Within
39. Pursue Sarah Hall: After the Boss fight at the start of the chapter, you come to a snowy area. From where you start, look for a small bunker in front of you on the right side. Inside is a collectible (shell casing).
40. Pursue Sarah Hall: In the same area as the last collectible, kill the first waves of enemies and stick to the far left side of the area while you chase Sarah Hall. Behind some sandbags is the collectible. This is before the ground starts to crumble, and before it turns nighttime.
41. Pursue Sarah Hall: When it gets dark and the ground starts to crumble below your feet, you will come to a part where you encounter the “Dire Wolves” for the first time. In the same spot where you see the first Dire Wolves is an Ammo Resupply Crate. Next to the crate is a collectible.
42. Pursue Sarah Hall: When you get to the part with the german soldiers attacking you, look for a big wooden house. A soldier will shoot you from the window of the upper floor. Go up there to find a collectible.
43. Pursue Sarah Hall: In the same area as the last collectible, move towards the next waypoint until you have to go into a building through a broken wall. Before going inside, turn to your left to see a little building. Go inside to find a collectible.
44. Pursue Sarah Hall: In the area where you encounter the German Tiger Tank, search the destroyed building on the right side by the street. In a dark room is a collectible on a cupboard.
Mission 9: Sand Castle
45. Land on the Mobile Refinery: Both collectibles of this mission are on the refinery platform (beginning of the mission). You can land in two different locations with your VTOL. In each one you must destroy a communications system. The first collectible is on the platform that has the communications panel on a rooftop. You must defend your teammate from this rooftop. In the same building that you are defending is a collectible (postcard) on the first floor, on a desk. It is hard to see. If you land on the other platform first, you must get the collectibles in reversed order.
46. Go to the Communications Array: This is on the refinery platform with the second communications panel. When you exit your VTOL, go to the left side to find find a collectible (drillbit part) on the ground.
Mission 10: Lotus Towers
47. Go to the Security Station: A couple of minutes after the mission begins, you will have to use an elevator to get to a shopping mall with many civilians and enemies. In the first shop on the left side is a collectible. It is hanging on the wall.
48. Breach the Air Vent: The collectible is in the room after breaching the air vent, in a locker on the left.
49. Go to Taylor’s Holding Cell: In the area where you get attacked by the ASP (big robot with turrets and rocket launcher), look in the office upstairs to find a collectible (statue) on a table.
50. Go to Tower Two: After pushing a container with your teammate to get outside, you will have to jump across some rubble to get to the other side. There are many robots spawning in this area. You will come to a section with some oriental market stalls. Follow your teammate until you have to climb up a structure at the end of the area with the market stalls. Then, turn around and look on the rooftop behind you to find a collectible (piece of carpet). Do this before wall-running with your teammate, as it will trigger a cutscene and bring you to a new area.
51. Hack the Console, Go to the Mobile Shop: You will come to a burning area where many robots attack you. As you go up the hill, you will see the wreck of one of the large elevators you saw earlier in the mission. In this wreck is a collectible (golden lantern).
52. Bring down the VTOL Leviathan: During the Boss fight against the VTOL, on the rooftop, to the right of where you start, is a collectible in a destroyed building.
Mission 11: Life
53. Go to the Coalescence Building Plaza: Turn around immediately when the mission begins and check the wall behind you to find a collectible (poster).
54. Hack the Terminal: In the room where you have to hack the terminal, to the left of the terminal is a collectible.
55. No Objective Available: Shortly after hacking the terminal, you will find Hendricks and get trapped in a dream. You start out under some trees in a snowy area, then slide down a hill into bloody water and come to three gates that are covered by vines. You must first go through the gate on the right side. After completing this gate, you must go through the one in the middle. The middle gate brings you to a desert area where this collectible is found. Follow your teammate until you get attacked by enemies. You will reach some sort of destroyed desert village. On the rooftop of the building on the far left is the collectible. It is probably the best hidden and hardest to reach of all collectibles. Look for a crack in the wall of the building and climb the balconies to reach the rooftop.
56. No Objective Available: At the very end of the chapter, the screen will turn grey and say “PURGING” in the middle. You will be walking very slowly and everything will get blurry. When this happens, search the first room. Your “Puring Percentage” will be 40% at this area. If it goes to 60%, you have gone too far. Look for the final collectible (feather) on the desk by the large “COALESCENCE” sign.
Good Listener accolade
Listen to all seven audio recordings in Mission 5: Hypocenter to get the “Good Listener” accolade. You must interact with all seven computer screens to listen to the recordings, which are all in the same room. The room is in the area where Kane says “Ok. According to the GPS, the source of the signal should be through there.” You will be approximately 36M from the objective. This is after descending into the core of the facility, when you get ambushed by a large group of robots. You must obtain all accolades in the game to get the “Personal Decorator” achievement.
Hero specialist (gold) gear in Multiplayer
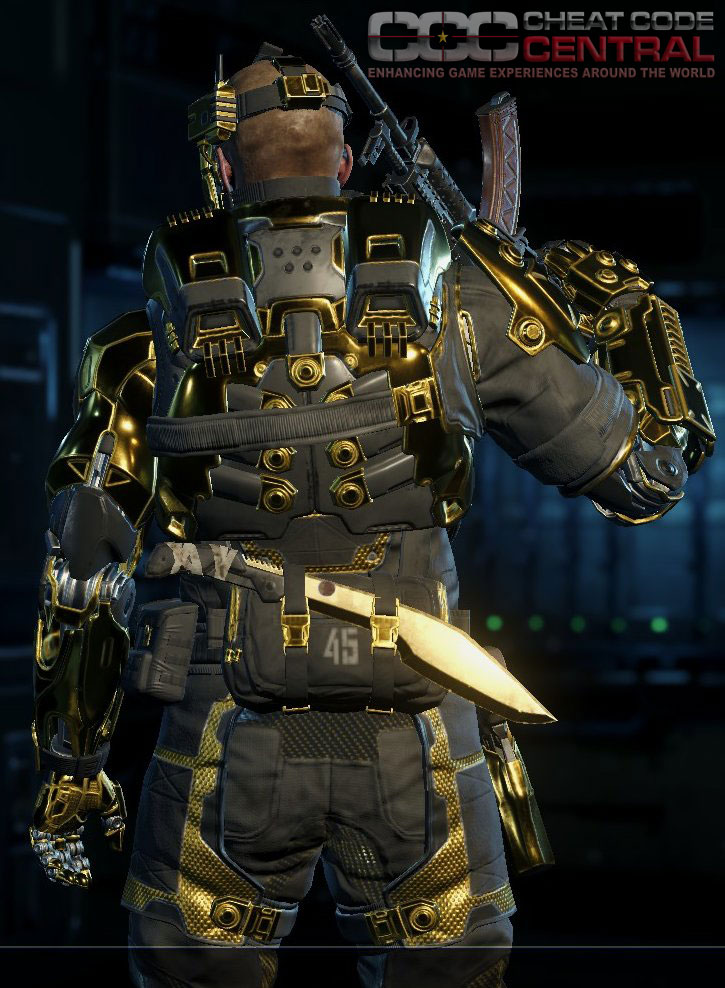
Unlock all heads and bodies for all nine specialists by completing all their challenges to unlock the Hero challenges for all nine specialists. Successfully complete the Hero challenge for a specialist to unlock their Hero gear, which is gold. The Hero challenges are not too difficult to complete. Here is a screenshot of the front and back of the gold Hero armor for Ruin.
Extra XP in Multiplayer
Use a weapon that does at least 30+ damage per shot in Hardcode mode to get “One Shot One Kill” medals worth 100 XP each.
Easy “Cyberpunk Body” challenge in Multiplayer
To unlock the Cyberpunk Body for the Prophet specialist, you must twice rapidly kill (within approximately 3.5 seconds) 2 enemies shortly after using Glitch. This is normally a very difficult challenge. To easily complete it, play in Hardpoint or Safeguard. Use the Overclock and Fast Hands perks and carry at least one frag grenade. Wait for a few enemies to crowd into a smaller area, then cook a grenade. Throw it at the enemies shortly before it explodes, then immediately use Glitch. You should be able to quickly complete this challenge using this method.
Recommended Supply Drop in Multiplayer
After the recent update to the Black Market, it is now better to buy Rare Supply Drops since you are not only guaranteed a Rare item, but you also have a better chance at getting Legendary and Epic items compared to the Common Supply Drop. You also get Cryptokeys returned back to you with each Rare Supply Drop opened.
Mannequin Zombies Easter Egg in “Nuk3town” map
First, download the bonus “Nuk3town” DLC map. Then, start a Multiplayer Custom Game, alone or with another player, in the “Nuk3town” map. Once the game begins, shoot all the heads off the mannequins around the map in under two minutes. If done correctly, the mannequins will disappear briefly and then reappear as zombies. The zombies will chase you and keep spawning. If you die, you will keep respawning. If you fail, you can quit the game, restart, and try again.
Weapon camouflage
Successfully complete the indicated task to unlock the corresponding weapon camouflage:
- 6 Speed Camo: Get 65 headshots with a single weapon in Multiplayer mode.
- Arctic Camo: Get 100 kills with a single weapon in Campaign mode.
- Ardent Camo: After getting 100 headshots with a single weapon, get 10 “Long Shot” medals with the same weapon in Multiplayer mode.
- Ash Camo: Get 10 headshots with a single weapon in Multiplayer mode.
- Battle Camo: After getting 100 headshots with a single weapon, get 2 rapid kills 5 times with both kills coming from the same weapon in Multiplayer mode.
- Black Market Camos (various): Progress through Multiplayer mode to earn Cryptokeys to buy Common and Rare Supply Drops from the Black Market, which sometimes contain Common, Rare, and Legendary camos.
- Black Ops 3 Camo: Pre-order bonus.
- Bliss Camo: After getting 100 headshots with a single weapon, get 50 kills with the same weapon with an optic sight and five other attachments in Multiplayer mode.
- Burnt Camo: After getting 100 headshots with a single weapon, get 50 kills with the same weapon without any attachments equipped in Multiplayer mode.
- Chameleon Camo: After getting 100 headshots with a single weapon, get 5 kills without dying 5 times with all kills coming from the same weapon in Multiplayer mode.
- Contagious Camo: Get 100 kills with a single weapon in Zombies mode.
- Cyborg Camo: Pre-order bonus from Juggernog, Hardened, and Digital Deluxe Edition.
- Dante Camo: Get 40 headshots with a single weapon in Multiplayer mode.
- Dark Matter Camo (animated): Unlock Diamond camo for all weapons in the game.
- Diamond Camo: Unlock the Gold camo for all weapons in a specific class (e.g. Assault Rifle) in Multiplayer mode.
- Fear Camo: Get 300 kills with a single weapon in Zombies mode.
- Flectarn Camo: Get 15 headshots with a single weapon in Multiplayer mode.
- Gold Camo: Unlock all other available camos for a weapon in Multiplayer mode.
- Heat Stroke Camo: Get 20 headshots with a single weapon in Multiplayer mode.
- Huntsman Camo: Get 400 kills with a single weapon in Campaign mode.
- Integar Camo: Get 50 headshots with a single weapon in Multiplayer mode.
- Jungle Camo: Get 200 kills with a single weapon in Campaign mode.
- Jungle Tech Camo: Get 5 headshots with a single weapon in Multiplayer mode.
- Policia Camo: Get 100 headshots with a single weapon in Multiplayer mode.
- Red Hex Camo: Get 1,000 kills with a single weapon in Zombies mode.
- Snow Job Camo: Get 30 headshots with a single weapon in Multiplayer mode.
- Take Out Camo: Hardee’s and Carl’s Junior promotion.
- True Vet Camo: Reach Prestige 1 in Black Ops 2 , Ghosts , or Advanced Warfare .
- Weaponized 115 Camo: DLC bonus included with Juggernog, Hardened, and Digital Deluxe Edition.
- WMD Camo: Get 600 kills with a single weapon in Zombies mode.
- Woodlums Camo: Get 650 kills with a single weapon in Campaign mode.
All Dark Ops challenges
The Dark Ops challenges are hidden challenges in Multiplayer and Zombies mode. They are not revealed until they have been completed. When a Dark Ops challenge is completed, you will earn a special Calling Card. If you want to try to complete all Dark Ops challenges, it is recommended to complete the “Fresh Start” Dark Ops challenge first, as it requires you to do a “Fresh Start” stats reset after you enter Prestige mode. The “Fresh Start” resets everything in Multiplayer except items obtained from the Black Market. Thus, if you have completed other Dark Ops challenges before completing the “Fresh Start” Dark Ops challenge, you will lose all progress made with the other Dark Ops challenges.
Multiplayer
- 1. Obtained: Earn the Dark Matter camo by getting Diamond camo on all weapons in the game.
- 2. 100 Percenter: Complete 100% of all multiplayer challenges.
- 3. Trick Shot: Destroy an HC-XD with a Combat Axe.
- 4. Dr. Lung: Kill an enemy underwater when you are both close to drowning.
- 5. Relentless Killer: Earn a Relentless medal (20 kills without dying).
- 6. Brutal Killer: Earn a Brutal medal (25 kills without dying).
- 7. Nuclear Killer: Earn a Nuclear medal (30 kills without dying).
- 8. Nuked Out: Earn a Nuclear medal in FFA without using scorestreak rewards.
- 9. Finish The Job: Kill an enemy that survived damage from 5 teammates in the same life.
- 10. Calamity: Kill an entire enemy team of 6 or more players in a very short time with a Specialist weapon.
- 11. Frenzy Killer: Earn a Frenzy Kill medal (5 rapid kills).
- 12. Super Killer: Earn a Super Kill medal (6 rapid kills).
- 13. Mega Killer: Earn a Mega Kill medal (7 rapid kills).
- 14. Ultra Killer: Earn a Ultra Kill medal (8 rapid kills).
- 15. Chain Killer: Earn a Kill Chain medal (9 or more rapid kills).
- 16. Fresh Start: Perform a “Fresh Start” stats reset.
Zombies
- 1. Deresurrectionist: Reach Deressurectionist (Level 35).
- 2. Apocalypse Averted: In Shadows Of Evil, help the others.
Multiplayer unlockables
Reach the indicated level in Multiplayer mode to unlock the corresponding bonus. Note: At Level 1, you will already have Ruin Specialist, Outrider Specialist, Prophet Specialist, Battery Specialist, UAV Scorestreak, Hellstorm Scorestreak, Talon Scorestreak, Kuda SMG, VMP SMG, KN-44 Assault Rifle, XR-2 Assault Rifle, KRM-262 Shotgun, 205 Brecci Shotgun, BRM LMG, Dingo LMG, Locus Sniper Rifle, Drakon Sniper Rifle, MR6 Pistol, XM-53 Launcher, Frag Lethal, Concussion Tactical, Afterburner Perk 1, Sixth Sense Perk 1, Blind Eye Perk 1, Fast Hands Perk 2, Ante Up Perk 2, Hard Wired Perk 2, Gung-Ho Perk 3, Blast Suppressor Perk 3, and Awareness Perk 3.
| Unlockable | |
| HVK-30 Assault Rifle | |
| Smoke Screen Tactical | |
| Weevil SMG | |
| Flak Jacket Perk 1 | |
| Semtex Lethal | |
| Gorgon SMG, Perk 1 Greed Wildcard | |
| Tracker Perk 2 | |
| HC-XD Scorestreak | |
| Haymaker 12 Shotgun, Perk 2 Greed Wildcard | |
| EMP Tactical | |
| Care Package Scorestreak | |
| BlackCell Launcher, Perk 3 Greed Wildcard | |
| Tactical Mask Perk 3 | |
| R.A.P.S. Scorestreak | |
| ICR-1 Assault Rifle, Primary Gunfighter 1 Wildcard | |
| Trip Mine Lethal | |
| Dart Scorestreak | |
| Vesper SMG, Overkill Wildcard | |
| Overclock Perk 1 | |
| Lightning Strike Scorestreak | |
| Seraph Specialist, RK5 Pistol | |
| Trophy System Tactical | |
| G.I. Unit Scorestreak | |
| P-06 Sniper Rifle, Secondary Gunfighter Wildcard | |
| Tactician Wildcard, Cold Blooded Perk 2 | |
| Counter-UAV Scorestreak | |
| Nomad Specialist, Man-O-War Assault Rifle, Primary Gunfighter 2 Wildcard | |
| Thermite Lethal | |
| Cerberus Scorestreak | |
| Pharo SMG, Danger Close Wildcard, | |
| Engineer Perk 3 | |
| Power Core Scorestreak | |
| Reaper Specialist, 48 Dredge LMG, Primary Gunfighter 3 Wildcard | |
| Shock Charge Tactical | |
| Guardian Scorestreak | |
| Argus Shotgun | |
| Ghost Perk 1 | |
| Wraith Scorestreak | |
| Spectre Specialist, Combat Knife Special | |
| Combat Axe Lethal | |
| Rolling Thunder Scorestreak | |
| Sheiva Assault Rifle | |
| Scavenger Perk 2 | |
| Hardened Sentry Scorestreak | |
| Firebreak Specialist, Razorback SMG | |
| Flashbang Tactical | |
| H.A.T.R. Scorestreak | |
| L-CAR 9 Pistol, Cerberus Scorestreak | |
| Dead Silence Perk 3 | |
| Mothership Scorestreak | |
| SVG-100 Sniper Rifle | |
| C4 Lethal | |
| Black Hat Tactical | |
| M8A7 Assault Rifle |
Multiplayer perks
The following is a list of all perks and their effects:
Perk 1
- Afterburner: Reduce recharge time for Thrusters.
- Blind Eye: Undetectable by enemy air support.
- Sixth Sense: Display mini-map indicator with the direction of nearby enemies.
- Overclock: Earn Specialist Weapon or Specialist Ability faster.
- Flak Jacket: Take less damage from enemy explosives and flames.
- Ghost: Avoid detection by enemy UAV while moving, planting, and defusing bombs; or while controlling scorestreaks.
Perk 2
- Fast Hands: Swap weapons faster and aim faster after sprinting. Can also reset the fuse when throwing back frag grenades.
- Ante Up: Spawn with starting bonus to scorestreak meter.
- Hard Wired: Immune to Counter-UAV, Power Core, EMP Grenade, and Smoke Screen. Cannot trigger Trip Mines, Shock Charges, or C4. Reduce digital imprint against enemy Tracker and Sixth Sense Perks.
- Tracker: See a digital imprint of enemy footsteps.
- Cold Blooded: Cannot be targeted by ground-based AI scorestreaks and immune to Thermal Optics.
- Scavenger: Replenish ammunition and equipment from enemies killed by non-explosive weapons.
Perk 3
- Gung-Ho: Hip-fire your weapon, deploy equipment, and throw grenades while sprinting.
- Blast Suppressor: No mini-map signature when thrust jumping. Thruster sound is suppressed.
- Awareness: Enemy movements are easier to hear.
- Engineer: Show enemy equipment and scorestreaks. Re-roll and booby trap Care Packages.
- Tactical Mask: Reduce the effects of Flashbangs, Concussions, and Shock Charges.
- Dead Silence: Move silently.
Skipping rounds in Shadows Of Evil
Use the following trick to advance to rounds 5, 10, or 15 without killing any zombies. When starting, you will spawn in a narrow alleyway. From this position, face the junction and look at the walkway above to find the Shadow Man. Hit the Shadow Man five times with your default weapon or any other wall weapon to advance to round 5 with some points scored. You can shoot him five more times to advance to round 10 with more points. Shoot him five more times to advance to round 15, and get even more points. However, after shooting him 15 times, he will disappear.
All rituals and Pack-A-Punch machine in Shadows Of Evil
Complete all rituals in the Shadows Of Evil map in Zombie mode to unlock the Pack-A-Punch machine for upgrading weapons. You can complete this solo and by the end of round 5 or 6. There are five collectible items you must find (Summoning Key, Golden Fountain Pen, Badge, Championship Belt, and Hair Piece). These items are used to start the five rituals. To get “The Beginning Of The End” achievement, you only need to do the first four rituals. The fifth and final ritual unlocks the Pack-A-Punch machine. You have to do all of this in one playthrough. You will also get the “From The Shadows” achievement along the way. When doing it solo, the order of the rituals does not matter, but in co-op it is important to note that you can only hold one collectible at a time (not all five at once). This means in co-op you must do a ritual before you can pick up the next collectible.
Building Rocket Shield in Shadows Of Evil
To build the Rocket Shield, you must find three parts. Each part is in a different district — one in the Canal District, one in the Footlight District, and one in the Waterfront District. You only need to open the first gate to each of these districts, then use the demon form to activate the power and unlock the stairs. The exact location of the parts slightly varies on each playthrough, but they will always be in the same district in the upstairs area. They always look the same; go to the locations in the video and run around the area until you see a button prompt to pick up the object. Once you have collected all three parts, open the second gate in the Waterfront District to find a workbench where you must assemble the shield (only takes a few seconds). You can activate the burst with RT. To get the “Strike!” achievement, wait for a large group of 10+ zombies, then use the burst to kill them.
Getting Widow’s Wine perk in Shadows Of Evil
To get the Widow’s Wine, you must open a portal in the Canal District. Transform into the demon to break open a door in the Canal. Behind the door is the portal that leads to a new area. Widow’s Wine is actually a perk, not just a grenade. After leaving the portal, kill the ghosts and activate the power to the Widow’s Wine machine. You can then buy the perk; it costs 4,000 points. It allows you to throw special grenades that damage and slow enemies. When you are being attacked, it automatically freezes the zombies and damages them over time until they die. The perk is limited to a few uses per round. Knifing enemies also has a chance of ensnaring them for a while. To get “The Spider And The Fly” achievement, you can either throw a Widow’s Wine grenade yourself or just let a large group of zombies attack you. Odds are you will get trapped by zombies in high level rounds, and the perk will automatically get activated and you will get the achievement. The zombies get damaged over time and will die automatically without you doing anything.
Summoning Civil Protector and Fuse locations in Shadows Of Evil
To summon the Civil Protector, you first must find three fuses and activate the fuse box. Each fuse is in a different district — one in the Canal District, one in the Footlight District, and one in the Waterfront District. They are all on the upper floor, and you must open two gates in each district to reach them. They glow blue. Their exact location slightly varies on each playthrough, but they are always in the same area, on the upper floor. Go through the portal in Canal District to reach the fuse box. Once it is active, you can summon the Civil Protector. There are four districts, and it must be activated in each one to get the “Beat CoP” achievement. Each activation costs 2,000 points. You can only have one active at a time. Wait for the robot to explode (takes 2-3 rounds), then you can activate the next. It will probably take you until round 13 to activate them all. In Co-Op mode, you must summon all four Civil Protectors by yourself. It does not count if another player summons him, but it also does not void the achievement either, as you can simply reactivate the box later and summon him yourself.
Gobblegum flavors in Shadows Of Evil
Gobblegum is obtained from a vending machine and provides temporary boosts. Gobblegum vending machines can be found in each of the three districts and require points. However, the machines will not always work and will dispense flavors randomly. Before starting a match, you can customize the Gobblegum flavors which will appear by selecing the “Gobblegum Packs” option. As you level up, you will unlock additional flavors. The following is a list of all available flavors and their effects:
- Aftertaste: Retain perks when downed.
- Alchemical Antithesis: 1 ammo for every 10 points.
- Always Done Swiftly: Similar to quickdraw.
- Danger Closest: No explosive damage.
- Dead Of Nuclear Winter: Nuke power-up spawn.
- Ephemeral Enhancement: Upgrade current weapon.
- Firing On All Cylinders: Shoot while running.
- Immolation Liquidation: Fire Sale power-up spawn.
- Impatient: Unknown.
- I’m Feelin’ Lucky: Spawn with random power-up.
- In Plain Sight: No threat for 10 seconds.
- Killing Time: Freeze enemies for 20 seconds.
- Kill Joy: Spawn with Insta-Kill power-up.
- Licensed Contractor: Spawn with Carpenter power-up.
- Lucky Crit: Unknown.
- Now You See Me: All enemies target players.
- One For The Road: Extra perk slot.
- On The House: Random perks.
- Perkaholic: Get all perks.
- Phoenix Up: Revive everyone and get perks.
- Pop Shocks: Melee deals electric damage.
- Private Eyes: Mark nearby enemies.
- Respin Cycle: Reroll mystery box.
- Stock Option: No reload.
- Sword flay: 5x damage on melee.
- Wall Power: Upgrade next weapon.
- Who’s Keeping Score: Spawn with double-points power-up.
Getting the Ragnarok DG-4 weapon (“Awakening” DLC)
To build the Ragnarok Wonder Weapon, you must find three parts and put them together at a workbench. The can be found at the following locations:
Part 1: Dropped by the first Panzersoldat (spawns in Round 12). Use the Wrath Of The Ancients bow to kill him quickly.
Part 2: Activate the Death Ray Trap (on the bastion walls after turning on the power). This spawns a blue glowing object in the sky. You must use a Wundersphere to get it. It is random which Wundersphere you must use to reach it, as it changes on every playthrough. There are four Wunderspheres — and one always leads to the part in the sky.
Part 3: In the Rocket Pad area, wait for 1-2 minutes until the rocket launches. Quickly use the switch underneath the rocket (turns from red to green when useable) and run back inside to the teleporter. There is a console with three lights that will turn from red to green. When they are all green, you must hit the switch on the console. Be careful of zombies spawning in this area.
Turning power on in Zetsubou No Shima (“Eclipse” DLC)
It is recommended to immediately turn on the power in the Zetsubou No Shima map, as it is needed for the achievements and to do the full Easter Egg. Complete the following six steps to permanently turn on the power:
1. Collect the bucket in the starting area. The exact place varies slightly with each playthrough, but it is always in the starting area.
2. Fill the bucket with irradiated water; water color does not matter. Water pools are behind the labs and marked on the map.
3. Use water to power up the generator; generator is inside the lab which is marked on the map. There are two of them. One on the left side, and right side of the map.
4. Refill the water and turn on the second generator. You can reuse water from same water pool to do this. The generators only stay on for a short time — so you must activate both of them in quick succession (preferably at the end of a round). When a generator has used up the water, it will turn off and you need to refill the water.
5. The bunker door can now be opened. Go inside bunker and through the door on the left. Go underwater to cut the webs that are blocking a turbine.
6. Zombies will now spawn underwater and trap you. Kill them all to exit the water, then press the power switch to permanently turn the power on.
Easy “Biff! Bap! KaPow!” achievement
To kill three enemies in a melee combo, you must first buy the fully upgraded “Takedown” skill in the safehouse. It is part of the Martial skill tree. The fully upgraded version is called “Rapid Strike”. It allows you to do a x3 melee combo. Make sure you equip it in your loadout before starting a mission. Then, look for three enemies that are standing close together. The first three enemies in Mission 6: Vengeance are perfect to do this on. Press the Right Analog-stick to attack one after the other. You should see a button prompt when close to an enemy. When done correctly, you will see a little animation of you rushing from enemy to enemy and instantly killing them.
Easy “Crackshot” achievement
At the start of Mission 9: Sand Castle, you will be flying a VTOL and must destroy the defenses of an enemy base. Fly 100+ meters away from the base and start shooting the enemies from afar. This works best with the VTOL’s machine gun. You can also zoom in to see enemies more easily. Odds are you will get the “Crackshot” achievement without even trying.
Easy “Decimator” achievement
At the end of Mission 1: Black Ops, you will be driving a truck and can use its turret against enemies. At a certain point, your truck will stop and lots of robots will attack you and try to climb the truck. They will die with one shot from the turret. Quickly shoot the large group of robots to get the “Decimator” achievement. If you fail to get it, back out to the main menu and resume from last checkpoint.
Easy “Fling Me To The Moon” achievement (“Awakening” DLC)
There are four Wunderspheres on Der Eisendrache. To activate them, you must first interact with the four landing pads. Once a landing pad has been triggered, the lights on the corresponding Wundersphere will turn from red to green. It will stay active throughout the match. The Wundersphere flings you into the air and to the landing pad (similar to a teleporter). Each use costs 500 points. Go to the indicated locations to find all four landing pads and Wunderspheres:
- Landing Pad 1: In the starting area.
- Landing Pad 2: In the first courtyard of the bastion, upstairs.
- Landing Pad 3: At the bastion walls (the area after turning on the power).
- Landing Pad 4: In the rocket pad area after using the teleporter.
- Wundersphere 1: From the rocket pad area to the starting area.
- Wundersphere 2: From the first courtyard to the bastion walls.
- Wundersphere 3: From the courtyard after the bastion walls (before going down to the catacombs) to the first courtyard.
- Wundersphere 4: From the bastion walls to the rocket pad.
Use each Wundersphere twice to get the “Fling Me To The Moon” achievement (you do not need to reactivate the landing pads for this).
Easy “Foe To Friend” and “Sting Like A Talon” achievements
A few minutes after Mission 2: New World begins, your teammate will tell you to take control of a drone. You can pick from small robots and flying drones. The flying drone is the Talon — so pick that one. Kill the enemies in the next room to get the “Foe To Friend” and “Sting Like A Talon” achievements.
Easy “For Real This Time” achievement
The training simulator can be accessed in the safehouse in Campaign mode, after completing Mission 2. It is a combat simulation consisting of 16 rounds. If you defeat all 16 waves, you are pretty much guaranteed a gold rating. Do it as quickly as possible to get even more points. 27,500 points are required for gold. To get the “Tried And True” decoration, you must get at least 35,000 points. You must be very quick to pull this off. The decoration is required for the “Personal Decorator” achievement. Set the difficulty to Recruit to make things easier.
Easy “Gun Game” achievement
A few minutes into Mission 4: Provocation, you will reach an area with lots of containers where you get ambushed by many robots. There is a mobile armory in this area. The trick is to use the mobile armory to switch loadouts. Get a kill with the primary and secondary weapons you have equipped. Then, go back to the mobile armory and switch weapons. Repeat this until you have 5 kills within 30 seconds to get the “Gun Game” achievement. There is also a checkpoint right in front of the mobile armory. Use it to retry if you fail to get the achievement.
Easy “Hold Still!” achievement
First, you must buy the “Blinding Swarm” cyber core upgrade in the safehouse. It is part of the Chaos skill tree. Then, unleash the swarm near a large group of human enemies and quickly kill them while they are stunned by the swarm. A good place to do this is early in Mission 4: Provocation. After killing the enemies in the first big area, you will come by a mobile armory and civilians/prisoners will come running down some stairs. There is a large group of enemies standing close together. Unleash the swarm and pick them off one by one while they are stunned. Kill yourself to restart the checkpoint if you do not get the “Hold Still!” achievement.
Easy “In Their Sleep” achievement
In Mission 3: In Darkness, the first group of enemies are perfect to kill 5 stunned enemies in under 3 seconds. Set the difficulty to Recruit, and make sure you have some flashbangs in your loadout. Then, wait until 5+ enemies are close together (there are more than enough enemies in this section), and throw the flashbang at them. Kill them as quickly as possible to get the “In Their Sleep” achievement. Use a machine gun or semi-automatic shotgun from close range. This only works on human enemies, not robots.
Easy “Maximum Firepower” achievement
To take control of an ASP, you must first buy the “Remote Hijack” skill in the safehouse. It is part of the Control Core skill tree. At the end of Mission 7: Rise & Fall, you will have to fight some large robots — the so called “ASP”. The first one you must destroy cannot be hacked. After that a smaller ASP is dropped off by a helicopter. Use the Remote Hijack ability on it. It takes a few seconds to hack it. Once you are in control of the machine, you will get the “Maximum Firepower” achievement.
Easy “None Left Standing” achievement (“Awakening” DLC)
There are two sure ways to spawn a minigun (also called Death Machine). The first one is to get the “Fatal Contraption” Mega Gobblegum from Monty’s Factory. Since you acquire Gobblegums randomly, this way may not be ideal. A much better and safer way is to run over the blue pressure plate near the Juggernog during anti-gravity. This one pressure plate will spawn a death machine at the workbench by the pyramid. To trigger anti-gravity, just stand on all four pressure plates around the pyramid for a few seconds. You must then kill the following four types of zombies with the minigun to get the “None Left Standing” achievement:
- 1. Normal Zombie (they spawn all the time).
- 2. Panzersoldat (large robot guy; spawns in Round 12, 17/18, 22/23, etc.).
- 3. Electric Zombie (must be electrified by a Panzersoldat’s shock charges. Just let him chase after you for a while and he will electrify a zombie).
- 4. Burning Zombie (must be burned by a Panzersoldat’s Flamethrower. Just let him chase after you for a while and he will burn a zombie).
Dogs are not needed to get the achievement. The earliest you can do it is in Round 12, as that is the first time a Panzersoldat spawns. Kill off some zombies and let him chase you around the pyramid room. When some zombies are burning/electrified, wait for anti-gravity, then run over the pressure plate and quickly collect the death machine. Then, kill the Panzersoldat and all the zombies.
Easy “Not Big Enough” achievement (“Awakening” DLC)
After getting the Ragnarok DG-4 weapon, every couple of rounds some Panzersoldaten will spawn (usually round 17/18, 22/23, etc.). When they spawn, weaken them first (about 10 shots with your bow), then plant the Ragnarok on the ground near them. It will make them hover for a few seconds. You must kill them while they hover in the air. This only lasts a very short time, which is why you must weaken them first. When they fall back down to the ground, it will no longer count towards the achievement. Your teammates can help you by planting their own Ragnarok traps. It does not matter who plants the trap. Only the player landing the killing shot will get the achievement, regardless of who set up the trap.
Easy “Parasite-Seeing” achievement
The parasites always spawn in Round 5. They are yellow insects flying around and shooting at you. Go to the train station in Round 5 and ride the train (costs 500 points to activate). While you are on the train, you must kill five parasites to get the “Parasite-Seeing” achievement.
Easy “Quick Off Your Feet” achievement (“Awakening” DLC)
To buy the BRM, first activate the four pressure plates in the undercroft (room with the pyramid after turning on power). You can do this by standing on each plate for a few seconds. This will trigger an anti-gravity effect. Wall run over all six pressure plates during anti-gravity. The ones you have not yet activated are glowing blue. This does not have to be done in one wave of anti-gravity. The BRM will now be unlocked at the wall by the pyramid. To reach it, you must double jump during anti-gravity. It costs 1,800 points.
Easy “Sorry, We’re DEAD” achievement
There are four stores in the Junction District starting area after opening the first gate. Kill ten zombies in any of them to get the “Sorry, We’re DEAD” achievement. You can shoot them or use the knife. The ten kills do not have to be from one store — they count across all stores. Always repair the barricades so you have more time to kill the zombies before they leave the store. Run from store to store and look if there is a zombie. You should get the achievement in round 6 or 7, as the spawns are a bit random.
Easy “Take A Bow” achievement (“Awakening” DLC)
The Wrath Of The Ancients is a bow you can upgrade. There are four different variations: electric, fire, wind, wolf. Complete the following steps in order to do the electric upgrade and get the “Take A Bow” achievement:
Step 1: Feed the three dragons. This is done by killing zombies under them. They must chew up seven zombies you have killed. The dragons will then fall apart.
Step 2: Collect the Wrath Of The Ancients bow that has just been unlocked.
Step 3: To start upgrading it, use the Death Ray Trap (section after turning on the power) and shoot the weather vane to the left of the death ray.
Step 4: A blue arrow will fall down from the weather vane. Collect it.
Step 5: There are three bonfires scattered around the map. Shoot them with arrows to light them up.
Step 6: Go to the Pyramid room. Wait for the anti-gravity to activate and wall run over the five blue symbols on the wall.
Step 7: Three electrified urns will now appear around the map. You must kill 5-8 zombies near each urn. Then, some blue orbs will get sucked into the urns. When the orbs stop appearing, move onto the next urn.
Step 8: Charge the arrows at the urns (hold RT). The arrows will now be electrified. Shoot the same three bonfires again with the electric arrows.
Step 9: Return to where you collected the blue arrow in Step 4 by the death ray, and hold X to interact with the blue fog.
Step 10: Shoot the weather vane with your arrows again and collect the blue arrow that falls down.
Step 11: Pick up the arrow and place it at the pyramid. Then, kill 15-20 zombies near the pyramid to collect blue orbs. After a while the upgrade will be finished.
Step 12: Finally, collect the new and super powerful bow.
Note: It is recommended to do this with a co-op partner since it is easier. They can hold off the zombies while you aim at the bonfires. However, this can be done solo.
Easy “The Beginning Of The End” achievement
Use the “Skipping rounds in Shadows Of Evil” trick to skip to round 15. You will start round 15 with 16,500 points, which is more than enough points to open everything if you have four players. Keep a zombie alive at the end of the first wave, then complete the first four rituals to get “The Beginning Of The End” achievement on the first wave.
Easy “Throwing Flak” achievement
The earliest opportunity to get the “Throwing Flak” achievement is in Mission 2: New World, when you have to chase down the suspect. You must cook a frag grenade and throw it at the Talons just a moment before it explodes. Talons almost always fly in swarms of three or more. It also counts when you throw the grenade on the ground and the Talons are flying over it. The achievement description is a bit misleading, as the grenade does not have to explode in mid-air.
Easy “Time To Slam” achievement (“Awakening” DLC)
After getting the Ragnarok DG-4 weapon, let two of your teammates kill themselves with a grenade, then plant the Ragnarok and revive them to get the “Time To Slam” achievement.
Achievements
Accomplish the indicated achievement to get the corresponding number of Gamerscore points:
- A Second Chance (20 points): Complete New World on Hardened, Veteran, or Realistic.
- High Tide (20 points): Complete In Darkness on Hardened, Veteran, or Realistic.
- Into the Abyss (20 points): Complete Hypocenter on Hardened, Veteran, or Realistic.
- Blood for Blood (20 points): Complete Vengeance on Hardened, Veteran, or Realistic.
- Friends and Foes (20 points): Complete Rise and Fall on Hardened, Veteran, or Realistic.
- Understanding Madness (20 points): Complete Demon Within on Hardened, Veteran, or Realistic.
- Fly, Swim, Shoot (20 points): Complete Sand Castle on Hardened, Veteran, or Realistic.
- 200 Stories of Sheer Adventure! (20 points): Complete Lotus Towers on Hardened, Veteran, or Realistic.
- Full Circle (50 points): Complete Campaign on Hardened, Veteran, or Realistic.
- Belly of the Beast (20 points): Complete Provocation on Hardened, Veteran, or Realistic.
- Curator (20 points): Discover all of the collectibles in the Campaign.
- Disavowed (20 points): Complete Black Ops on Hardened, Veteran, or Realistic.
- Hold Still! (20 points): Kill 6 enemies affected by one Blinding Swarm or Firefly Swarm.
- Rolling Heavy (10 points): Kill 5 enemies using one burst of Unstoppable Force.
- Sting like a Talon (20 points): In Campaign, kill 20 enemies while flying the same Talon.
- Decimator (20 points): In Campaign, kill 10 enemies in under 3 seconds.
- Gun Game (20 points): In Campaign, kill 5 enemies with 5 different guns in under 30 seconds.
- Personal Decorator (90 points): Earn all Decorations.
- Doing Camo Right (10 points): In Campaign, unlock all camos for any weapon.
- Maximum Firepower (10 points): Take control of an ASP.
- Walking Encyclopedia (10 points): Discover all of the collectibles in any Mission.
- Crackshot (10 points): In Campaign, kill 5 enemies from over 100m away.
- Can’t Hide (10 points): In Campaign, kill an enemy through a wall or obstruction.
- Biff! Bap! KaPow! (10 points): Kill three enemies in a melee combo.
- Inertial Distance (10 points): In Campaign, wall run over 250 meters.
- For real this time (10 points): Earn a Gold Rating in the training simulator.
- Foe To Friend (10 points): Use an enemy combat robot to kill 10 enemies.
- Unlocked Potential (10 points): Fully upgrade a Cybernetics Core.
- Lock, Stock, And Then Some (10 points): In Campaign, unlock all attachments for any weapon.
- In Their Sleep (10 points): In Campaign, kill 5 stunned enemies in under 3 seconds.
- The Beginning of the End (60 points): In Shadows of Evil, complete all Rituals.
- From the Shadows (25 points): In Shadows of Evil, spot the Shadowman fives times in one game.
- Not out of Gobblegum! (25 points): In Shadows of Evil, purchase and chew every type of GobbleGum in your Pack.
- Sorry, we’re DEAD (25 points): In Shadows of Evil, kill 10 zombies that are inside of a store in one game
- Strike! (25 points): In Shadows of Evil, use the rocket shield attack to kill at least 10 zombies in one burst.
- Beat CoP (25 points): In Shadows of Evil, summon the Civil Protector in every district in a single game.
- The Spider and the Fly (25 points): In Shadows of Evil, kill 10 zombies ensnared by a Widow’s Wine grenade
- Margwa Party (25 points): In Shadows of Evil, kill 2 Margwas in a single round.
- Parasite-Seeing (25 points): In Shadows of Evil, kill 5 Parasites while riding on the train.
- Welcome to the Club (20 points): Reach Sergeant (Level 10) in Multiplayer while playing online.
- Battle Tested (20 points): Reach Commander (Level 55) in Multiplayer while playing online.
- Tactical Specialist (20 points): Get 5 Medals based on a Specialist Ability in a single game.
- Deadly Specialist (20 points): Get a Specialist-based medal that requires 3 or more rapid kills while using any Specialist Weapon.
Additionally, there are four secret achievements:
- No One Will Believe You (50 points): Complete the Campaign on Realistic.
- Another Side of the Story (20 points): Complete the Campaign on any difficulty.
- Throwing Flak (10 points): Kill 3 Talons with a single mid-air grenade detonation.
- Silverback In Black (10 points): Hack the Data Vault and brace yourself for Cyber’s Avengening in Dead Ops Arcade 2.
The following achievements require the “Awakening” bonus downloadable content:
- Der Meisterbogenschuetze (40 points): In Der Eisendrache, obtain all of the ancient bows.
- None Left Standing (20 points): In Der Eisendrache, kill every type of zombie using a minigun.
- Take a Bow (20 points): In Der Eisendrache, upgrade the Wrath of the Ancients.
- Not Big Enough (20 points): In Der Eisendrache, trap and kill a Panzersoldat using the Ragnarok DG-4.
- Time to Slam (15 points): In Der Eisendrache, revive two players protected by the Ragnarok DG-4.
- Quick Off Your Feet (5 points): In Der Eisendrache, wall buy the BRM.
- That’s a lot of Jigawatts! (5 points): In Der Eisendrache, electrocute 121 zombies.
- Fling Me to the Moon (5 points): In Der Eisendrache, use every Wundersphere twice.
- Death From Above (5 points): In Der Eisendrache, kill a zombie while being flung by a Wundersphere.
Additionally, there is one secret achievement with the “Awakening” bonus downloadable content:
- My Brother’s Keeper (75 points): In Der Eisendrache, the one must be erased.
The following achievements require the “Eclipse” bonus downloadable content:
- Sanguine Serum (40 points): In Zetsubou No Shima, drink fresh Widow’s Wine.
- Herbal Remedy (20 points): In Zetsubou No Shima, use a plant to return to life.
- The Ultimate Sacrifice (20 points): In Zetsubou No Shima, retrieve the Skull of Nan Sapwe.
- Crop Duster (15 points): In Zetsubou No Shima, kill 10 zombies with a single shot of the KT-4.
- Iron Lung (5 points): In Zetsubou No Shima, stay underwater for one minute.
- In the Belly of the Beast (5 points): In Zetsubou No Shima, survive getting consumed.
- Assault With Battery (5 points): In Zetsubou No Shima, electrocute a zombie with a shield.
- Web of Defeat (5 points): In Zetsubou No Shima, remove webs in every possible way in one game.
- One Too Many (5 points): In Zetsubou No Shima, throw up.
Additionally, there is one secret achievement with the “Eclipse” bonus downloadable content:
- Seeds of Doubt (75 points): In Zetsubou No Shima, the one must be saved.
The following achievements require the “Descent” bonus downloadable content:
- Wield a Fist of Iron (40 points): In Gorod Krovi, wield the Gauntlet of Siegfried.
- Time Attack (20 points): In Gorod Krovi, complete Time Attack: Round 20.
- Taking Flight (15 points): In Gorod Krovi, ride a Dragon.
- Not One Inch (15 points): In Gorod Krovi, complete a Lockdown Event.
- Viktorious Revenge (15 points): In Gorod Krovi, complete all solo Trials in one Zombies game.
- Vaporeyezed (5 points): In Gorod Krovi, use the Gigant Beam to kill 20 Zombies in one activation.
- Fire Mission (5 points): In Gorod Krovi, kill 8 zombies with a single Dragon Strike.
- Blown Away (5 points): In Gorod Krovi, kill 10 zombies at once with the Guard of Fafnir.
- Zombiepult (5 points): In Gorod Krovi, launch 10 zombies into the air at the same time.
Additionally, there is one secret achievement with the “Descent” bonus downloadable content:
- Love And War (75 points): In Gorod Krovi, the one must be freed.
The following achievements require the “Salvation” bonus downloadable content:
- Pack-A-Punch-ectomy (15 points): In Revelations, recover the Pack-a-Punch machine from its abductor.
- Keep Close (15 points): In Revelations, assist a Keeper in defeating every type of enemy.
- Death Ray (15 points): In Revelations, kill 40 enemies with a single activation of a Corruption Turret.
- The Grand Tour (15 points): In Revelations, visit every unique location within 2 minutes.
- Wardrobe Change (15 points): In Revelations, wear three different hats.
- Wonderful (15 points): In Revelations, kill 10 enemies in one shot with each wonder weapon.
- Controlled Chaos (15 points): In Revelations, override all of the Corruption Engines before round 6.
Additionally, there are two secret achievements with the “Salvation” bonus downloadable content:
- For The Good Of All (30 points): In Revelations, the Key must be opened.
- A Better Tomorrow (30 points): In Revelations, complete the cycle.