Considered by many to be the greatest Star Wars game of all time and one of BioWare‘s undisputed masterpieces, Star Wars: Knights of the Old Republic is the developer’s 2003 RPG. Originally released as an Xbox exclusive, KOTOR eventually made its way to PC due to popular demand. Later, the game would receive ports to iOS and Android and a Nintendo Switch port. Xbox owners can still play the original version of the game thanks to backward compatibility, with the title available digitally on the Xbox Marketplace and original Xbox physical discs working in every subsequent Xbox console with a disc drive.
The title is noteworthy for being BioWare’s first non-Dungeons & Dragons game, having previously worked on both Baldur’s Gate and its sequel. Still, KOTOR utilizes many of the same RPG mechanics and rules as Baldur’s Gate and the pen-and-paper Dungeons & Dragons. The game’s announcement was met with plenty of praise, with BioWare having earned plenty of accolades as a talented studio thanks to Baldur’s Gate‘s success. After an initial reveal at E3 2001, the game was eventually released in July 2003, selling over 250,000 units in just its first week of release. It would end up being one of the fastest and best-selling games on the Xbox and is commonly recognized as one of the greatest games ever made.
Star Wars: Knights Of The Old Republic Premise
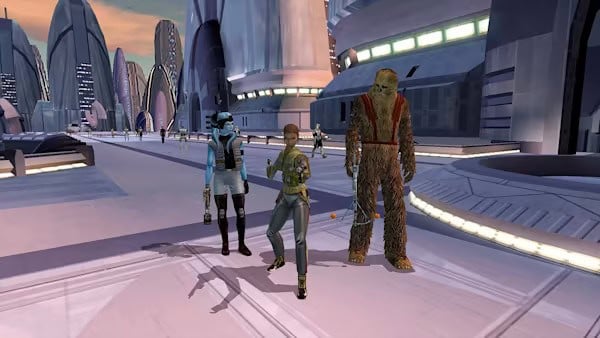
©Star Wars: Knights of the Old Republic gameplay screenshot – Original
The story of Star Wars: Knights of the Old Republic takes place thousands of years before the events of the canon Star Wars films during a period known as the Old Republic. During this time, the Sith and the Jedi are in open conflict with one another, with a particularly evil Sith known as Darth Revan terrorizing the galaxy. The Jedi are able to thwart Revan, but his apprentice Darth Malak only picks up where he left off. You start the game as a mercenary on a freight ship who is awoken from a deep sleep only to find that the ship is under attack from Sith forces. After creating a character, you set off to escape the ship, becoming embroiled in a galaxy-spanning quest and discovering your connection to the Force.
In terms of its gameplay, KOTOR is a third-person 3D RPG where players have control of their main character and two allies. The game abides by the Dungeons & Dragons rule set and uses the d20 System behind the scenes to calculate the success and power of attacks, conversations, and other elements. One of the more noteworthy parts of KOTOR‘s gameplay is its morality system, which is affected by choices the player makes as well as how they treat other characters and respond to them in conversations. The morality system is split between Light and Dark side points, and depending on which side characters align with they gain new powers.
Star Wars: Knights Of The Old Republic Main Characters
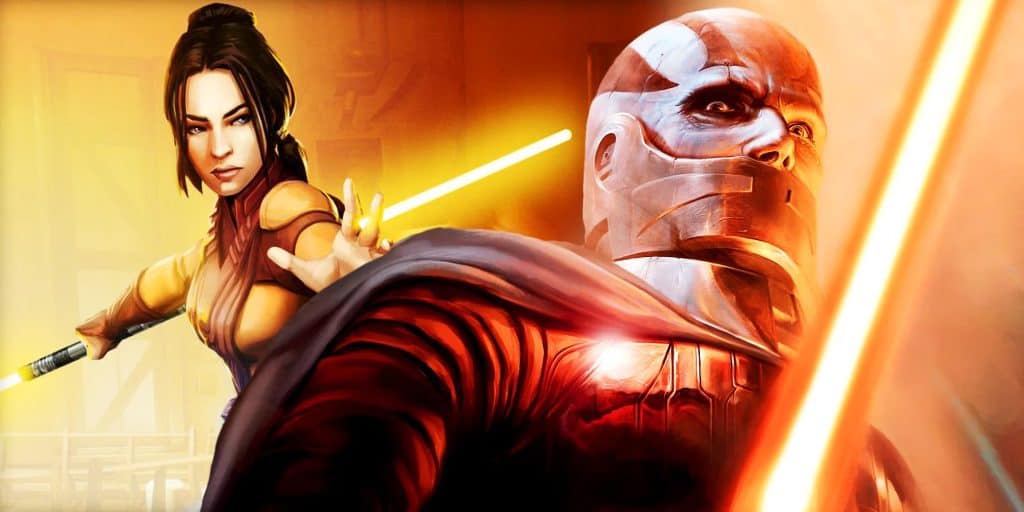
©Star Wars: Knights of the Old Republic character artwork – Original
Joining the main player character in Star Wars: The Knights of the Old Republic is a cast of allies and enemies that rank among some of the greatest characters in the Star Wars universe. The game builds off of the established lore and storytelling conventions of the IP to create a vast and fully realized world in the universe’s distant past, allowing the writers to play with series tradition while injecting a fair amount of new ideas. The main characters in KOTOR include:
- Player Character: Anyone who has played KOTOR knows that the player character has an official name that shouldn’t be revealed due to spoilers. Regardless, the player character is the protagonist of KOTOR and a powerful Jedi. Players get to determine whether they align with the Light or Dark Side based on their actions.
- Bastilla: Bastilla is a member of the Jedi Council and one of the most powerful Force users in the galaxy. Her search for a way to stop Darth Malak leads to her capture on Taris, from which the player character rescues her.
- Carth: Carth is the captain of the ship the player character awakens on and is a former Republic soldier. He is a constant companion to the player and often serves as the voice of reason.
- Darth Malak: Darth Malak is the apprentice of the Sith Lord Darth Revan and the main antagonist of KOTOR. He is a potent force-user with plans to bring the Republic under the heel of the Sith.
Games in the Star Wars: Knights Of The Old Republic Series
The success and universal acclaim of KOTOR would make a sequel all but a guarantee. However, BioWare would pass the reins to fellow noteworthy studio Obsidian rather than take on the development itself. Obsidian’s work on the direct sequel is still seen as some of the best quest designs in the genre, which many of the team members would repeat while working on Fallout: New Vegas for Bethesda. Following the direct sequel to KOTOR, there have been no new mainline games in the series. That said, Electronic Arts and BioWare eventually partnered up to make an MMORPG set in the KOTOR universe. The series’ MMORPG, The Old Republic, still has a dedicated player base to this day. Games in the KOTOR series include:
- Star Wars: Knights of the Old Republic (Xbox, 2003)
- Star Wars: Knights of the Old Republic II: The Sith Lords (Xbox, 2004)
- Star Wars: The Old Republic (PC, 2011)
Star Wars: Knights Of The Old Republic Cheats & Secrets
PC Version Cheat Codes
PC players have the option of using cheats in Star Wars: Knights of the Old Republic by following the steps below. Make sure to type cheats as they appear in the table for them to work. These cheats are for PC ONLY and will not work with other versions of the game.
Note: Enabling cheats in the PC release of KOTOR involves editing a game file; create a backup copy of the file before proceeding. Use a text editor (e.g. Notepad) to edit the “swkotor.ini” file in the game folder. Scroll to the “GAME OPTIONS” section and look for the line that reads “EnableCheats=0“. Change it to the following:
- “EnableCheats=1“
Save the file and start the game. While playing the game, press the tilde key ( ~ ) to display the console window, then enter one of the following codes to activate the corresponding cheat function. Press [Tab] to list all console commands.
| Cheat | Code |
|---|---|
| Invincibility | invulnerability |
| Heal selected party member’s health and Force points | heal |
| Press W or S to move faster; repeat to disable | turbo |
| Full map | revealmap |
| Get indicated number of credits | givecredits [number] |
| Brightens screen; not recommended for certain areas | bright |
| Set “Computer Use” skill | setcomputeruse [number] |
| Set “Demolitions” skill | setdemolitions [number] |
| Set “Stealth” skill | setstealth [number] |
| Set “Awearness” skill | setawareness [number] |
| Set “Persuade” skill | setpursuade [number] |
| Set “Repair” skill | setrepair [number] |
| Set “Security” skill | setsecurity [number] |
| Set “Strenght” skill | setstrength [number] |
| Set “Desterity” skill | setdexteriry [number] |
| Set “Constitution” skill | setconstitution [number] |
| Set “Intelligence” skill | setintelligence [number] |
| Set “Wisdom” skill | setwisdom [number] |
| Set “Charisma” skill | setcharisma [number] |
| Set “Awareness” skill | setawareness [number] |
| Add indicated number of levels | addlevel [number] |
| Add indicated number of experience points | addexp [number] |
| Add the indicated number of Light Side points | addlightside [number] |
| Add the indicated number of Dark Side points | adddarkside [number] |
| Spawn indicated item | giveitem [item name] |
| Spawn medpacks | givemed |
| Spawn repair packs | giverepair |
| Spawn computer spikes | givecomspikes |
| Spawn Sith Armor | give sith armor [number] |
| Unknown | restartminigame |
| Unknown | warp |
| Unknown | infiniteuses |
| Unknown | whereami |
| Unknown | dancedancemalak |
Item Values for “giveitem” Cheat
Use one of the following values with the “giveitem [item name]” code:
| Item | Code |
|---|---|
| Calo Nord’s Battle Armor | g_a_class8005 |
| Jedi Robe | g_a_jedirobe01 |
| Jedi Knight Robe | g_a_kghtrobe03 |
| Star Forge Robe | g_a_mstrrobe07 |
| Cardio Regulator | g_i_belt001 |
| Verpine Cardio Regulator | g_i_belt002 |
| Adrenaline Amplifier | g_i_belt003 |
| Advanced Adrenaline Amplifier | g_i_belt004 |
| Nerve Amplifying Belt | g_i_belt005 |
| Sound Dampening Stealth Unit | g_i_belt006 |
| Advanced Stealth Unit | g_i_belt007 |
| Eriadu Stealth Unit | g_i_belt008 |
| Calrissian’s Utility Belt | g_i_belt009 |
| Stealth Field Generator | g_i_belt010 |
| Adrenaline Stimulator | g_i_belt011 |
| CNS Strength Enhancer | g_i_belt012 |
| Electrical Capacitance Charge | g_i_belt013 |
| Thermal Shield Generator | g_i_belt014 |
| Battle Stimulant | g_i_cmbtshot001 |
| Droid Light Plating Type 1 | g_i_drdltplat001 |
| Droid Medium Plating Type 1 | g_i_drdmdplat001 |
| Droid Medium Plating Type 1 | g_i_drdmdplat001 |
| Advanced Repair Kit | g_i_drdrepeqp002 |
| Security Interface Tool | g_i_drdsecspk001 |
| Advanced Flame Thrower | g_i_drdutldev007 |
| Strength Gauntlet | g_i_gauntlet01 |
| Eriadu Strength Gauntlets | g_i_gauntlet02 |
| Sith Power Gauntlets | g_i_gauntlet03 |
| Stabilizer Gauntlets | g_i_gauntlet04 |
| Bothan Machinist Gloves | g_i_gauntlet05 |
| Verpine Bond Gauntlets | g_i_gauntlet06 |
| Dominator Gauntlets | g_i_gauntlet07 |
| Karaken Gauntlets | g_i_gauntlet08 |
| Bastila’s lightsaber | g_i_gauntlet09 |
| Cardio Package | g_i_implant101 |
| Response Package | g_i_implant102 |
| Memory Package | g_i_implant103 |
| Done | g_i_implant104 |
| Biotech Package | g_i_implant201 |
| Retinal Combat Implant | g_i_implant202 |
| Nerve Enhancement Package | g_i_implant203 |
| The Party Selection Screen Available | g_i_implant204 |
| Bavakar Cardio Package | g_i_implant301 |
| Bavakar Reflex Enhancement Package | g_i_implant302 |
| Bavakar Memory Chip | g_i_implant303 |
| Bio-Antidote Package | g_i_implant304 |
| Cardio Power System | g_i_implant305 |
| Gordulan Reaction System | g_i_implant306 |
| Navaradon Regenerator | g_i_implant307 |
| Sith Regenerator | g_i_implant308 |
| Beemon Package | g_i_implant309 |
| Cyber Reaction System | g_i_implant310 |
| Light-scan Visor | g_i_mask01 |
| Motion Detection Goggles | g_i_mask02 |
| Bothan Perception Visor | g_i_mask03 |
| Verpine Ocular Enhancer | g_i_mask04 |
| Bothan Sensory Visor | g_i_mask05 |
| Vacuum Mask | g_i_mask06 |
| Sonic Nullifiers | g_i_mask07 |
| Aural Amplifier | g_i_mask08 |
| Advanced Aural Amplifier | g_i_mask09 |
| Neural Band | g_i_mask10 |
| Verpine Headband | g_i_mask11 |
| Breath Mask | g_i_mask12 |
| Teta’s Royal Band | g_i_mask13 |
| Sith Mask | g_i_mask14 |
| Stabilizer Mask | g_i_mask15 |
| Interface Band | g_i_mask16 |
| Demolitions Sensor | g_i_mask17 |
| Combat Sensor | g_i_mask18 |
| Stealth Field Enhancer | g_i_mask19 |
| Stealth Field Reinforcement | g_i_mask20 |
| Interface Visor | g_i_mask21 |
| Circlet of Saresh | g_i_mask22 |
| Pistol Targeting Optics | g_i_mask23 |
| Heavy Targeting Optics | g_i_mask24 |
| Blue double lightsaber | g_w_dblsbr001 |
| Red double lightsaber | g_w_dblsbr002 |
| Green double lightsaber | g_w_dblsbr003 |
| Yellow double lightsaber | g_w_dblsbr004 |
| Purple double lightsaber | g_w_dblsbr005 |
| Bastila’s light saber | g_w_dblsbr006 |
| Blue lightsaber | g_w_lghtsbr01 |
| Red lightsaber | g_w_lghtsbr02 |
| Green lightsaber | g_w_lghtsbr03 |
| Yellow lightsaber | g_w_lghtsbr04 |
| Purple lightsaber | g_w_lghtsbr05 |
| Darth Malak’s lightsaber | g_w_lghtsbr06 |
| Long Sword | g_w_lngswrd01 |
| Advanced Sensory Implant | g_w_lngswrd02 |
| Naga Sadow’s Poison Blade | g_w_lngswrd03 |
| Blue short light saber | g_w_shortsbr01 |
| Red short light saber | g_w_shortsbr02 |
| Green short light saber | g_w_shortsbr03 |
| Yellow short light saber | g_w_shortsbr04 |
| Purple short light saber | g_w_shortsbr05 |
| Short Sword | g_w_shortswrd01 |
| Massassi Brand | g_w_shortswrd02 |
| Teta’s Blade | g_w_shortswrd03 |
| VibroSword | g_w_vbroswrd01 |
| Krath Dire Sword | g_w_vbroswrd02 |
| Sith Tremor Sword | g_w_vbroswrd03 |
| Echani Foil | g_w_vbroswrd04 |
| Bacca’s Ceremonial Blade | g_w_vbroswrd05 |
| Bacca’s Ceremonial Blade (Requires: Melee, Critical Strike, Flurry) Attack Mod +5, +1-6 Electric | g_w_vbroswrd06 |
| Bacca’s Ceremonial Blade (Requires: Melee, Critical Strike, Flurry) Attack Mod +5, +1-8 Electric | g_w_vbroswrd07 |
| Bacca’s Ceremonial Blade (Requires: Melee, Critical Strike, Flurry) Attack Mod +5, +2-12 Electric | g_w_vbroswrd08 |
| Advanced Stabilizer Gloves | g1_i_gauntlet01 |
| Advanced Senseory Implant | g1_i_implant301 |
| Advanced Bio-Stabilizer Implant | g1_i_implant302 |
| Advanced Combat Implant | g1_i_implant303 |
| Advanced Alacrity | g1_i_implant304 |
| Advanced Bio-Stabilizer Mask | g1_i_mask01 |
| Guardian of the Force | g1_w_dblsbr001 |
| Mantle of the Force | g1_w_dblsbr002 |
| Guardian of the Force | g1_w_lghtsbr01 |
| Mantle of the Force | g1_w_lghtsbr02 |
| Guardian of the Force | g1_w_shortsbr01 |
| Mantle of the Force | g1_w_shortsbr02 |
Xbox Cheats
Free Roam Camera
Go to the Messages menu and enter the following code:
- X, Left, A, X
If done correctly, you will see a message appear reading “Punch it Chewie”. Press Start to exit the Messages menu and then press the right analog stick down (R3). You will be able to maneuver the camera around freely.
Nintendo Switch Cheats
The Nintendo Switch version of Star Wars: Knights of the Old Republic has a hidden cheat menu. To access it, make sure not to be in any menu screens. During normal gameplay, without pausing, press the left analog stick (L3) three times. This will open a cheat menu that allows players to manipulate various aspects of the game.
Star Wars: Knights of the Old Republic Secrets
Hidden Ending
Note that this secret only works in the original Xbox version of KOTOR. Additionally, you will need two controllers to enable this secret. Before the final battle with Darth Malak, press the L + R Triggers and Y on two controllers — one in the P1 port and the other in the P4 port. If done correctly, the player character will take out their lightsaber. Open the door and talk to Malak to trigger an alternate ending.
Voice Modulation
This is another secret that requires both the original Xbox version of the game and two controllers. With one controller in port 1 and the other in port 4 (P1 and P4), press the black or white button on the P4 controller to raise or lower the pitch of character voices.
Bastilla’s Underwear
Equip Bastilla with the Dark Robes and then unequip them to see her in her undergarments.
Star Wars: Knights of the Old Republic Glitches
Item Duplication Glitch
The classic item duplication glitch from the original Xbox and PC releases still works on other platforms. Regardless of which platform you experience Star Wars: Knights of the Old Republic on, the following item duplication glitch will still be usable while players are on Manaan.
- Head to the Submarine Base on Manaan
- Head to any airlock chamber within the base
- Equip any items you wish to duplicate on your companion characters
- Save the game
- Immediately unequip all the items from your companion characters
- Exit through the airlock
- As soon as the party appears in the water, head right back inside
- Your companion characters will be wearing the gear you equipped and then unequipped from them
You can repeat these steps to duplicate any item as many times as you like.
Double Bendak Starkiller Blasters
After beating Twitch in the tournament on Taris, do not talk to the Hutt to receive your reward. Instead, go speak with Bendak Starkiller and accept his challenge. Go and speak to the Hutt and he will share his excitement over the fight with Bendak but will not give you a reward. After defeating Bendak, go and speak to the Hutt to get your reward, then speak to him again. He will give you another set of rewards that includes a second of Bendak’s blasters.
Double Carth’s Blaster
Before the cutscene on Leviathan where Carth fires his blaster at Malak, equip him with two melee weapons. After the scene, you will have two of Carth’s Blaster in your inventory instead of one.
Force Enemies to Skip Turns
There are two tricks players can use to skip enemy turns and never allow them to attack. One of these is only usable in boss fights, while the other only works against characters using melee weapons.
To skip boss enemy turns, select a single attack against the opponent and then pause the game. Save the game and then load the most recent save file. You should resume battle with it still being your turn. Repeat this process to quickly defeat boss enemies without ever taking damage.
To skip turns in fights against enemies wielding melee weapons, first, run up to the enemies to initiate battle. When they take out their weapons, run far enough away that they can’t hit you but not so far that they draw ranged weapons. Use the Rapid Fire ability against the enemies as they use up their turn trying to run after you. This is a great way to easily clear the battles in the Dueling Pit.
Bypass the Droids Before Kashyyyk
Before players get the Star Map to enter Kashyyyk, there is a tough battle against two Droids. Thanks to a glitch, though, players can easily skip this battle. After speaking to an important character before heading to Kashyyyk, the Droids will attack. Instead of fighting them, run over to the Star Map and interact with it to trigger a cutscene. Your party members will continue fighting the Droids but not take damage. After letting them fight the Droids, run in the opposite direction of the Droids and have your party members follow you. You can simply leave the fight without having to defeat the Droids.
Dak Vesser Reincarnated
With Juhani in your party, talk to Dak Vesser while on Korriban. He should be near the first tomb on the left. After, he will head to the Cantina. Take Juhani out of your party and speak with Dak. Tell him you will not leave and then fight him. Save the game and then reload it after killing him. He will magically reappear in the Cantina, allowing you to fight him again and again by repeating this process. Use this glitch to get infinite credits, lightsaber crystals, and Jedi Knight Robes.
Duplicate Bastilla’s Lightsaber
There is a handy trick players can use to duplicate Bastilla’s equipment and get plenty of additional EXP in the process. First, agree to participate in the Swoop Race on Taris by talking to Kandon and riding for the Black Vulkars. After, head into the Black Vulkar base and steal the Prototype Accelerator to bring to the Hidden Beks. After racing, winning Bastilla, and returning with her to the Upper City, place all your items into the footlocker next to your hideout’s Work Bench.
Head back to the Lower City and tell Gadon’s bodyguard that you have the accelerator. The game will glitch and place you at the Swoop track again. Bastilla will appear to have escaped from Brejik, and talking to her brings up dialogue indicating you rescued her. After the conversation, you will reappear in your hideout with Bastilla’s lightsaber, Brejik’s Arm Band and Belt, and earn 525 EXP. Players can continually repeat this process before leaving Taris.
Light Side Points
While on Dantooine, head to the Sandral Estate. Talk to the Droid and let them know you represent the Council. Once inside, speak to the head of the estate and then talk to the daughter. Respond with “What I do is my own business”. You will earn Dark Side points. Speak with her again and apologize. After she tells you her name, choose “I don’t have time to listen to this” to earn Light Side points. Speak with her again and repeat the steps to earn Light Side points every time.
Dark Side Points
To easily earn infinite Dark Side points, speak with Roland Wann after obtaining the Star Map on Manaan. Ask him to give you a bribe. You can repeat this as many times as you like after ending the conversation, earning Dark Side points each time.
Easy EXP on Korriban
To earn easy EXP using only a single Computer Spike, head to the Sith Academy on Korriban. In the dueling Arena, hack into the Datafile and then access the security cameras. Each time the camera changes views, you will gain EXP. Repeat this process as many times as you like for easy EXP.
Star Wars: Knights of the Old Republic Cheat FAQs
Are there cheats for Star Wars: Knights of the Old Republic?
The availability of cheats in KOTOR depends on which version players have. PC players have the benefit of activating in-game cheats and using console commands. Similarly, the newest version of the game on Nintendo Switch has a built-in cheat menu. The original version on Xbox and the iOS release do not include in-game cheats or a cheat menu.
What is the max level in Star Wars: Knights of the Old Republic?
Every RPG has a different level cap, but KOTOR abides by the classic Dungeons & Dragons rule set. As such, the max character level in KOTOR is 20, which holds true for both the player character and their companions.
How long to beat Star Wars: Knights of the Old Republic?
Most playthroughs of KOTOR will take, on average, about 30 hours. That said, there is so much to do in the game that players can easily get distracted from the main quest/critical path. For those hoping to squeeze everything out of KOTOR and 100% the game, expect to spend 45-50 hours.
Does character class matter in Knights of the Old Republic?
Simply put, the class that players choose at the game’s outset has a dramatic effect on how you play the game. The starting class will determine the various perks and stat buffs that the player can benefit from, as well as what type of equipment they can use. Further, certain classes are aligned with very specific builds as players get further into KOTOR and unlock the use of the Force.
The image featured at the top of this post is ©Star Wars: Knights of the Old Republic key art / Original