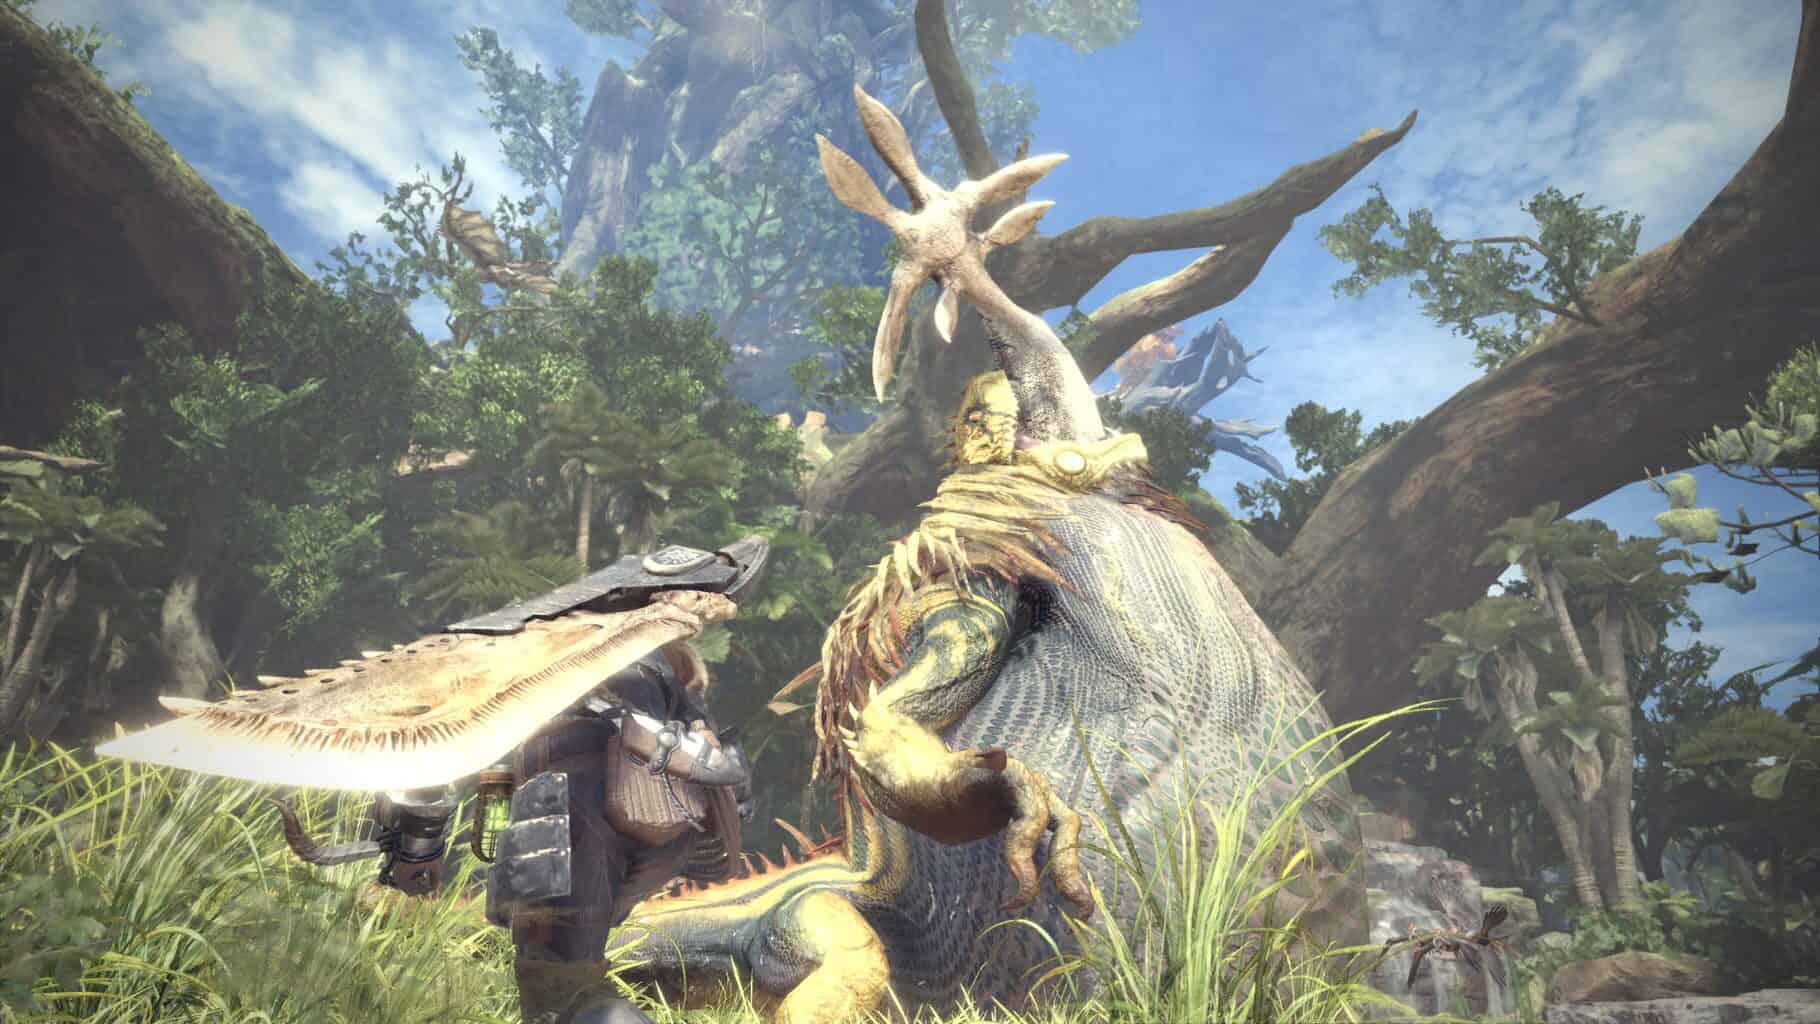
Monster hunting became much more fun with Capcom’s installment of Monster Hunter: World. Players looking for interactive and immersive environments look no further. Monster Hunter: World is as captivating as it is creative. Players can hunt down the scariest of monsters to win loot for crafting weapons, armor, and more.
Premise of Monster Hunter: World
Monster Hunter: World allows players to hunt alone or in a group with the online multiplayer mode. As players progress, they can craft more armor appropriate to take down even the most difficult monsters in the game. In a third-person perspective, Monster Hunter: World can be played on PlayStation 4, Xbox One, and Windows.
Characters in Monster Hunter: World

There is a plethora of characters in Monster Hunter: World, here is a look at the major characters in the title.
The Handler: The handler is in charge of handling quests.
The Commander: Head of the Reasearch Commission HQ.
Field Team Leader: The leader of assisting every new hunter on their first hunt.
Grammeowster Chef: The head of the canteen she is the main cook and offers quests fort ingredients for her meals.
Titles in the Series
There are a number of titles in the series, which can be found here. However, let’s take a look at some of the title’s canon to the series.
- Monster Hunter (2004)
- Monster Hunter 2 (2006)
- Monster Hunter: World (2018)
- Monster Hunter: Rise (2021)
Monster Hunter: World Cheats and Unlockables
Secret Kirin monster quests
Kirin is an extremely rare monster in Monster Hunter: World that makes a return from previous games. Kirin is only available in select quests, which the game does not reveal. There are actually multiple Kirin quests — the first one is the “Gone in a Flash” Low rank five-star optional quest, which is unlocked by completing the following tasks:
After unlocking two-star assignments, check the Biologist NPCs in Astera regularly. The Smart Biologist will have a quest available when there is a yellow exclamation point (!) above his head. He is standing near the Botanical Garden on the lower level of Astera. He will give you a series of quests that you must complete, ranging from two star to five star. Play all of these quests. More become available when you unlock higher star assignments.
After those four quests are completed, the Impatient Biologist in Astera (standing in front of the Botanical Garden) will give you the Kirin quest. You can now fight and slay Kirin and craft armor from his drops. You also unlock the Thunderproof Mantle after completing the quest, when you report back to the Impatient Biologist. This will make future Kirin encounters much easier.
To unlock the nine-star tempered Kirin quest (Thunderous Rumble in The Highlands), successfully complete the story and reach Hunter Rank 49 to unlock it as a main assignment on the quest board. Hunt large monsters after the story to rank up and get this quest. Note: This is a tempered Kirin and one of the hardest fights in the entire game. It is recommended to bring a group of high-level players and wear the Thunderproof Mantle. If you do not want to wait until Hunter Rank 49, there is an easy workaround. Just go to the quest board and search for an SOS flare, set it to high rank and specify Kirin as the target. You can then join someone else’s game.
Rainbow Pigment
Successfully complete “The White Winds of The New World” 9* quest to unlock the Rainbow Pigment.
Ryu costume
To unlock the Ryu costume in Monster Hunter: World, have a Street Fighter 5 save file. The Ryu costume is tied to the “Down the Dark, Muddy Path” arena challenge in the Gathering Hub and is only available if you have played Street Fighter 5. This challenge puts you against a giant Barroth and can be completed with another player. This quest rewards you with SF5 tickets. You need seven tickets to unlock the Ryu costume.
After you have obtained seven SF5 tickets, go to Smithy’s to unlock the Ryu costume. Additionally, you can still get the Ryu costume if you have not played Street Fighter 5 by joining into sessions that are focused on arena challenges. Go to a quest board and select “Search for an Online Session”. Set the Quest preference to “Event Quests” to be paired with players that have the same goal.
Easy powerful end-game armor
Successfully complete the “A Colossal Task” assignment to reach Hunter Rank 11 and unlock the High Rank quests, putting you into the end-game. You can now farm Zorah Magdaros for powerful armor. Every Zorah Magdaros quest will drop monster materials, but the final “A Colossal Task” assignment provides the most. The “A Colossal Task” quest will randomly appear on your quest board. There is a chance it will appear at any time after returning from a quest and resetting the board, but it is quite rare. However, SOS Flares allow you to get around this limitation. Use the online SOS system to quickly and easily farm this mission. Additionally, use a daily voucher to increase your rare loot drops. You can earn double the materials if you are lucky. Use the following steps to easily farm powerful end-game armor:
1. Join/start an online session.
2. Go to the “Quest Counter” and “Join a Quest”.
3. Select “Respond to SOS” and set the target to Zorah Magdaros.
4. Search and make sure “Quest Type” is “No Preference”.
5. Go to the “Optional” tab, and you should get “Left Quite the Impression”. This is the optional quest that will randomly appear on your board. It is identical to the final battle against Zorah Magdaros.
6. During the quest, farm as many mining outcrops as possible to get Dragonite Ore and Zorah Carapace. The outcrops will repopulate after a few minutes.
7. When attacking the cores, check for monster materials that drop. Also, watch the falling rocks, as they can also drop monster material.
8. To damage Zorah quicker, use the slinger and launch rocks at the trapped stalactites. They will explode and damage Zorah. When the large monster appears, damage Zorah enough to cause it to retreat so you do not have to waste time fighting it.
9. During the third phase, aim for the face to smash his rocky jaw region. Once it cracks, you will get bonus rare materials. Remember that you can load a cannon with up to five shots; you do not need to reload after every shot.
Easy money
Progress in the story until you unlock the “Prickly Predicament” three star optinal quest. Talk to the Chief Botanist in the Botanical Research section to get the quest. Complete it by collecting 20 Cactuses, then return to him to unlock the ability to cultivate and grow Might Seeds. The Might Seeds are extremely valuable and can be sold for 140 zenny. Simply place a might seed in the cultivation slot and let it multiply while you are out doing quests. After you return from quests, grab the might seeds and sell them at the shop. To speed the farming process up, unlock the second cultivating slot to grow twice as much. To unlock the second cultivating slot, complete the “Persistent Pests” four star optional quest.
Wear the Bandit Mantle for monsters to drop rare trade-in items when attacked. To get the Bandit Mantle, complete the “Redefining The Power Couple” five star quest. Trade-in items are essentially junk items that are only useful for selling. They cannot be used to craft or upgrade — so you do not have to worry about selling useful monster parts. To activate the Bandit Mantle, string attacks until the mantle begins to glow. Once activated, the effect will last a set amount of time, causing items to drop from the monster.
Whenever you are doing quests, you can earn trade-in items with it. The higher level the monster, the more valuable the trade-in items. Everyone in your team can also use the Bandit Mantle, multiplying your earnings. Go back and fight weak monsters from earlier quests using your high-level gear, and you can get 10,000+ zenny in a few minutes. If all allies are wearing Bandit Mantles, you can get more than 30,000+ zenny in a few minutes.
Easy monster materials
To get more monster materials, there are four basic tips to follow. The first two tips are easy to do from the beginning of the game, but you will need specialized equipment for the last two that will not be available until later in the game. The four tips are as follows:
- Select investigations with gold rewards.
- Use daily reward vouchers on investigations to double your rewards.
- Use the Bandit Mantle to get rare materials while attacking monsters.
- Use the Plunder Blade to get even more rare materials.
Investigations have randomized reward tiers —- you can view the reward boxes on each investigation. Some investigations have one gold reward, and two silver rewards; or two bronze rewards and one gold reward. You always want to do the ones with gold rewards. The quests usually are not any harder, and often involve captures.
Check in every day to collect a voucher. When you login, collect your daily rewards. This will always include a voucher. Vouchers are very useful, as they can double your quest rewards, or increase your chances of getting rare drops. Do not waste vouchers on investigations with only bronze or silver rewards.
Get the Bandit Mantle as soon as possible. When this special mantle is equipped, it causes monsters to drop rare items when you attack them. The effect does not stack, but it can be shared —- so your whole team gets the benefits of the Bandit Mantle while it is active. To get it, complete the “Redefining The Power Couple” optional Level 5 quest.
Get the Plunderblade. This is a special equipment item for your Palico that steals items from monsters when your Palico attacks. Shiny materials will drop from monsters more often, and you will get more rewards at the end of a hunt. The Plunderblade becomes more effective at dropping monster materials as you level up your Palico’s proficiency. To get the Plunderblade, successfully complete the “Into the Bowels of The Vale” quest in Rotten Vale. Take a piece of raw meat to the lower areas of Rotten Vale. Search for a Legiana corpse (Area 6/9). Track Odogaron and follow it to the Legiana corpse. It will ignore you and go for the corpse. Go to Area 13 (Odogaron’s Den) and wait for Odogaron to leave the area. Use Dung Bombs to chase it away if it does not leave.
When you arrive, there will be a Grimalkyne Plunder waiting near the Legiana corpse. Approach the Grimalkyne, and it will retreat. Track him to Area 15. After finding him in Area 15, he will retreat again. To draw him out, drop a raw meat on the ground. When the Grimalkyne appears, approach it to view a cutscene. You will now be friends with the Grimalkyne, and it will give you the Plunderblade.
With the Bandit Mantle and Plunderblade, you will be able to earn lots of extra rewards while simply completing random investigations and other quests. That is useful for getting parts you need to upgrade weapons and build armor, and you can sell what you do not want for extra zenny.
Easy resources
You can farm resources by looting flowerbeds, cactuses, mining outcrops, bonepiles, etc. Every time you gather resources from one of these areas, you will get a random drop. Certain items have increased rarity, and gathering nodes usually can be looted three times. To improve your resource gathering potential, put together the following special armor set, which has unique skills that will greatly improve your resource gathering potential:
- Shamos Goggles (Alpha)
- Rathian Mail (Alpha)
- King Beetle Brachia (Beta)
- Hunter’s Coil (Beta)
- King Beetle Crura (Beta)
To unlock the King Beetle armor set, collect a Great Hornfly. It can be obtained by talking to the Botanical Research Center NPC and boosting honey/bug cultivation.
This special armor set has five decorations: two Geology Jewel 1 and three Specimen Jewel 1. The Geology Jewels are the most important and upgrading them is the most important factor. Each Geology Jewel allows you to gather extra items from bonepiles, gathering points, and mining outcrops. Combine all the armor to get the following skills: Botanist Lvl. 4, Geologist Lvl. 3, Entomologist Lvl. 3, Master Fisher Lvl. 1, Master Gatherer Lvl. 1, and Forager’s Luck Lvl. 1. There are lots of other skills, but these are the most important skills. With this armor equipped, you will get more herbs/seeds/mushrooms per loot, increase the number of times you can use a gather node, make it easier to catch fish, make gathering nodes faster, and increase your chance of getting rare gathering resources.
Easy Tier 3 sniping decorations
This following melding exploit allows you to get the best sniping decorations every time you meld. The melding process at the elder melder is basically random. You give him decorations you do not want, and you get a random decoration in return. Tier 3 decorations are the most valuable and rarest to receive — so it can take a long time until you get the one you really want. To get any decoration you want from the melder, first save your game to the cloud storage before you meld and restart the game. This allows you to keep your current progress and you will not lose any items you are about to meld. Then, return to the elder melder and meld strange streams in the First Wyverian Ritual.
Meld sets of three as many times as desired and write down what you got out of each roll in slot 1-3. Once you melded a couple of times and found decorations you want, load your previous save game from the cloud storage and restart the game again. The rolls will have the exact same result as before — so you now know what each slot will give you. If you found something you like in roll 2 for example, start a quest and complete it. This will skip one roll and you can now meld the item you want.
Easy Armor Spheres
Armor Spheres are increasingly important near the end of the game. Armor Sphere allow you to upgrade your body armor parts, and you need a lot of them if you want to max out your complete set. However, if you stock up on spheres early in the game, you can have a good amount to upgrade your favorite armor set towards the end. Use the following method to get lots of Armor Spheres. Go to the Resource Center in Astera and register bounties. These range from collecting plants to slaying monsters. The easiest way by far is to collect items like flora, honey, mushrooms, bonepiles, or mining ore. All these items can easily be tracked on the world map and completed while you are doing quests. To complete them, return to the Resource Center in Astera and turn them in for one armor sphere each. If you make it a habit to do bounties before activities and turning them in after, you can get 4+ spheres after every 1-2 quest.
Easy Dragonite Ore
Dragonite Ore is a rare material that can be collected from Mining Outcrops. Mining Outcrops are large black/blue crystals that stick out of the ground. These resource points can be mined multiple times, and you get random drops from Mining Outcrops each time you use them. Mining Outcrops can only be mined approximately three times before you need to wait for them to reset. Use the following steps to easily farm Dragonite Ore:
1. Dragonite Ore spawns in the Coral Highlands. Coral Highland ore deposits also spawn Machalite, Aquacore, Coral Cryastis, and other ore types.
2. Go to the second/upper level of Area 9, on the northeast ledge above the road that connects to Area 5, to find a Mining Outcrop.
3. A second Mining Outcrop is located in Area 8, on the north path that connects to Area 10.
4. After mining these outcrops, wait a few minutes for the materials to respawn and reset, then continue mining.
5. Run between both areas to collect Dragonite Ore. After finding the Mining Outcrops for the first time, they will permanently appear on your map.
You can farm these locations while going on a free-roam expedition. Without a time limit, it is easy to run between these two resource points, collecting lots of ore. Complete bounties between Mining Outcrops to make the most of your time while you wait for the ore to reset. That makes earning lots of ore easy.
Easy Thunderbugs
Thunderbugs are an important item. Combine Thunderbugs with Trap Tools to craft Shock Traps to capture big monsters. To craft one Shock Trap, you need one Thunderbug and one Trap Tool. Trap Tools can be purchased at the vendor, but Thunderbugs are harder to obtain. They are displayed on the map if you found some, but at first you need to find a location to collect them. The Ancient Forest has an area in the trees where you can find three Thunderbugs next to each other; it is up in the trees in Section 6. You can collect them each time you do a quest in the Ancient Forest, or when they respawn after a while.
Easy Golden Fish
Golden Fish are very valuable and can be sold for 1,000 zenny each. To farm Golden Fish, progress quite far in the story and reach Coral Highlands. In Zone 14 is a small pond that contains Golden Fish (1,000z) and Golden Fry (5,00z). If you are visiting this area for the first time, it can be a bit hard to find. The video shows a quick way to get there starting from the northeast camp. The actual items you will be selling later on are the Golden Scale and Gilded Scale that you get from farming these two fish types.
Capturing monsters
Big monsters can be captured with traps for special rewards. There are a few things to know to capture big monsters. The first thing is you need a Pitfall Trap or Shock Trap and a way to tranquilize the monster. This can be done with tranq bombs or tranq ammunition. Trap Tool can be bought at the provision’s vendor for 200z. The following are crafting recipes for these items:
If you go on a “Capture Investigation”, both the Trap and Tranq option will be in the starting box. When you are trying to capture/trap a monster, engage in the fight as usual and try to inflict as much damage as possible. The main goal is to weaken it, throw down a trap, and tranquilize it. Since the game does not have health bars, you need to pay close attention to the fight and look for signs of weakness on the monster. For example, if you see it starting to limp, you can immediately throw down a Shock or Pitfall Trap next to it. It is also possible to capture it while it is stunned and lying on the floor. Additionally, you can capture it while it is retreating back to its nest. Run past the monster and throw down a trap in the set path to the nest to capture it.
Legiana monster location
Legiana is a monster that can be found in Coral Highlands during the “Embodiment of Elegance” hunting quest. Before you can hunt Legiana, you have to first find him, which can be difficult. The Coral Highlands is probably the most difficult land to navigate in the game. It is filled with platforms and vertical gameplay that can make it easy to get lost. Travel north in Coral Highlands until you reach the wide-open area in Zone 8. Straight ahead (north) is a large wall you can climb. This is the place where you can expect to start seeing footprints and signs of Legiana. If you cannot see him in this area, follow the way and climb up towards Zone 13 to eventually encounter Legiana.
Odagaron monster location
Odagaron is a monster you can find in the Rotten Vale. When you look for it in the “Into The Bowels Of The Vale” story mission, you can find him in the lower level in Zone 14. Once you reach the area, you can find traces of Odagaron and a cutscene will be triggered. Then, track him down again and defeat him to complete the mission.
Getting Light Crystals
Light Crystals can be obtained in a few different ways. You can get them from nearly any blue mining node. When you reach the red mining nodes, they go to a different crystal. They are very rare, and you have a chance of getting them from any blue mining node. When you are about to get one, you character will do an animation after mining to show they are excited. It will appear and they will hold the Light Crystal up briefly. Another way to get them is to purchase them from the Melding Pot in town. You need Silver Wyverian Prints to get them from the Melding Pot, but they are also a guaranteed way to get them. Your Safari Cats and the Ship can also bring them back, but this is very rare.
Unlocking Ropelift
To unlock the “Ropelift” fast transportation tool, you need to reach Coral Highlands and visit the Research Center. Check in with the Airship Engineer on the top floor. He will give you a delivery request for five Shamon Hides and one Sturdy Bone. You will also have to give 1,000 research points. Both of these delivery items can be found in the Coral Highland, and you can quickly get the Ropelift transportation. For the Shamon Hides, check the moving enemy dots on the map and hunt five Shamons. Sturdy Bones can be found in different bone piles around the Coral Highlands. Once you have all materials and research points, go to Astera and complete the delivery quest at the resource center to unlock the Ropelift station in Coral Highlands. They make it a lot easier to travel around and move up and down the levels.
Unlocking extra meal recipes
Whether you are at the Canteen in home base or are sitting by your camp in the field, both kitchens are identical. Every meal has set specific ingredient types with a small chance of success for the following buffs. You can greatly increase the chances of obtaining these buffs by using fresh ingredients. You can further increase the potency of the buffs through procuring new ingredient options. Whenever you are at home base, go to the kitchen. The chef often has an “!” over his head, indicating he has something important to say. Usually, he will give you optional quests such as The Pain from Gains and Exterminator of The Waste. The Meowscular Chef can only be found at the main kitchen — so make sure you check from time to time. Get the quests and complete them to get new meal recipes.
Changing appearance
You can change appearance attributes (hairstyle, facial hair, make-up, and clothing) in your room in Astera. Go to the box in your room and select “Change Appearance” at the bottom.
Changing armor color
Progress through most of the main story. Once you can start doing Rank 6 and High Ranked hunts, you will be able to access High Ranked gear. This gear can have its color changed. If it is not High Ranked gear, you cannot change the color of it. Once you get some High Ranked armor, go the red chest in your house, and select the option to change appearance. Select “Change Armor Pigment” to change the armor color. Certain armors have more customization options than others. This is also free to do as many times as desired, but it has to be High Rank armor.
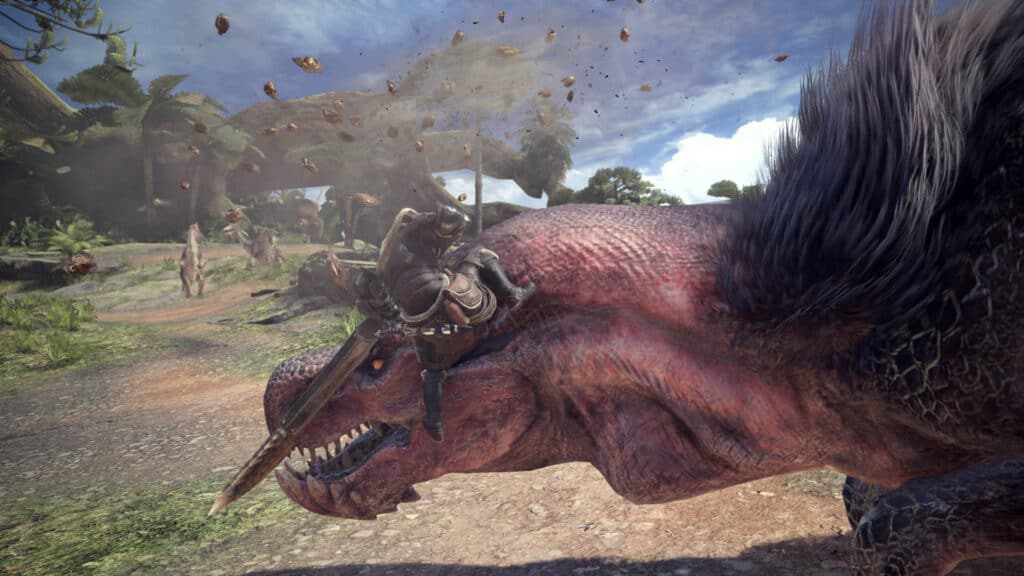
Mounting and riding monsters
To ride monsters in the game, you first need high ground. Find a rock or some other elevated platform and wait until the monster is near you. Then, sprint and jump onto the monster and perform a mid-air attack. If timed correctly, you will automatically mount and ride the monster. Next, perform the on-screen commands to damage the monster. You can also mount monsters from the ground by performing a jump attack. This is a bit more difficult because you have to jump onto the monster from the correct spot and land the jump attack from the back. Once you are riding the monster, you basically have a free damage phase where the monster cannot harm you.
Finding Poogie
You can find Poogie in Astera on the main floor in the hub area. Go up and interact with him. An exclamation point will appear at the exact time you have to pet him. If you miss this trigger, Poogie will push you away and you have to try again. If timed correctly, hearts will appear above his head and you can name him, dress him, and carry him around the map. It is believed that hugging Poogie gives good luck when crafting rare items at the blacksmith.
Secret Poogie costumes
Once Poogie is your friend, take him to the following spots in Astera to find bonus costumes. Note: You can only find one costume per visit to Astera. Complete a quest or leave, then return to get another one. Additionally, all these Poogie costumes can be customized with different colors.
Apprentice Fiver: Place Poogie near the Huntsman/White Flag near the Commander’s large table.
Emperor’s New Duds: Go through the backdoor of the Blacksmith shop, up the stairs, and place Poogie on the wooden platform hanging off the ledge at the top.
Hog In A Frog: Go to the Botany area and place Poogie near the Scoutfly Lamp on the wooden plank in the center.
White Jammies: Go to the Smart Biologist NPC, left of the Botany area. Place Poogie near the large stone fossil in the back corner.
Pet animals
You can catch wild animals and keep them as pets in your room in Astena. Early in the game, you will get a standard hunting net that allows you to catch animals with a net trap nearby. This can only be used on non-lethal small animals. Once you catch some animals, go back to your room in Astera and talk to your housekeeper. You can choose from all your pet animals and select one that will run, crawl, or fly around your room.
Armor strengths and weaknesses
The following is a list of the strengths and weaknesses for armor:
Ingot: Strong against Thunder / Weak against Fire, Ice
Death Stench: Strong against Fire, Water, Ice / Weak against Thunder, Dragon
Brigade: Strong against Fire, Thunder, Dragon
Legiana: Strong against Water, Ice / Weak against Fire, Thunder
Odogaron: Strong against Fire, Water / Weak against Thunder, Ice
Rathalos: Strong against Fire, Water, Ice / Weak against Thunder, Dragon
Leather: Strong against Fire
Chainmail: Strong against Water
Bone: Strong against Fire, Thunder and Dragon
Vespoid: Strong against Dragon
Kestodon – Strong against Fire
Gajau: Strong against Water
Jagras: Strong against Water and Dragon / Weak against Fire, Thunder and Ice
Kulu: Strong against Ice / Weak against Water
Alloy: Strong against Water and Dragon / Weak against Fire, Thunder and Ice
Tzitzi: Weak against Thunder, Ice (but a good base defense stat)
Lumu: Strong against Water, Ice / Weak against Fire
Girros: Strong against Thunder, Dragon / Weak against Water
Baan: Strong against Water / Weak against Ice, Dragon
Pukei: Strong against Water and Dragon / Weak against Thunder
Hunter’s: Strong against Fire and Water
Barroth: Strong against Thunder / Weak against Fire, Water and Ice
Jyura: Strong against Water / Weak against Fire and Thunder
Kadachi: Strong against Thunder / Weak against Water
High Metal: Strong against Ice / Weak against Water, Thunder
Butterfly: Strong against Thunder, Dragon / Weak against Fire, Water
Shamos: Strong against Fire, Water / Weak against Ice
Hornetaur: Strong against Dragon / Weak against Fire, Water
Anja: Strong against Fire / Weak against Water, Thunder, Ice
Rathian: Strong against Fire / Weak against Thunder, Dragon
Diablos: Strong against Fire, Dragon / Weak against Water, Ice
Kirin: Strong against Thunder, Dragon / Weak against Fire, Water, Ice
Armor skills
The following is a list of the effects of the skills attached to armor:
Adrenaline: Reduces Stamina Depletion at low health
Affinity Sliding: Sliding increases affinity for a while
Aquatic Expert: Improves mobility in water
Artillery: Increase damage from explosives
Attack Boost: Attack power and affinity increase at Level 7
BBQ Master: Increases cooking skill
Botanist: You can gather more herbs
Cliffhanger: Stamina decreases slowly when climbing
Constitution: Less stamina lost when running and evading
Critical Eye: Boosts affinity (7 levels)
Defence Boost: Defence increases (7 levels)
Earplugs: Roars have less effect on you
Entomologist: You will destroy less small insect bodies
Evade Extender: Evade distance increases
Evade Window: Invulnerability period increases when evading
Fire Attack: Increases fire element attack damage
Fire Resistance: Resistance to fire increases
Focus: Weapons will charge faster
Fortify: Increases your defence and your attack gradually
Guard: Guarding reduces less stamina and has less knockbacks
Health Boost: You have more health
Heavy Artillery: Heavy weapons do more damage
Honey Hunter: Amount of honey you gather will increase
Hunger Resistance: Gradually decreases stamina loss
Ice Attack: Ice element attacks do more damage
Ice Resistance: Increases resistance to ice
Intimidator: More small monsters will avoid you
Item Prolonger: Some item effects last longer
Jump Master: Attacks will not knock you back when jumping
Marathon Runner: Stamina depletes slowly during certain actions
Master Gatherer: Gathering materials is faster
Master Mounter: Mounting monsters is easier
Muck Resistance: You can move more freely in muck
Palico Rally: Powers up palicos
Paralysis Resistance: Paralysis lasts for a less amount of time
Paraylsis Attack: Paralysis lasts longer on opponents
Poison Attack: Poison builds up faster in opponents
Poison Resistance: Poison is less effective
Pro Transporter: Speed when carrying items is faster
Quick Sheath: Sheathing is quicker
Recovery Speed: Temporary damage heals faster
Recovery Up: You can recover more health
Scoutfly Range Up: Scoutflies have more range
Slinger Capacity: Loading capacity for slinger increases
Slugger: Monsters dizzy up much easier
Special Ammo Boost: Special ammo does more damage
Speed Crawler: Crouched movement is faster
Speed Eating: Consuming items is faster
Speed Sharpening: Whetstone can be used quicker
Sporepuff Expert: Sporepuffs recover health
Stamina Surge: Stamina recovers faster
Stamina Thief: Certain attacks can dizzy monsters
Stealth: Easier to evade monsters
Stun Resistance: Stuns last for a shorter time
Thunder Attack: Increases thunder element attack damage
Thunder Resistance: Counters thunder element
Water Attack: Water element does more damage
Water Resistance: Less damage taken from water element
Wide Range: Some items will also buff nearby teammates
Windproof: Wind protection is enabled.
All weapons and weapon upgrades showcase
This video showcases all weapons and their upgrades in Monster Hunter: World. There are 421 unique weapon designs. There are 14 different weapons, and each has a few upgrade trees with one to two weapon designs per tree. It comes out to roughly 30 design variants per weapon. This video shows them in the same order as the in-game list (timeline below). Weapon upgrades can be crafted at the Smithy in Astera. All you need are monster materials, which are acquired by defeating large monsters. Each monster unlocks new weapon upgrade trees.
All armor sets showcase
This video showcases all 132 Monster Hunter: World armor sets and Palico armors in their Alpha and Beta forms (including Death Stench, Origin, Brigade, Butterfly, and Horizon: Zero Dawn Palico). These are all the sets in the Day One version without DLC (only the first set of Horizon: Zero Dawn gear is released thus far). More armor sets will release in the future. Note: All armor sets have an Alpha and Beta version in High Rank, and they look slightly different or have a different color. Each of the timelinks below count for two sets (Alpha and Beta upgrade).
Easy “A Living Fossil” trophy
To get the “A Living Fossil” trophy, you must capture a “Petricanths”. It is a rare glowing fish. You must use the fishing rod to catch it. It can spawn in the bright blue waters on Rotten Vale map. It can spawn during daytime and on any rank/difficulty. It is an extremely rare spawn and will not show up on each visit. It is recommended to fast travel to the Ancient Forest map and return if it does not spawn. It works well to fast travel to the Ancient Forest since the creature needed for trophy “Snuggles for All” spawns there — so you can try your luck with different trophy at the same time.
Additionally, the creature needed for “Bristles for All” trophy spawns in the same location as the Petricanths fish. That other creature will spawn on the back of the nearby mosswine. So go to the mosswine first before it walks away, and then check for the Petricanths fish. If it is not there, fast travel to the Ancient Forest to look for the third creature and come back. It can take hours of fast traveling to find the fish. Note: Fast traveling back to camp does not make fishes/animals respawn. You must travel to a completely different map to reset everything.
Easy “Angling for A Bite” trophy
You will automatically have a fishing rod in your inventory after you complete the prologue (when you reach Astera for the first time and get your weapons). Go on an expedition (for example, in the Ancient Forest), and find a small lake or go to the ocean. Select the fishing rod and aim it at the water. As soon as a fish bites (food starts moving), immediately reel in the fish. An easy fishing spot is on the Ancient Forest map, Southwest Camp (1). Just a little east of the camp you can see a pool of water on the map.
Easy “Bristles for All” trophy
To get the “Bristles for All” trophy, you must catch the Bristly Crake, which is a tiny black bird. It rides on the back of Mosswines in Rotten Vale only. It can spawn at any time of day and on any rank. It can take hours to find the bird, as it is ultra rare. There are two locations you can check in one visit. See the exact locations and what the creature looks like in the video below. Check them both in one visit and if the creature is not in either spot, fast travel to another map (such as Astera or Wildspire Waste) and return. You have to travel to another map for it to reset. Fast traveling between camps in Rotten Vale will not reset it.
Note: Leave your Palico behind (talk to your cat at camp and tell it to stay) and equip the Ghillie Mantle. This way you will not scare off the rare bird. If your Palico is with you, it could scare the bird. The Ghillie Mantle renders you invisible to animals so they will not even know you are there. Get close and use the capture net to capture it.
Easy “Mmm, So Tasty!” trophy
To get the “Mmm, So Tasty!” trophy, you need to use the BBQ Spit while on a quest or during an expedition. It is a fixed item in your inventory that you will always have from the start of the game. You also need some raw meat to cook, which you can get from slaying small monsters and looting them. Activate the BBQ Spit from the item wheel. Then, let the steak cook for 2.5 rotations (until the last second before it gets burned). It may take a few tries to get the timing down. If it turns black, you have let it cook for too long. If it is a rare steak, it did not cook for long enough. Keep trying until it is called a “Well-done Steak”.
Easy “Rainbow Bright” trophy
To get the “Rainbow Bright” trophy, you must capture a “Prism Hercudrome” with the capture net. This is a small bug sitting on some trees in the game. It only spawns at dusk and dawn. The sun icon in the top left corner will start blinking when the sun goes up or down. That is when this rare bug will spawn in specific locations. It is available on the low and high rank difficulty. The capture net is automatically in your inventory from the beginning of the game. Equip it and shoot it at the creature to capture it alive. You can then use it as a pet in your room in Astera.
Easy “Snuggles For All” trophy
To get the “Snuggles For All” trophy, you must catch the Downy Crake, which is a tiny white bird. It only spawns on the backs of Aptonoths in the Ancient Forest and on the backs of Apceros in Wildspire Desert (friendly dinosaur monsters). It can spawn at any time of day and on any rank. To catch it, you have to be wearing the Ghillie Mantle. Otherwise, the bird will fly away and you will not be able to catch it. The Ghillie Mantle is unlocked automatically during the story. ‘
You can equip it at the item box in Astera or at any camp. It is recommended that you fast travel between the Ancient Forest and Wildspire Desert. At the first camp of each area are the required monsters that can spawn the bird on their back. If it is not there, immediately fast travel to the other map and keep doing this over and over again. It can take hours to find the birds, as they are ultra rare (1% spawn chance at best). With the Ghillie Mantle, they cannot see you. Run up to the dinosaurs and use the capture net to catch one of the birds off the dinosaur’s back. You can also hear a chirping sound when the birds are nearby.
Trophies
Successfully complete one of the following tasks to get a trophy:
Conqueror of the New World (Platinum): Unlock all trophies for Monster Hunter: World.
Giant Crown Master (Gold): Obtain a giant crown for almost every monster in your hunting log.
Miniature Crown Master (Gold): Obtain a miniature crown for almost every monster in your hunting log.
Capture Pro (Silver): Capture 50 monsters.
Giant Crown Collector (Silver): Obtain a giant crown for 10 or more monsters in your hunting log.
Miniature Crown Collector (Silver): Obtain a miniature crown for 10 or more monsters in your hunting log.
Monster Hunter (Silver): Hunt 500 large monsters.
Monster Ph.D. (Silver): Research everything about almost every monster.
An Inquisitive Mind (Bronze): Complete your first investigation.
Angling for a Bite (Bronze): Catch your first fish.
Bosom Buddies (Bronze): Become fully proficient with any Palico Gadget.
Bourgeois Hunter (Bronze): Possess 1,000,000 zenny.
Capture Novice (Bronze): Capture your first monster.
Commissioned Work (Bronze): Obtain 100,000 research points.
Elderslayer (Bronze): Slay 50 elder dragons.
Established Hunter (Bronze): Reach hunter rank 100.
First Friends (Bronze): Befriend your first Tailraider.
Giant Crown (Bronze): Record your first giant crown in your hunting log.
HELP! (Bronze): Fire an SOS flare for the first time.
Hunters United (Bronze): Complete a quest via multiplayer.
Hunters United Forever (Bronze): Complete 100 quests via multiplayer.
I Am the Reinforcements (Bronze): Respond to an SOS flare and help complete 10 quests.
Impregnable Defense (Bronze): Obtain five highly rare pieces of armor.
Miniature Crown (Bronze): Record your first miniature crown in your hunting log.
Mmm, So Tasty! (Bronze): Cook your first well-done steak.
Monster Slayer (Bronze): Hunt 100 large monsters.
Movin’ On Up (Bronze): Move into an upgraded room.
New World Settler (Bronze): Establish five camps.
Nowhere to Go but Up (Bronze): Complete 50 arena quests.
Power is Everything (Bronze): Obtain five highly rare weapons.
Spreading the Word (Bronze): Collect over 50 Guild Cards.
Step into the Arena (Bronze): Complete your first arena quest.
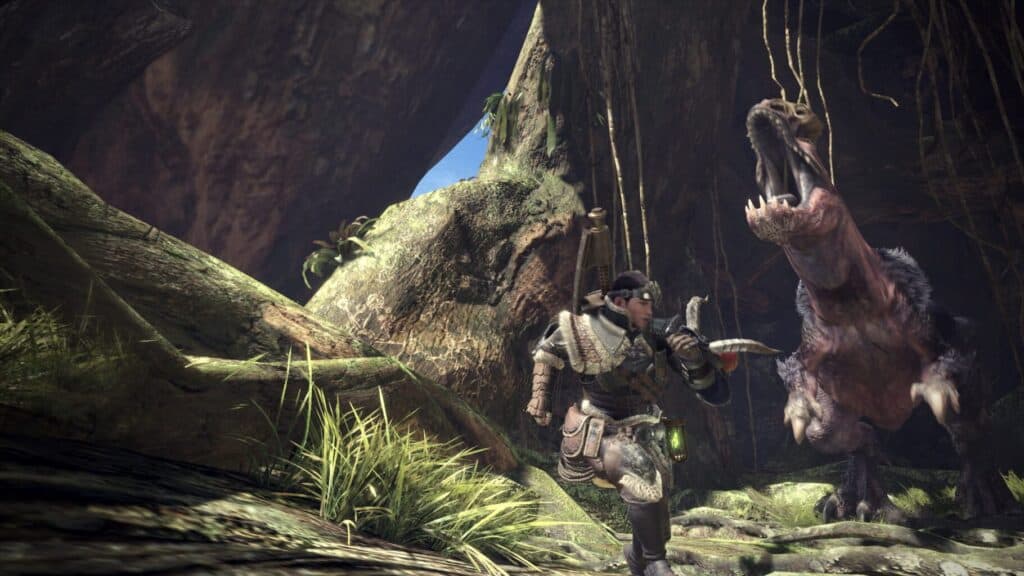
The Art of Camouflage (Bronze): Escape the Jagras pack by hiding in some shrubs.
The Bigger They Are… (Bronze): Mount your first monster.
The Franchise Hunter (Bronze): Complete 50 investigations.
The Hunter’s Life for Me (Bronze): Complete 50 optional quests.