
The first game in the Borderlands franchise was released on October 20, 2009. It focused on a group of Vault hunters traveling to the planet Pandora in search of riches and laid down the foundation of one of the biggest shooting franchises in modern gaming. In retrospect, the game is seen as one of the greatest video games ever made, with excellent sales and critical reception. Borderlands is a shooter that everyone should play, and it’s still tons of fun today.
©Gearbox
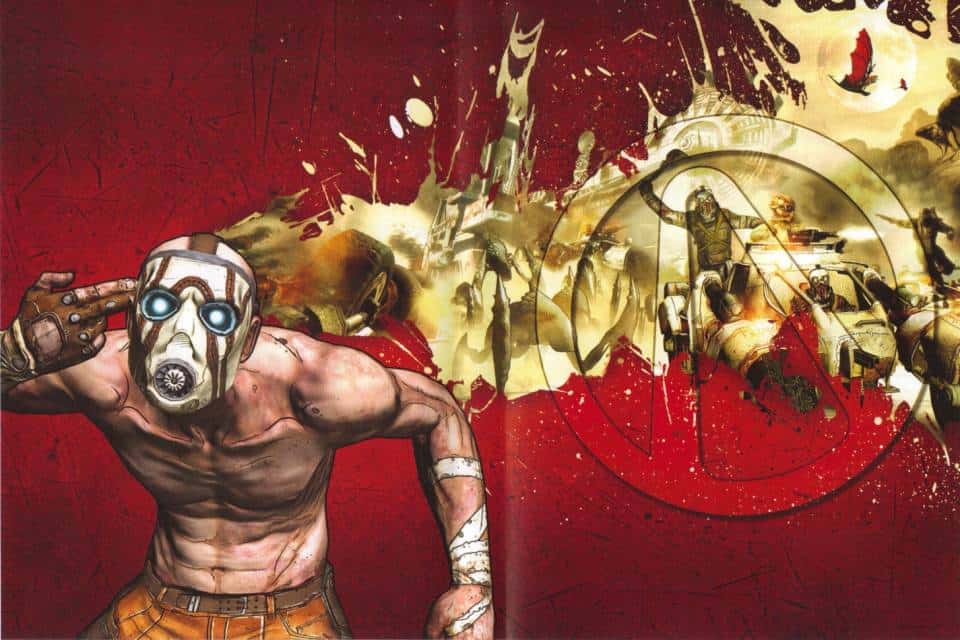
Borderlands Premise
While the game is primarily a first-person shooter, it does include elements from RPGs, such as character building. The gameplay revolves around taking missions from NPCs or Bounty boards and collecting weapons and experience to flesh out your character build. Borderlands can be enjoyed alone, but it’s even better with its great four-player co-op. For those who prefer competitive multiplayer, arenas can be found throughout the game’s world.

©Gearbox
Borderlands Main Characters
- Roland
- Mordecai
- Lilith
- Brick
Other Titles In The Series
- Borderlands (2009)
- Borderlands 2 (2012)
- Borderlands: The Pre-Sequel (2014)
- Borderlands 3 (2019)
- Tiny Tina’s Wonderlands (2022)
Borderlands Cheats
Cheat mode
Note: This procedure involves editing a game file; create a backup copy of the file before proceeding. Use a text editor to edit the “WillowGame.ini” file in the “My Documents\My Games\Borderlands\WillowGameConfig” directory. Change the indicated value in one of the following lines in that file to activate the corresponding cheat function:
| Result | WillowGame.ini Edit |
|---|---|
| Invincibility | Set “bDemiGodMode” to “true” |
| Increase weapon slot capacity | Set “WeaponReadyMax” from 2 to 4 |
| Increase maximum inventory | Set “InventorySlotMax_Misc” to a higher number |
| NPCs can damage each other | Set “bIgnoreNPCFriendlyFire” to “false” |
| Can damage own teammates | Set both entries of “bIgnoreFriendlyFire” to “false” |
| Bosses do not regain health after dying | Set “bBossesRegenHealthOnReset” to “true” |
| Resurrect all players when someone dies | Set “bResurrectAllPlayersWhenOneDies to “true” |
Unlockables
New Game+ mode
Successfully complete the game to unlock New Game+ mode. In your second playthrough, all enemies are more powerful.
Secrets
Duplicating items and weapons
Start a co-op game with at least one other player. Drop the item(s) and/or weapon(s) you want to duplicate. Then, leave the game through a non-saving method, such as force-closing the game. Since the game did not save after you dropped the item(s) and/or weapon(s), you will still have them, and the other player(s) who picked them up will also have them.
Easy loot and money
Every time you load a saved game, the chests and lootable objects restock. Save the game near a place where there are multiple weapon chests, such as in the town of New Haven. Collect all the loot in them, then save the game. Reload the saved game, and collect all the loot again. Keep the loot you want, and sell the loot you do not want. Repeat this as many times as desired. Note: You get more money and better loot when there is more than one player. This is best done with four players.
Easy rare weapons
Save the game near a location with multiple weapon chests, such as in the town of New Haven. Then, host a game, and have three other players join. Collect all the weapons in the chests, then exit out of the game, and host a new game at the same spot. Repeat this process as many times as desired. You should get quite a few rare weapons using this method.
Easy experience and weapon proficiency
Use the following trick to get easy experience and weapon proficiencies, as well as good weapons and money by selling loot from all the dead enemies. Once you reach “The Middle Of Nowhere” area, you will eventually get the “Circle Of Slaughter” quest. When do you do the quest, enter the arena, and kill all but one enemy (preferably a little one). Do not kill all enemies, or the quest will end. Also, do not die, or you will potentially lose a lot of money. After killing all but one enemy and collecting all items desired, exit out, and the game will save automatically. Reload your saved game, sell all desired items through one of the nearby machines, and repeat the quest as many times as desired. Note: There are three rounds; the last one is called” Final Round”. Do not finish it if you want to repeat this trick.
Easy experience
Note: This trick requires at least one player with a high level (preferably between 40-50). Have the high-level player(s) join your game and travel to places with high-level enemies. Stay back, and have the high-level player(s) kill the high-level enemies to quickly increase your experience because the game has experience sharing. This is also a good way to get high-level weapons and items.
Successfully complete the game, and try to be around level 40 with your character. Then, start a split-screen game with your high-level character and a new character that you want to level up quickly. Find a location with a lot of enemies that are easy to kill (for example, the Lost Cave with the crabs and leveled-up Skags). Make sure your high-level character was saved in the area you wish to go, and load him or her as the host with the other character as the second player. Leave the low-level character by the New-U Station, and use your high-level character to kill all the enemies. Your new character will gain levels almost instantly. This will begin to slow down around level 28, but you will still be able to get them to around level 35 relatively quickly. You will now be able to begin a new game with your new character at a very high level and play through the game easily while collecting more and better loot. This is a great way to play with the other three characters and start at a high level.
Hidden house with Rider gun in New Haven
When you get the “Another Piece Of The Puzzle” quest (do not complete), you can go to a secret house in New Haven. When you enter the house, you take a lift down to the bottom. There is one regular weapon chest and a red weapon chest. The red weapon chest always contains the “Rider” gun, which is a reference to the Red Ryder BB gun from the classic movie A Christmas Story. Its stats usually vary slightly each time you get one. The weapon can only be found in this house. The weapon’s manufacturer is “Gearbox” (the game’s developer), as opposed to an in-game company such as Dahl, Hyperion, etc. Note: When this location is used with the others in New Haven for the “Easy loot and money” trick, you can get a lot of loot and money quickly.
Weapon chest locations in New Haven
Hidden rare weapon chest in Rust Commons West
Go to the far northwest corner (on the map) in Rust Commons West. Find the rock wall with the gun tower on top of it. Stand near the left side of the gun tower. Then, crouch and stay against the rock wall as you move down the rocks. The warning sign may appear. Ignore it, and try to move as quickly as possible. The chest is basically in front of the gun tower, under a large rock overhang. The weapons chest has a high chance of spawning rare weapons. Note: It may require a few attempts to reach the chest. Once you get the weapons, you either must kill yourself or exit the game because there is no way to leave this area safely.
Secret “Fish” easter egg in Treacher’s Landing
Go to the secret dock (farthest south point of the starting position) in Treacher’s Landing. Shoot the yellow barrel to the right of the dock. Then, shoot the green barrel in the distant trash pile to the east of the boat. Shoot one of the blue barrels on the boat. Finally, shoot the red barrel in the water to the left of the boat.
“Bandit Treasure” quest
Fast travel to Old Haven, then follow the left wall to find a pile of dead bandits. Look for the glowing bandit or glowing key nearby to unlock the “Bandit Treasure” quest.
“Green Thumb” quest
Fast travel to “The Middle Of Nowhere” Bounty Board. Get a car from Scooter’s, and drive to the right. Look for the small shack with big plants around it. Talk to the man leaning against the shack to unlock the “Green Thumb” quest.
Extra SDU Backpacks
Sometimes during your second playthrough and beyond, you will get an extra SDU Backpack after repairing a Claptrap, even after you have reached the 42 maximum allowed slots in your inventory, which is not supposed to happen and is a known glitch in the game. Thus, before you turn in a repair kit to rescue a Claptrap, exit the game to save. Then, turn the repair kit in to the Claptrap. If you do not get an SDU Backpack, leave the game through a non-saving method, such as force-closing the game. Then, try again until you get an SDU Backpack.
Extra item space
Create a second character for use in Co-op mode. When you want to store an item, start a Co-op game with your main character and secondary character. Transfer the items you want to store to the secondary character until you need them, then transfer them back.
Critical hits
It is important to try to get critical hits on enemies so you kill them quicker and get additional XP. To get a critical hit on a human, shoot it in the head. If you use a sniper rifle, it will usually kill them instantly. For a Skag, shoot it in the face when its mouth is open. This varies depending on the type. For the pups, shoot them while they roar at you. For adults, quickly shoot them while they jump at you. For the spitters, shoot their mouths while they fire their poison projectile at you. Critical hits are easiest at close range with a shotgun or scattergun.
Quick reloads
While reloading, press [Melee] as soon as the cartridge is removed or new rounds are being inserted, and the gun will reload instantly.
Defeating The Destroyer (final Boss)
Make sure you have a good shotgun with full ammunition. Destroy the purple tentacles first by shooting the spheres to prevent it from shooting missiles. Then, jump behind the red tentacles at the very back of the map. You will be next to a wall and two of the large tentacles. You can do this on either side. The eye that shoots the beam will not be able to hit or damage you. The only time you may get hit is if the purple tentacles with the spheres reappear, or it does the “energy wave” attack. While behind The Destroyer, shoot at the red tentacles. You should be able to kill The Destroyer in less than two minutes using this method.
Claptrap locations
The ten Claptraps can be found at the following locations. When you repair a Claptrap, it will reward you with an SDU Backpack, which adds three extra slots to your inventory.
Crazy Earl’s Scrapyard
When you enter the area, go left at the “T” intersection. Fight your way through bandits, and you will find him in one of the camps. To get the repair kit, just jump on the washing machine to get onto the platform. Kill the bandits, and grab the kit.
Crimson Fastness
You should just run into this Claptrap. He will be next to some other dead Claptraps.
Krom’s Canyon
When you enter the area, go right. The Claptrap is (from the perspective of only using the right side of the map) at the northwestern part of that canyon.
New Haven
The Claptrap is in the town right next to the bounty board.
Old Haven
The Claptrap does not spawn until you have completed the quest to save the Claptrap from the cage. Once you have completed that quest, enter the area, and take the first right. Follow that street, as if you were heading towards the base of troopers that have the two turrets. He will be in a house on your left, before you turn the corner to head towards that base. His kit is on the rooftops.
Sledges Safehouse
The Claptrap is in the north-west part of the map, near some rubble, and close to a stairwell; listen for the Claptrap’s moaning. His repair kit is above you when you are standing on the waypoint.
Tetanus Warrens
The Claptrap is north of where you start, before you get to the fork in the road, on the left side. The repair kit is further north, staying left, above some metal structures in the first corner, farthest north west.
The Lost Cave
The Claptrap is near the point where there is a “T” intersection and a bandit outpost area. When you are looking at the outpost as you enter, the left path leads to a dead end, and the right path leads to the spiral area. The repair kit is up the hill (following the rail tracks up and around) and just behind the second or third building in some pipes.
The Salt Flats
When you enter the area, go towards the huge piece of saw machinery. Once you enter that area (from the right side), take your first right, and you should see the Claptrap.
Trash Coast
When you enter the area, turn right and look at your map. You will see a fork in the road, go left, then make your first right. The Claptrap is in the middle of a bandit encampment right next to where a bunch of lava crab worms are. If you find the shack on the ocean, it is straight west of that and a little south. It is almost right in the middle of the southern portion of the map. The repair kit is on top of the pipe where the diamond leads. Follow it back to the trash pile, and climb onto the pipe to get it.
Legendary weapons
The following special, rare weapons can be found throughout the game:
Atlas
| Code & Name | Weapon Type | Notes |
|---|---|---|
| BLR Wicked Troll | Pistol | Regenerates health |
| AX Savage Chimera | Revolver | Fires random elements; 3 × Fire/Corrosive/Explosive/Shock |
| SG1100 Genocide Hydra | Shotgun | High damage; special spread |
| SG340 Genocide Hydra | Shotgun | High damage; special spread |
| CVL25 Fearsome Cyclops | Sniper rifle | High damage; explosive attack; 3 × Explosive |
Dahl
| Code & Name | Weapon Type | Notes |
|---|---|---|
| RF5D Wicked Hornet | Pistol | 2-shot corrosive burst; 2 × Corrosive |
| AX220 U Savage Anaconda | Revolver | Very high damage & accuracy |
| BA 100 War Bulldog | Shotgun | Large magazine; fast reload |
| CR38 Scoped Raven | Assault rifle | Large mag; 5-shot burst |
| CR780 U Genocide Raven | Assault rifle | Large mag; 5-shot burst; 2 × Shock |
| TEK540D Malevolent Wildcat | Assault rifle | Large magazine |
| LBD Fearsome Penetrator | Sniper rifle | Large magazine; high RoF; 2 × Fire |
Hyperion
| Code & Name | Weapon Type | Notes |
|---|---|---|
| RF5.W Wicked Invader | Pistol | Large scope; continuous burst while zoomed |
| TMP2 Vile Reaper | Pistol | Massive melee bonus; steals life |
| BA 630.W Fatal Butcher | Shotgun | 5-shot burst |
| ZX330.W Fatal Butcher | Shotgun | 5-shot burst |
| AR300.W Genocide Destroyer | Assault rifle | Continuous burst while zoomed |
| CR320 Genocide Destroyer | Assault rifle | Continuous burst while zoomed; 3 × Shock |
| RF200.G Malevolent Bitch | SMG | Large critical bonus |
| PPZ1270.G Fearsome Executioner | Sniper rifle | Large mag; 5-shot burst while zoomed |
| LB1170.G Fearsome Executioner | Sniper rifle | Large mag; 5-shot burst zoomed; 3 × Fire |
| RPG720.W Colossal Nidhogg | Rocket launcher | Fast reload; rains additional rockets |
Jakobs
| Code & Name | Weapon Type | Notes |
|---|---|---|
| RV21 XX Savage Unforgiven | Revolver | Huge crit; slow fire |
| KLR330 ZZ Savage Unforgiven | Revolver | Huge crit; slow fire |
| SG1 XX Genocide Striker | Shotgun | Tight spread; huge crit |
| VRR29 ZZ Fearsome Skullmasher | Sniper rifle | Multiple projectiles |
| GGN20 Long Skullmasher | Sniper rifle | Multiple projectiles |
Maliwan
| Code & Name | Weapon Type | Notes |
|---|---|---|
| HRD C Wicked Firehawk | Pistol | Powerful incendiary; 4 × Fire |
| TK4 Wicked Firehawk | Pistol | Powerful incendiary; 4 × Fire |
| KLR300 B Pestilent Defiler | Pistol | Powerful corrosive; 4 × Corrosive |
| MAL300 C Pestilent Defiler | Revolver | Powerful corrosive; 4 × Corrosive |
| SPR630 B Fatal Plague | Shotgun | Powerful corrosive; 4 × Corrosive |
| TD3 B Combustion Hellfire | SMG | Powerful incendiary; 4 × Fire |
| DVL350 C Fearsome Volcano | Sniper rifle | Powerful incendiary; 4 × Fire |
| GGN30 Solid Volcano | Sniper rifle | Powerful incendiary; 4 × Fire |
| SPC260 C Colossal Rhino | Rocket launcher | Powerful incendiary; 4 × Fire |
SES Munitions
| Code & Name | Weapon Type | Notes |
|---|---|---|
| BLR4 Wicked Gemini | Pistol | Large mag; split-shot burst |
| HRD5.2 Wicked Gemini | Pistol | Large mag; split-shot burst |
| TMP88 Vile Thanatos | Pistol | Large mag; fast reload |
| TMP88.3 Vile Thanatos | Pistol | Large mag; fast reload |
| ZPR43 Fatal Crux | Shotgun | Large mag; special explosive pattern; 1–4 × Explosive |
| PPZ470.3 Fearsome Orion | Sniper rifle | Large mag; shock projectiles; 3 × Shock |
| PPZ7 Fearsome Orion | Sniper rifle | Large mag; shock projectiles; 3 × Shock |
Tediore
| Code & Name | Weapon Type | Notes |
|---|---|---|
| PRO4-A Wicked Predator | Pistol | Regenerates its own ammo |
| EQ20-B Savage Equalizer | Revolver | Regenerates ammo; 2 × Fire |
| DEF900-B Genocide Defender | Shotgun | Regenerates ammo; 2 × Shock |
| GRD12-A War Guardian | Assault rifle | Regenerates ammo |
| SV4-A Malevolent Savior | SMG | Regenerates ammo |
Torgue
| Code & Name | Weapon Type | Notes |
|---|---|---|
| RF4 Cruel Violator | Pistol | 3-shot burst |
| ZX1 Friendly Fire | Shotgun | Powerful incendiary pattern; 3 × Fire |
| KKA4 Malevolent Gasher | SMG | High damage; burst fire |
| LB570 Fearsome Cobra | Sniper rifle | Powerful explosive; slow fire; 4 × Explosive |
| RPG21 Colossal Redemption | Rocket launcher | Large rocket; big bang |
Vladof
| Code & Name | Weapon Type | Notes |
|---|---|---|
| TK6 Cruel Rebel | Pistol | Large mag; fast reload |
| HRD6/V2 Wicked Rebel | Pistol | Large mag; fast reload |
| TMP2 Stabilized Vengeance | SMG | High accuracy; ignores shields |
| ZX330/V3 Fatal Hammer | Shotgun | Large mag; high damage; 3 × Explosive |
| RWL20/V3 Colossal Mongol | Rocket launcher | Spawns a horde of additional rockets |
Special weapon effects
There are sometimes cryptic or humorous messages found in the stats box for weapons. These lines indicate a certain effect for the weapon. The text usually gives a hint as to what the special ability does, and is also often a reference to a video game, movie, famous quote, etc. Sometimes the description relates to the Boss or enemy who dropped the weapon. For example, the description for The Clipper reads “Don’t Drop It… Might Lose A Toe.” The Clipper belongs to the Boss Nine-Toes and is the reason for the weapon’s name. Note: Some of the listed effects may not be completely accurate. All weapons vary in quality, except Eridian weapons, which are always green. Boss and quest weapons range from green up to purple, with blue being the most common. Weapons will also vary in accuracy, fire rate, ammunition count, etc., based on what weapon is the basic model. For instance, some revolvers have two rounds; however, these revolvers generally do more damage than the revolvers that have three or six rounds. Essentially, orange weapons modify the base gun with their special modifiers.