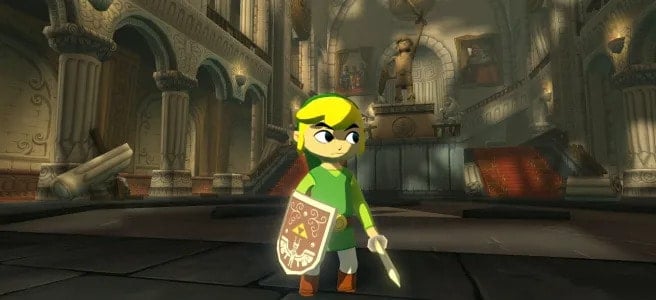
After the initial tech demo for the Nintendo GameCube gave fans a glimpse of what a “next-gen” adult-leaning Zelda title could look like, the reveal of The Legend of Zelda: Wind Waker as the first Zelda title for the system came as a bit of a shock. Replacing the realistic and darker visual style of the 128-bit Zelda tech demo is a brightly-colored cartoonish art style. Then, to complicate things, Link looked to be no more than 10-12 years old. “Toon Link” controversy aside, The Wind Waker‘s arrival in 2002 quickly dispelled any skepticism. This wasn’t just the next Zelda game, it was inarguably one of the best.
In hindsight, most fans now look back fondly on Wind Waker for being one of the more unique Zelda games. In addition to its beautiful visuals (which have a much more timeless quality than some of the other 3D Zelda titles) and its amazingly fluid combat, The Legend of Zelda: Wind Waker has some absolutely incredible dungeon designs. Each of these spaces is neither overly large or complex, hitting that sweet spot between challenge and flow. From the Forsaken Fortress all the way to the showdown against Ganondorf atop his tower, Wind Waker‘s dungeons are a masterclass in balance.
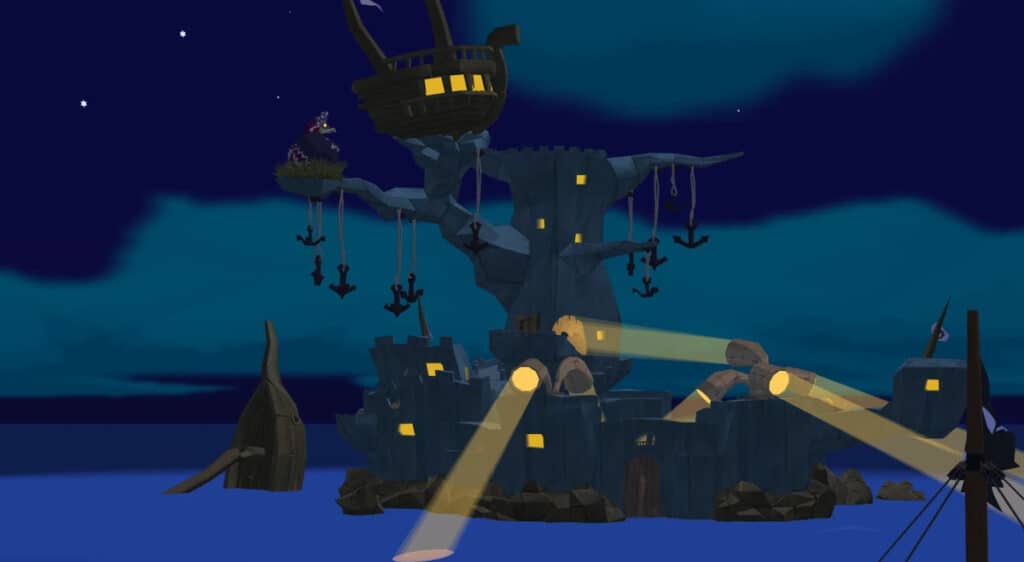
Forsaken Fortress
©
Overview
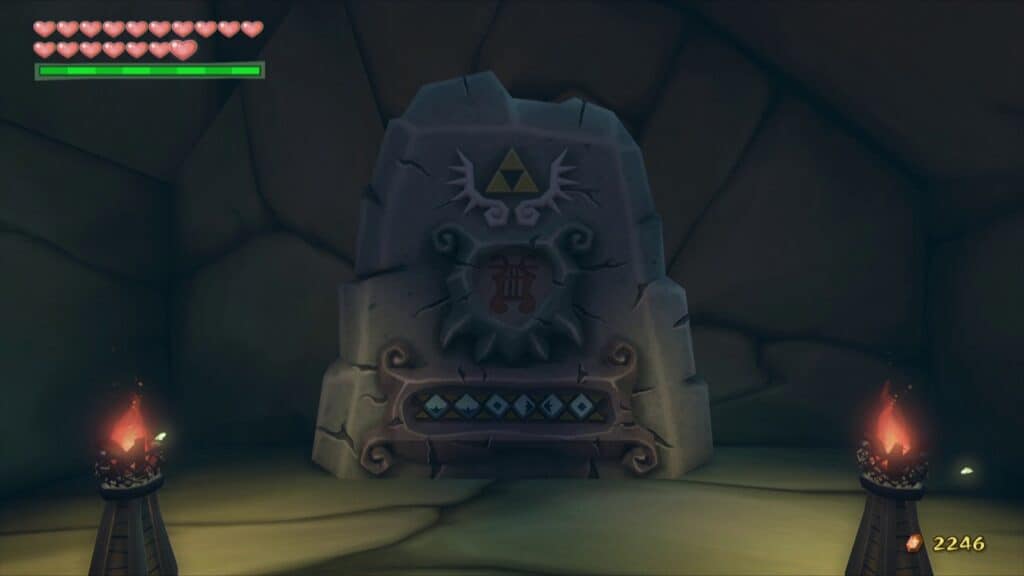
Although the Forsaken Fortress is technically the first dungeon Link enters in The Legend of Zelda: Wind Waker, it’s one that he eventually returns to as his first visit there is somewhat unsuccessful. This imposing prison island is home to a host of menacing enemies and constantly surveying spotlights, which make the first stealthy approach up to its peak highly dangerous. After obtaining the Master Sword, Link sets off on a return voyage back to the Forsaken Fortress to finally rescue his sister and the other maidens. Additionally, he vows to get revenge against the Helmaroc King for kidnapping his sister. The Forsaken Fortress is the only dungeon in Wind Waker that players will have cause to enter twice.
Enemies
Link encounters the following enemies in the dungeon:
- Blue Bokoblins
- Green Bokoblins
- Floormasters
- Keese
- Miniblins
- Moblin Busts
- Moblins
- Octoroks
- Phantom Ganon (Mini-Boss, Second Visit)
- Rats
Items
- Hero’s Sword (First Visit)
- Piece of Heart (First Visit)
- Skull Hammer – Link obtains the Skull Hammer on his second visit to the Forsaken Fortress after defeating the Phantom Ganon mini-boss. This large hammer Is useful in pounding the large pegs found throughout the Great Sea. Further, it’s great at defeating enemies as an alternative to Link’s sword. The Skull Hammer is absolutely essential in defeating the final boss of the Forsaken Fortress, the Helmaroc King.
- Heart Container (Second Visit)
Boss
- Helmaroc King – After initially humiliating Link during his first visit, even going so far as to brazenly display his capture to Ganon, Link returns to the Forsaken Fortress in order to put a true hurting on the giant bird that’s been kidnapping girls around the Great Sea. In the first phase, the Helmaroc attempts to stop Link from reaching his sister in time as her prison floods. Link is able to remove him as an obstacle by striking the Helmaroc’s helmet with the Skull Hammer. Similarly, in the second phase Link must again strike the helmet of the giant bird with the Skull Hammer before slashing its weak spot that the helmet conceals.
Dragon Roost Cavern
©
Overview
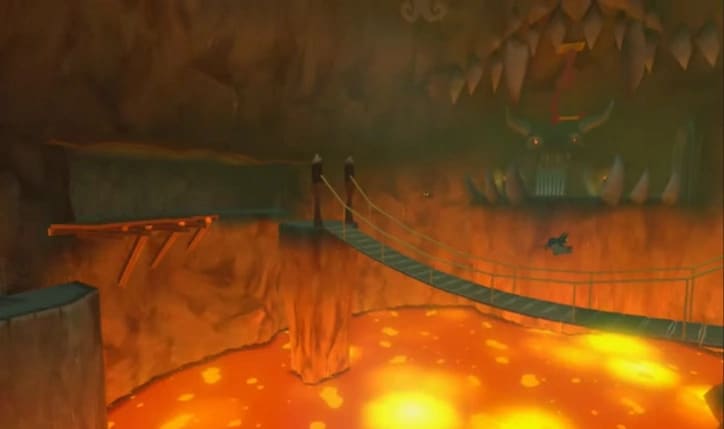
Although Link’s first dungeon is technically the Forsaken Fortress, his initial visit to this location is unsuccessful and places him on his adventure in earnest. That adventure takes him to Dragon Roost Island, where the Dragon Roost Cavern sits as the first official dungeon the young Link will traverse in search of the Goddess’s Pearls. The cavern itself is in the shape of a volcano, which is fitting considering the number of fire-based obstacles and enemies Link encounters inside. By strategically dropping water on some of the lava geysers, Link can create makeshit platforms that help him reach previously inaccessible areas.
Enemies
Link encounters the following enemies in the dungeon:
- Blue Bokoblin
- Green Bokoblin
- Kargarok
- Keese
- Fire Keese
- Lava Geyser
- Magtail
- Moblin
- Rat
- Red ChuChu
Items
- Grappling Hook – The key item of the Dragon Roost Cavern is the Grappling Hook, which is similar in functionality to the iconic Hookshot. Using the Grappling Hook, Link can swing from certain platforms, steal loot from enemies before defeating them, and plunder sunken treasure from the bottom of the ocean.
- Treasure Chart 39
- Treasure Chart 11
- Heart Container
- Din’s Pearl
Boss
- Gohma – Gohma is a massive one-eyed arthropod that emerges from the lava at the center of Dragon Roost Cavern to stop Link from obtaining Din’s Pearl. Similar to its predecessors in other Zelda games, The Legend of Zelda: Wind Waker‘s version of this massive arachnid’s weak spot is its singular eye, which Link must carefully expose to attack by gradually cracking the fiend’s armor. Thankfully, the arena in which Link faces off against this monster features plenty of breakable stone platforms that he can use for this very purpose.
Forbidden Woods
©
Overview
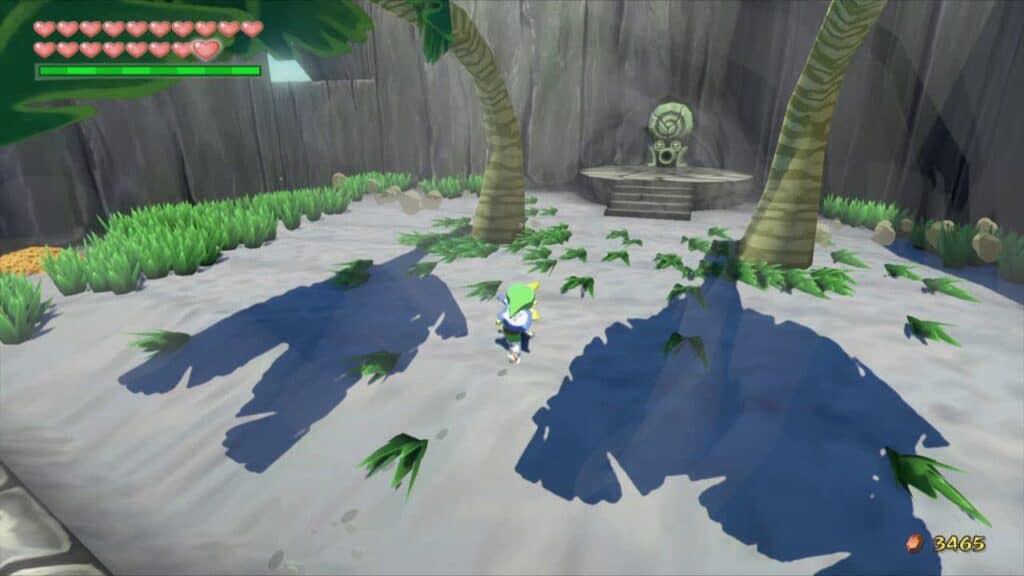
The Legend of Zelda: Wind Waker‘s Forbidden Woods is the game’s second official dungeon and other imposing-looking island for Link to traverse in his search for the pearls that grant access to the Master Sword. After saving the Great Deku Tree, the tree tells Link that he must enter the Forbidden Woods and rescue Makar. To help Link in this mission, the Great Deku Tree gifts Link with a Deku Leaf. The Deku Leaf is instrumental in both the Forbidden Woods and every subsequent dungeon as an item that allows Link to glide effortlessly from platform to platform. The dungeon itself contains tons of plant life choking off entrances or accessways, requiring Link to find creative solutions toward clearing it out of the way.
Enemies
Link encounters the following enemies in the dungeon:
- Boko Baba
- Dexivine
- Green ChuChu
- Moblin
- Morth
- Mothula
- Octorok
- Peahat
- Vines
Items
- Boomerang – The classic Legend of Zelda item makes its return in Wind Waker via the Forbidden Woods, and this new version of the iconic tool is one of the best in the series. Instead of hitting one target at a time, Link can use Wind Waker‘s Boomerang to lock-on to up to 5 targets at once.
- Treasure Chart 15
- Treasure Chart 1
- Heart Container
- Farore’s Pearl
Boss
- Kalle Demos – This large plant-like monster is the second major boss of Wind Waker and the final guardian of the Forbidden Woods. Resembling a large Deku Baba, the fiend will attach itself to the ceiling using its vines. With his newly acquired Boomerang, Link will need to target and attack the vines in order to cause Kalle Demos to fall to the ground. After falling, the plant monster’s weak spot is open to attack, which Link can then slash with his sword.
Tower of the Gods

©
Overview
Perhaps one of the best dungeons in the entire Zelda series, the Tower of the Gods is a stark white tower that shoots straight up out of the Great Sea, communicating its importance to all who sail by it. According to the game’s lore, this tower is meant to be a test for those who consider themselves a hero, confirming whether or not these individuals are truly worthy of the title. Rather than move through the dungeon on foot, Link uses his boat The King of Red Lions to maneuver through the dungeon’s floors, paying careful attention to the rising and falling water levels as he makes his way through its confines.
Enemies
Link encounters the following enemies in the dungeon:
- Armos
- Armos Knights
- Blue Beamos
- Red Beamos
- Kargarok
- Keese
- Rats
- Red Bubble
- Silver Darknut (Mini-Boss)
- Wizzrobes
- Yellow ChuChu
Items
- Hero’s Bow – Along with his sword, few pieces of equipment are as important for Link’s success against Ganon than the Bow. In addition to bequeathing the Master Sword to Link, the Tower of the Gods is also where players will obtain The Legend of Zelda: Wind Waker‘s version of the iconic bow. This version of the bow can store up to 30 arrows in its quiver, and Link has access to standard, fire, ice, and light arrows.
- Heart Container
- Master Sword
Boss
- Gohdan – Gohdan is both an interesting and unique boss in the Zelda series in that it’s a disembodied set of hands and a head. This ancient guardian exists as the final test for any hero who enters the Tower of the Gods and is an adequate challenge as a result. That said, using Link’s new bow makes short work of Gohdan, as the process for defeating this guardian is quite simple. Link will need to aim at the exposed weak points on his hands with the bow, which causes Gohdan to collapse to the ground. After collapsing, Gohdan’s mouth is open, and throwing a bomb into his open mouth will decrease his health. Repeat this process and Gohdan is soon defeated.
Earth Temple
©
Overview
With a name like Earth Temple, you’d be forgiven for assuming that the 5th dungeon of The Legend of Zelda: Wind Waker takes place in a forest or volcano biome. Instead, this dungeon has an ethereal ghost theme, complete with hauntings from zombie and ghost-like enemies in the ReDead and Poes, respectively. Before Link can even enter the dungeon, he needs the aid of the Power Bracelets, which players acquire on Fire Mountain. In addition to plenty of undead threats and a prevalent purple mist that prevents Link from using items, the Earth Temple also features plenty of light puzzles that require use of the dungeon’s item — the Mirror Shield.
Enemies
Link encounters the following enemies in the dungeon:
- Blue Bubble
- Red Bubble
- Dark ChuChu
- Green ChuChu
- Red ChuChu
- Floormaster
- Moblin
- Poe
- ReDead
- Stalfos
Items
- Mirror Shield – The Mirror Shield is the most powerful shield that Link can obtain in Wind Waker and is absolutely necessary for solving some of the Earth Temple’s puzzles and defeating its final boss. Aside from its utility in the Earth Temple, the Mirror Shield can deflect projectiles that other shields cannot, such as the fireballs from Wizzrobes.
- Heart Container
- Master Sword Powerup
Boss
- Jalhalla – Jalhalla is the only boss other than Ganon to appear in another Zelda game, as this conglomoration of Poes also makes an appearance in Four Swords Adventures. Several poes merging together and bound by a strange mask, Jalhalla is vulnerable to the same kind of attacks as any other Poe or undead foe, meaning Link’s new Mirror Shield comes in handy in this fight. Using the light beams around the arena, Link will need to reflect the illumination from these back onto Jalhalla. After a certain amount of time, he will solidify into stone and fall to the ground. Once solid, Link will need to pick him up and throw him against the wall of the arena.
Wind Temple
©
Overview
The penultimate dungeon in The Legend of Zelda: Wind Waker, the Wind Temple is mostly a means for Link to obtain the all-important Hookshot. Once Link has the Hookshot in his possession, it’s only a matter of time before he faces off against the dungeon’s boss. Still, the Wind Temple is valuable for more than just providing Link with one of his most iconic pieces of equipment. Players obtain the final power upgrade for the Master Sword by completing this dungeon and besting its challenges.
Enemies
Link encounters the following enemies in the dungeon:
- Armos
- Armos Knight
- Blade Trap
- Blue Bubble
- Floormaster
- Golden Darknut
- Green Bokoblin
- Peahat
- Stalfos
- White Darknut
- Wizzrobe
- Red Wizzrobe (Mini-Boss)
Items
- Hookshot – Just like the Hookshot in other Zelda games, Link uses this tool to close gaps or to pull objects toward himself. When Link equips the Iron Boots before using the Hookshot, he can pull much more toward himself thanks to the additional stability the boots provide. Like most other dungeon key items, the Hookshot is necessary for solving many of the dungeon’s puzzles and beating its final boss.
- Master Sword Powerup (Final)
Boss
- Molgera – The giant flying sand-snake Molgera is the final boss of the Wind Temple. This unruly beast will repeatedly descend and then reappear above the sand in its arena. By tracking Molgera’s movements carefully (and keeping a safe distance), Link can use his new Hookshot to pull the beast toward him and attack it. Aiming for Molgera’s purple tongue is the trick to closing the distance between Link and the boss, and once it’s within proximity players can attack using the Hookshot again and then, eventually, the Master Sword.
Ganon’s Tower
©The Legend of Zelda: Wind Waker gameplay screenshot – Original
Overview
Ganon’s Tower is technically the final dungeon in The Legend of Zelda: Wind Waker, but only loosely. Rather than exist as an honest-to-goodness dungeon, this final trial is more of a boss gauntlet. There are rooms for Link to make his way through as he climbs the tower, but almost all of these contain either groupd of enemies or a repeating boss fight from past dungeons. When Link gets to the top, he meets Ganondorf himself and learns the fiend’s motivations behind trying to acquire the Triforce. After a climactic final battle, Link and Zelda are victorious, and the Great Sea returns to peace.
Enemies
Link encounters the following enemies in the dungeon:
- Bokoblin
- Miniblin
- Peahat
- Purple ChuChu
- Red Bubble
- Stalfos
- Wizzrobe
Items
None
Boss
- Gohma
- Kalle Demos
- Jalhalla
- Molgera
- Phantom Ganon
- Puppet Ganon
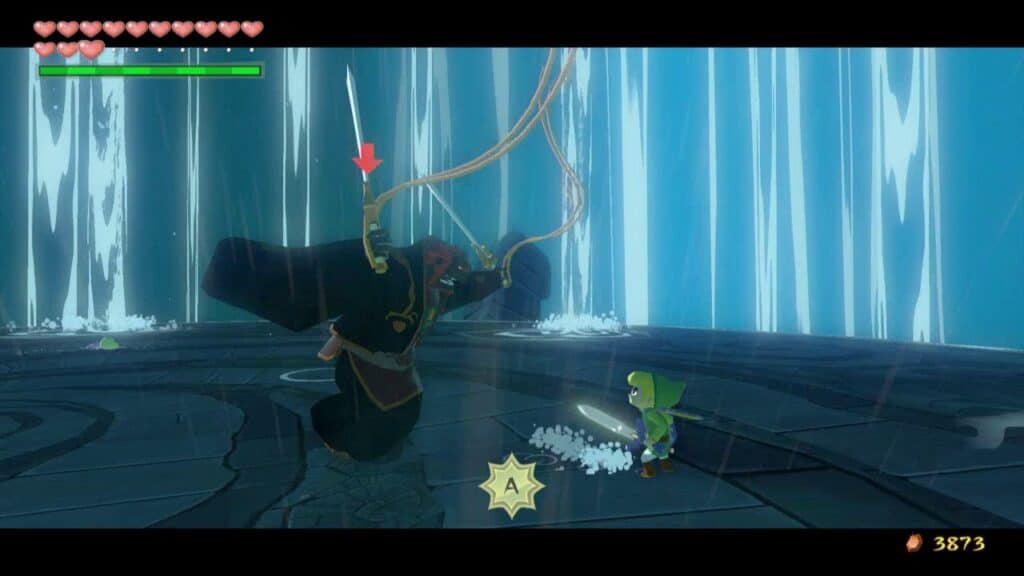
- Ganondorf – While most Zelda games have players face off against a final beast form of Ganon, The Legend of Zelda: Wind Waker flips this tradition on its head. Instead, players face off against the beast-like Puppet Ganon before fighting the Demon King himself. Having bested Puppet Ganon in single combat, Ganondorf invites Link up to the top of his tower, where he reveals his plan to resurrect Hyrule under his control. The former King of Hyrule (Link’s boat) interferes, giving Link and Zelda the chance they need to stop him and save the Great Sea. This battle is epic in every sense of the word, not just for its important connections to the game’s lore, but for how it’s the best choreographed sword battle in the entire game. A fitting conclusion to an increidble game.