Like the game it takes the bulk of its inspiration from, Link’s Awakening has some incredible dungeons for players to traverse through. Link’s Awakening continues the traditional top-down third-person perspective of both the original Legend of Zelda and its SNES predecessor to present one of the best 2D games in the series, handheld or otherwise. Though the puzzle-solving and combat encounters of these spaces tend to skew on the easier side, all dungeons in Link’s Awakening still maintain the core element that has come to define these locations throughout the series — fun.
Starting with the Game Boy Color remaster of the game in Link’s Awakening DX, the title contains a total of 9 main dungeons along with 4 spaces that players can consider as “mini-dungeons”. These mini-dungeons don’t contain the traditional Compass and Map items that players can regularly find in Zelda‘s dungeons proper, but they do almost always contain valuable items and, occasionally, a mini-boss encounter. The final location in Link’s Awakening, the Wind Fish’s Egg, is less of a dungeon and more of a maze with a boss gauntlet at the end, which players enter after collecting all of the Instruments of the Sirens.
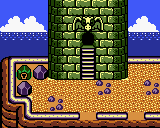
Tail Cave
©Gameplay screenshot – Original
The Tail Cave is the first dungeon that players will head to after acquiring Link’s sword on the Toronobo Shores. Before Link can enter it, though, he needs to find the Tail Key that lies within the Mysterious Forest. After using the Magic Powder on Tarin, Link can proceed deeper into the forest where a chest containing the Tail Key can be found. The Tail Cave gets its name from the shape that the dungeon takes, which also happens to closely resemble the dungeon’s boss Moldorm.
Items:
- Roc’s Feather (Dungeon Key Item)
- Full Moon Cello (Instruments of the Sirens)
- Heart Container
Boss:
- Moldorm
| Moldorm’s appearance in Link’s Awakening is very similar to his fight in A Link to the Past. To defeat this worm-like foe, Link must slash its only weak point (the tip of its tail) four times with his sword. However, to make things more difficult, Moldorm moves faster and faster with each successive strike. If Moldorm runs into Link and knocks him into the pit surrounding the boss arena, players must re-enter the boss room and start the fight over from the beginning. |
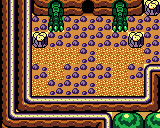
Moblin Cave
©Gameplay screenshot – Original
Before players can proceed to Link’s Awakening‘s second main dungeon, the Bottle Grotto, the game has you take a detour to recover Madam MeowMeow’s pet, the Chain Chomp BowWow. BowWow is a prisoner inside the nearby Moblin Cave, which Link must enter in order to free it. Before he can escape with BowWow, though, he’ll need to defeat the mini-dungeon’s mini-boss, the Moblin Chief. With BowWow in tow, Link can now proceed to the Bottle Grotto and receive its help in gaining entry to the dungeon.
Items:
- BowWow
Boss:
- Moblin Chief (Mini-Boss)
Bottle Grotto
©Gameplay screenshot – Original
After rescuing BowWow, Madam MeowMeow will ask Link to take it for a walk, which is perfect because players need the pet to destroy the defenses surrounding the entrance to the second dungeon, the Bottle Grotto. Just like the Tail Cave, the Bottle Grotto gets its name from the shape that it makes when looking at the map, which resembles one of the iconic Empty Bottle items from A Link to the Past. The dungeon’s item, the Power Bracelet, is one of the more useful items in the game and a prerequisite for defeating the dungeon’s boss, the Genie.
Items:
- Power Bracelet (Dungeon Key Item)
- Conch Horn (Instruments of the Sirens)
- Heart Container
Boss:
- Genie
| The fight with the Genie begins with the foe taunting Link, explaining that he can’t hurt him as long as he’s inside of his bottle. After a few rounds of throwing projectiles at the hero, the Genie will retreat inside his bottle and begin advancing toward Link. If players slash the bottle with the sword, it will freeze the Genie in its tracks. This is where the opportunity arises to put the newly acquired Power Bracelet to use, picking up the Genie’s bottle and throwing it against the wall. This is the only way Link can harm the boss, and after three rounds of this the bottle will break. The final phase of the fight requires Link to slash the real Genie with his sword while avoiding the two illusory ones. |
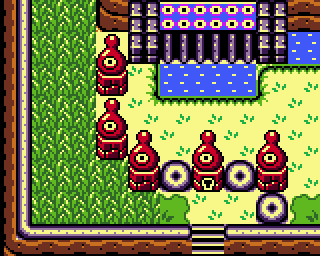
Kanalet Castle
©Gameplay screenshot – Original
Link needs the Slime Key to enter the game’s third dungeon, the Key Cavern, but the owner of the Slime Key needs Link’s help first. Before Link can obtain the Slime Key from Richard, he asks Link to head back to his former home, Kanalet Castle, to retrieve his 5 Golden Leaves. Within the castle are several enemies and a mini-boss, but the leaves themselves are rather easy to find. They await Link both within the castle and outside the castle on the surrounding grounds. After Link obtains all 5 leaves, players can leave the castle and head back to Richard’s villa, where he leads the player through a secret passage to a chest containing the key.
Items:
- Golden Leaves (x5)
Boss:
- Ball and Chain Soldier (Mini-Boss)
Key Cavern
©Gameplay screenshot – Original
With the Slime Key in his possession, Link can finally enter the Key Cavern, Link’s Awakening‘s third dungeon. This dungeon also takes a shape that fits with its name, resembling two keys. Additionally, players will find plenty of Small Keys within that they will need to use to unlock the doors connecting each of the rooms, more than any of the other dungeons in the game. The Pegasus Boots within the Key Cavern are yet another important item that will come in handy for the rest of Link’s adventure on Koholint Island, and they’re also necessary for defeating the Slime Eyes boss.
Items:
- Pegasus Boots (Dungeon Key Item)
- Sea Lily’s Bell (Instruments of the Sirens)
- Heart Container
Boss:
- Slime Eyes
| Link will need to use his new Pegasus Boots during every phase of this fight, helping to illustrate the variety of uses they have within the game. The fight begins with Slime Eyes clinging to the ceiling, requiring Link to dash into the wall using the Pegasus Boots. This causes Slime Eyes to fall, opening him up to sword strikes before beginning to separate into two eyes. From here, players can use the Pegasus Boots to execute a dash attack to sever the two eyes, defeating each one separately. |
Dream Shrine
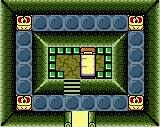
©Gameplay screenshot – Original
Link can finally enter the Dream Shrine in Mabe Village now that he has both the Power Bracelet and Pegasus Boots. Though the mini-dungeon is just a single room with a bed, Link can lie down on the bed to transport himself into the true Dream Shrine. Here, he needs to use both of the prerequisite items to bypass sections of the crumbling floor and lift heavy rocks blocking his path. The reward waiting for Link at the end of the dungeon is the Ocarina, which is an essential item for the main quest.
Items:
- Ocarina (Dungeon Key Item)
Boss:
- N/A
Angler’s Tunnel
©Gameplay screenshot – Original
Before players can enter the Angler’s Tunnel, they first need to be able to open its entrance using the Angler Key. This item is only obtainable after defeating a Desert Lanmola, and entering the desert is only possible after playing the Ballad of the Wind Fish to travel there with Marin. Once Link has the Ocarina from the Dream Shrine, he can easily complete all these steps, though they do require a significant time investment. The dungeon itself is rather straightforward and just a hoop for players to jump through to obtain the Flippers and the next of the Instruments Link needs to wake the Wind Fish.
Items:
- Flippers (Dungeon Key Item)
- Surf Harp (Instruments of the Sirens)
- Heart Container
Boss:
- Angler Fish
 | The battle with the Angler Fish is one of the few boss fights in Link’s Awakening that takes place from a side-scrolling perspective. Link will need his new Flippers to enter the arena, where the perspective switches to the aforementioned side-scrolling view and Link can swim up or down to avoid the smaller fish the Angler summons. To defeat this foe, Link simply needs to avoid getting hit and successfully slash the Angler Fish using his sword. |
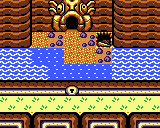
Catfish’s Maw
©Gameplay screenshot – Original
Catfish’s Maw is one of the more interesting dungeons in Link’s Awakening in that it features a recurring mini-boss that Link must defeat four separate times. The Master Stalfos occasionally shows up from time to time to torment Link, forcing the two into battle. After defeating this menace a fourth time, Link obtains the Hookshot. And, as one might expect, the Hookshot is an essential piece of gear for both traversing the later parts of the dungeon and defeating its boss, the Slime Eel.
Items:
- Hookshot (Dungeon Key Item)
- Wind Marimba (Instruments of the Sirens)
- Heart Container
Boss:
- Slime Eel
 | The fight with the Slime Eel requires both patience and timing. At the beginning of the battle, the Eel will circle Link and attempt to hit him. Thankfully, using Roc’s Feather to jump over the Eel makes this phase rather easy. Eventually, the Eel will destroy parts of the wall to create makeshift tunnels. Once the Eel enters the wall, it will occasionally pop its head out and open its mouth. Link has a limited window here to use the Hookshot and pull the Eel towards him, with its weak spot ready for a sword slash. Repeating this process a few times will see the boss easily fall, but it does take some finesse to get the timing of the Hookshot strikes right. |
Southern Face Shrine
©Gameplay screenshot – Original
Another dungeon, another side quest involving retrieving the key to open it. Before Link can enter the 6th official dungeon in Link’s Awakening, the Face Shrine, he needs to head to a smaller version of the dungeon in the southern part of the map region where the actual dungeon is located (just north of Animal Village). Inside, Link must defeat an Armos Knight to obtain the Face Key, which he can then use to enter the actual Face Shrine dungeon.
Items:
- Face Key (Dungeon Key Item)
Boss:
- Armos Knight (Mini-Boss)
Face Shrine
©Gameplay screenshot – Original
After clearing the Southern Face Shrine and obtaining the Face Key, Link can finally enter the Face Shrine proper. As Link’s Awakening‘s 6th official dungeon, the Face Shrine offers more of what players have seen up until this point but with some clever twists in the form of the introduction of Wizzrobes. If players have the Boomerang before entering the Face Shrine, defeating the Wizzrobes is much easier, making obtaining it a recommended detour before heading there. The dungeon’s main treasure is an upgrade to the Power Bracelet, which Link will put to use in lifting the massive elephant statues blocking his progress.
Items:
- L-2 Power Bracelet (Dungeon Key Item)
- Coral Triangle (Instruments of the Sirens)
- Heart Container
Boss:
- Facade
 | Fittingly, the boss of the Face Shrine is an actual face, the enemy known as Facade. The fight against Facade is rather straightforward, only requiring players to detonate bombs on top of his face. However, the foe makes things more difficult by constantly throwing out a barrage of flying tiles and pots for Link to dodge. That said, if players are patient and wait for the optimal windows of attack, taking down Facade is fairly easy. |
Color Dungeon
©Gameplay screenshot – Original
The Color Dungeon is a new location that only features in the Game Boy Color remaster and Nintendo Switch remake of Link’s Awakening. Despite it not containing one of the Instruments of the Sirens, the Great Fairy that resides within the dungeon gifts Link with one of the game’s best rewards. After completing the Color Dungeon, players have the choice between the Red or Blue Mail, which will either enhance Link’s attack or defense. Essentially, completing the Color Dungeon is a requirement. That the dungeon is fun to traverse is just the icing on the cake.
Items:
- Red Mail or Blue Mail (Dungeon Key Item)
Boss:
- Hardhit Beetle
 | The Hardhit Beetle is technically the third major foe players will tackle in the Color Dungeon after facing off against two mini-bosses. Accordingly, this foe is the most challenging of the three and forces players to be on their toes. In addition to throwing out projectiles and summoning Stalfos to assist in battle, Link needs to defeat the Hardhit Beetle quickly. Instead of taking and then sustaining damage, the Hardhit Beetle will revert back to full health unless Link attacks in quick succession. Players will know they’re close to defeating the boss when it turns orange and then red. |
Eagle’s Tower
©Gameplay screenshot – Original
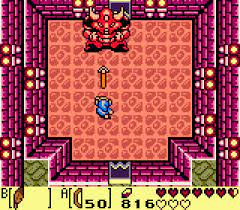
Eagle’s Tower is Link’s Awakening’s seventh official dungeon and one of its best. There’s a case to be made that Eagle’s Tower is one of the best 2D dungeons in the series. The greatest challenge of Eagle’s Tower comes in the threat of falling back down to previous floors, requiring Link to backtrack back up to his last known position. Additionally, the boss of Eagle’s Tower is another one of the few side-scrolling boss fights in the game and a true test of player ability. That the boss requires Link to use every tool in his arsenal and memorize attack patterns is exactly what makes Eagle’s Tower one of the best parts of the game.
Items:
- Mirror Shield (Dungeon Key Item)
- Organ of Evening Calm (Instruments of the Sirens)
- Heart Container
Boss:
- Evil Eagle
 | After Link defeats Eagle’s Tower’s mini-boss the Grim Creeper and chases him up to the roof, the foe will jump on the back of the Evil Eagle and initiate the actual boss battle of the dungeon. Accordingly, the fight against Evil Eagle is significantly tougher than fighting against the Grim Creeper. Link needs to dodge the Evil Eagle’s flight path while also timing attacks against its single weak point, its beak. Thankfully, Link can use every single item in his arsenal to make this battle easier. There’s not actually one set strategy that works outside of memorizing the boss’ attack patterns and responding in kind, which is what makes this fight so unique. |
Turtle Rock
©Gameplay screenshot – Original
The final official dungeon of Link’s Awakening, Turtle Rock is a staple location making a return after its debut in A Link to the Past. Turtle Rock is impressively large and contains return appearances of several other mini-bosses from throughout Link’s Awakening. Additionally, it features one of the more unique environmental puzzles in the game via the moving block puzzles that allow Link to cross gaps or lava pits. Once Link clears Turtle Rock, he has all eight Instruments of the Sirens. All that is left is to head to the Wind Fish’s Egg and awaken the sleeping being.
Items:
- Magic Rod (Dungeon Key Item)
- Thunder Drum (Instruments of the Sirens)
- Heart Container
Boss:
- Hot Head
| Before Link can finish his time on Koholint Island and wake the sleeping Wind Fish, Turtle Rock has one final challenge for the hero to overcome in the form of Hot Head. Thankfully, the dungeon provides Link with the one tool he needs to defeat the boss in the form of the Magic Rod. As Hot Head maneuvers around the arena, players can wait for him to pop out of the lava and then fire off a shot using the Magic Rod to harm him. In between shots, Link will need to dodge the fireballs that fly out every time Hot Head appears. |
Wind Fish’s Egg

©Gameplay screenshot – Original
After collecting all of the eight Instruments of the Sirens, Link can head to the Wind Fish’s Egg and play the song necessary to awaken the Wind Fish. The Egg will open up, and inside is a labyrinth that Link must traverse in order to get to the inner chamber where the Wind Fish slumbers. However, after making his way through the maze, Link needs to defeat a boss gauntlet before coming to the game’s conclusion.
Items:
- N/A
Boss:
- Shadow Nightmares
 | The Shadow Nightmares are the last thing standing between Link and awakening the Wind Fish. This boss gauntlet is a series of shadow beings that take the form and abilities of other noteworthy bosses from the Zelda series, including A Link to the Past‘s versions of the wizard Agahnim and Ganon. The final form, Dethl, is an original enemy to the Zelda series and the most challenging foe in the gauntlet. However, if players happen to have the Boomerang, all it takes is a single hit from the item in order to defeat Dethl. |
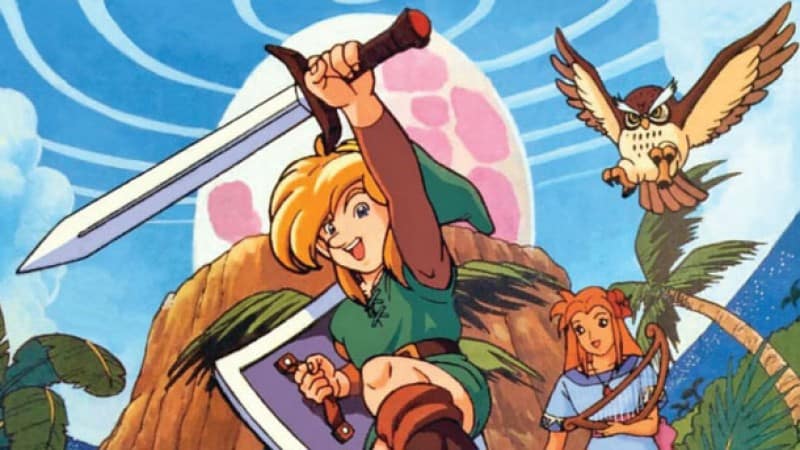
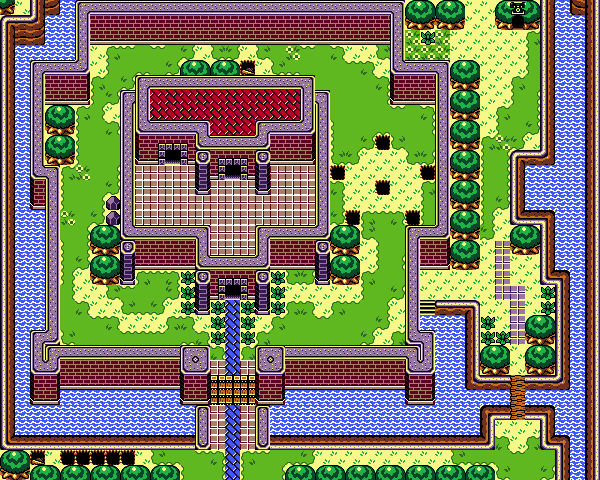
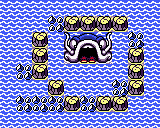
The image featured at the top of this post is ©Zelda concept art