Octopath Traveler is an RPG game with polygonal environments. Developed and published by Square Enix in collaboration with Acquire, Octopath Traveler features pretty and interactive graphics. Octopath Traveler is available to play on Nintendo Switch. It is a sprite-based game where characters are 2D but move in a 3D world. Moreover, each character has unique fighting abilities, providing an individualistic touch throughout the game.
Octopath Traveler Premise
The game features high-definition effects with magical lighting, giving the already beautiful world an otherworldly look. At the start of the game, players will choose from the provided characters. Players can swap between the stories of the eight characters as they progress through the game. Octopath Traveler incorporates a turn-based battle system with “Break and Boost” features. Break allows players to “break” an enemy, causing them to lose their turn in battle. The Boost feature is one in which every party member receives a boost point at the end of each battle.
Main Characters in the Game
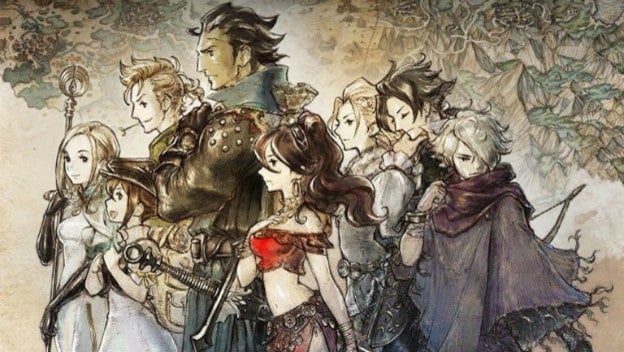
There are numerous NPCs encountered as the game progresses. However, there are eight main protagonists the player can take control of.
- Ophilia: Cleric, capable of healing wounds
- Cyrus: Scholar, the revealer of information
- Tressa: Merchant
- Olberic: Warrior
- Primrose: Dancer
- Alfyn: Apothecary, can deal elemental damage
- Therion: Thief
- H’annit: Huntress
Titles in the Octopath Series
The Octopath Traveler series has a few titles that build on each other regarding the storyline and gameplay.
- Octopath Traveler (2018)
- Octopath Traveler: Champions of the Continent (2020)
- Octopath Traveler 2 (2023)
Octopath Traveler Cheats

Octopath Traveler Battle-Tested weapons
Battle-Tested weapons are some of the most powerful weapons in the game. They are only available after completing the main story. They are also useful for unlocking post-game advanced jobs. Successfully complete the indicated task to unlock the corresponding Battle-Tested weapon:
Battle-Tested Axe
Location: Victors Hollow – Go up and find Ned to purchase the axe from him.
Stats: PHYS 350, ELEM LIGHTNING / ICE 250
Battle-Tested Blade
Location: Wellspring – Travel west to the Captain’s House, and use the Merchant skill to purchase the Battle-Tested Sword from Erhardt.
Stats: PHYS 400, CRIT 150, increases PHYS attack
Battle-Tested Bow
Location: S’warkii – Find Z’aanta near the town save point to purchase the bow from him.
Stats: PHYS 384, CRIT 186, lowers PHYS DEF on enemy
Battle-Tested Dagger
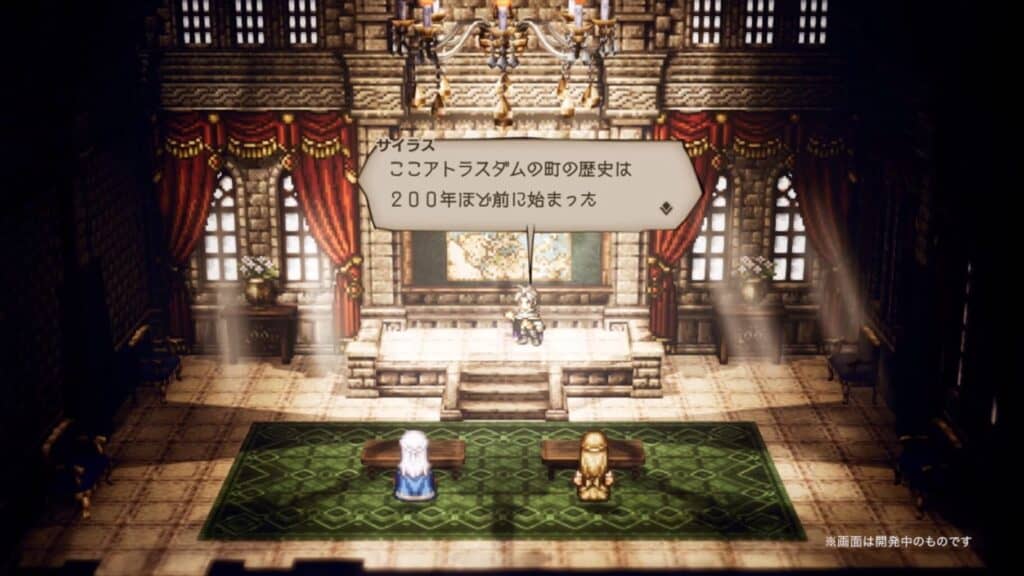
Location: Atlasdam – Travel east from Atlasdam, and follow the trail south until you reach Undertow Cave. Go to the end of the cave, and use the Thief skill to steal the dagger from Vanessa Hysel. You can keep trying until you succeed. There are no negative effects for failing.
Stats: PHYS 380, EVASION 140, lowers enemy ACC
Battle-Tested Shield
Location: Marsalim – Use the Merchant skill to purchase the shield from Greig the Unbreakable in the middle of the town square.
Stats: PHYS DEF 132, EVASION -88, HP and SP regen every turn
Battle-Tested Spear
Location: Noblecourt – Successfully complete Orlick’s side quest, then go up the stairs and challenge Leon to a duel.
Stats: PHYS 390, CRIT 148, may Blind enemies
Battle-Tested Staff
Location: Saintsbridge – Enter the cathedral, and talk to Bishop Bartolo. Use the Merchant skill to purchase the staff from him.
Stats: PHYS 212, ELEM 399, slows enemies
Sub-jobs
First, successfully complete any character’s first chapter to unlock sub-jobs. Then, go to the indicated shrine on the world map to get the corresponding sub-job. The shrines appear on the radar as a curved platform supporting four pillars. Additionally, there are four advanced jobs that can be unlocked after defeating a powerful boss inside their Level 50 dungeon.
- Apothecary: East Saintsbridge Traverse (Shrine of The Healer)
- Cleric: Western Stillsnow Wilds (Shrine of The Flamebearer)
- Dancer: Northern Wellspring Sands (Shrine of The Lady of Grace)
- Hunter: East Victors Hollow Trail (Shrine of The Huntress)
- Merchant: Moonstruck Coast (Shrine of The Trader)
- Runelord: West Everhold Pass (Shrine of The Runeblade)
- Scholar: Western Noblecourt Flats (Shrine of The Sage)
- Sorcerer: Eask Duskbarrow Trail (Shrine of The Archmagus)
- Starseer: Western Wispermill Flats (Shrine of The Starseer)
- Thief: South Quarrycrest Pass (Shrine of The Prince of Thieves)
- Warmaster: North Riverford Traverse (Shrine of The Warbringer)
- Warrior: North Stonegard Pass (Shrine of The Thunderblade)
Completing “At Journey’s End” side quest
After defeating all Chapter 4 bosses, complete the “At Journey’s End” final side quest to unlock the endgame content. As soon as you have completed the “Alphas And The Impresario” request, a fast travel spot on the map will appear (near Everhold), allowing you the access to Ruins Of Hornburg and its final dungeon, Gate Of Finis. Before stepping in, it is important to level up your unused characters since you will be using both parties for the final stage. The following steps are recommended:
1. “Kit, The Traveler”: Give him a Healing Grape after completing the first chapter on any character (you will find him outside your starting area).
2. “In Search Of Father (I)”: Guide/Allure “Aspiring Actor” (a NPC which can be found at the east side of Noblecourt) to Kit, who is in Noblecourt as well.
3. “Daughter Of Dark God (I)”: Duel/Provoke Alphas, a guard that can be found in the outside of Ravus Manor in Bolderfall.
4. “Daughter Of Dark God (II)”: Alphas will follow Lyblac to Saintsbridge. Scrutinize/inquire to get his poem, and bring it to Flora, who is at the cathedral entrance.
5. “In Search Of Father (II)”: Kit is located in Moonstruck Coast. Give him the Lapis Lazuli, which can be purchased/stolen from a merchant on Grandport.
6. “Alphas And The Impresario”: As soon as all previous side quests are completed, fast travel to S’waarki and go to the west to find Impresario and Alpha. Defeat the mini-boss.
Secret ending
Successfully complete the “Ruins Of Hornburg” optional dungeon to view the secret ending. To unlock this dungeon, complete the “Daughter Of The Dark God” and “In Search Of The Father” side quests. Start the “Daughter Of The Dark God” side quest by traveling to Ravus Manos in the Clifflands and challenging a guard to a duel. Start the “In Search Of The Father” side quest by talking to Kit, who will appear outside the first city you select at the start of the game. After completing those two side quest, travel to the West S’wark’ii Trail and talk to the Impresario to unlock the “Ruins Of Hornburg” dungeon. Successfully complete the “Ruins Of Hornburg” high-level dungeon and defeat the boss at the end to unlock the secret ending.
Infinite Leaves
This exploit requires Cyrus and his “Evasive Maneuvers” support skill, as well as Tressa and her starting ability to gather Leaves after leaving an area/zone. Travel to North Rippletide Coast, which is located southeast of Atlasdam City and northwest of Rippletide City. On the far right side of the zone is a dungeon/cave called Undertow Cove, which is a Level 45 dungeon. When entering it, there is a small loop/roundabout that you can walk just south of the entrance that takes you back to the entrance and out before triggering a random encounter. Use Tressa’s ability to grab Leaves after she exits the dungeon to get between 1,140-1,368 Leaves. Each run takes approximately 10-12 seconds walking or 7-8 seconds running. This allows you to gather approximately 6,840 Leaves every 10 second, and approximately 410,000 Leaves an hour.
+50% XP and JP accessories
Before you can get these accessories, you first must complete the main stories for Ophilia and Olberic. You can only obtain the Captain’s Badge (XP) after completing Olberic’s story, and you can only obtain the Badge Of Friendship (JP) after completing Ophilia’s story. Successfully complete the indicated tasks to unlock the +50% XP and JP accessories:
Captain’s Badge accessory (+50% XP): Travel to Wellspring after completing Olberic’s main story, and find the Captain with an orange side quest marker. After getting the quest, go to Goldshore. Enter the Cathedral, and use Inquire/Scrutinize on Bishop Donovan. Return to the Captain in Wellspring to complete the quest and unlock the Captain’s Badge.
Badge Of Friendship accessory (+50% JP): Travel to Saintsbridge with Therion after completing Ophilia’s main story. Talk to Emil in Saintsbridge to start his sidebquest. Travel right and cross the bridge to find a Bully NPC. Steal the River Blossom item from the Bully, and then return the flower to Nathan to complete the quest and unlock the Badge Of Friendship.
Note: If you unlock the specialist classes, you can increase +50% XP/JP to +100% XP/JP. The Starseer class has a passive ability to increase +50% JP, and the Warmaster class has a passive ability to increase +50% XP. Both abilities stack with these accessories.
Easy XP and JP
This method involves random encounters — so remove any passive skills that lower the amount of random battles you encounter while walking around. Equip items and accessories to increase the encounter rate. Also, improve character speed and accuracy so H’annit can defeat Caits with Arrow Storm. The goal is to find and defeat Caits. Caits spawn after every five random battles or so. Caits spawn anywhere on the map. If you do not enter a battle with a Cait, flee to speed up the discovery process. To defeat them, use Soulstones, as they never miss when used. Use a medium Soulstone to kill in one hit. If you use a small Soulstone, you can attempt to capture the Cait. One Soulstone is enough to defeat a Cait. The best location to farm Caits is in Northern Wellspring Sands in the Sunlands. You can also find them in Quicksand Caves. Whenever a Cait spawns in these locations, you will always find one Cait that rewards XP and one that rewards JP in the same battle.
Primrose the Dancer has an ability called Bewildering Grace that causes random effects. One of those random effects is to reward your team with x100 XP or x100 JP. If you are grinding, just try using this ability every turn to get easy XP and JP. You can also give this ability a x4 boost.
Alternate title screen
Successfully complete the “At Journey’s End” final side quest to change the title screen to have a crown on it, showing full completion of the game.
Capturing the Dreadwolf
The Dreadwolf, and other high level sub-bosses, normally spawn after completing difficult dungeons. Dungeons begin to appear in the Chapter 2 areas. Reach the end of the dungeons and defeat the sub-bosses for those sub-bosses to then spawn in standard battles where they can be captured. That is how you can get some of the best animal captures in the game. Note: To increase the random encounter chance, use the Alluring Ribbon. This accessory is unlocked by completing the side quest in Stillsnow. H’annit, or any other Hunter class, can capture animal/monster enemies that appear in random encounters. Boss encounters or humans cannot be captured. To capture the Dreadwolf, one of the best animal captures in the game, complete the following steps:
1. Travel to Northreach in the Frostlands. Go south and left to the dungeon, the Maw Of The Ice Dragon. Reach the end of the cave to encounter Dreadwolf. Then, defeat him.
2. After defeating the Dreadwolf once, equip any skills/items to increase your encounter rate, then get into random battles until the Dreadwolf appears. It will only appear in random battles if you have defeated it once.
3. The Dreadwolf is a Level 10 Strength monster, with Wild Scratch (Sword, Hits All) that can only be summoned once. It can hit multiple enemies for 6,000+ damage per hit, making it very powerful.
While the Dreadwolf is not the best animal summon, he is the easiest to get in the game. The best animal capture is the Chubby Cait. However, these are random enemies that spawn very rarely, and capturing them is even harder. If you can defeat the Dreadwolf, you can consistently capture it.